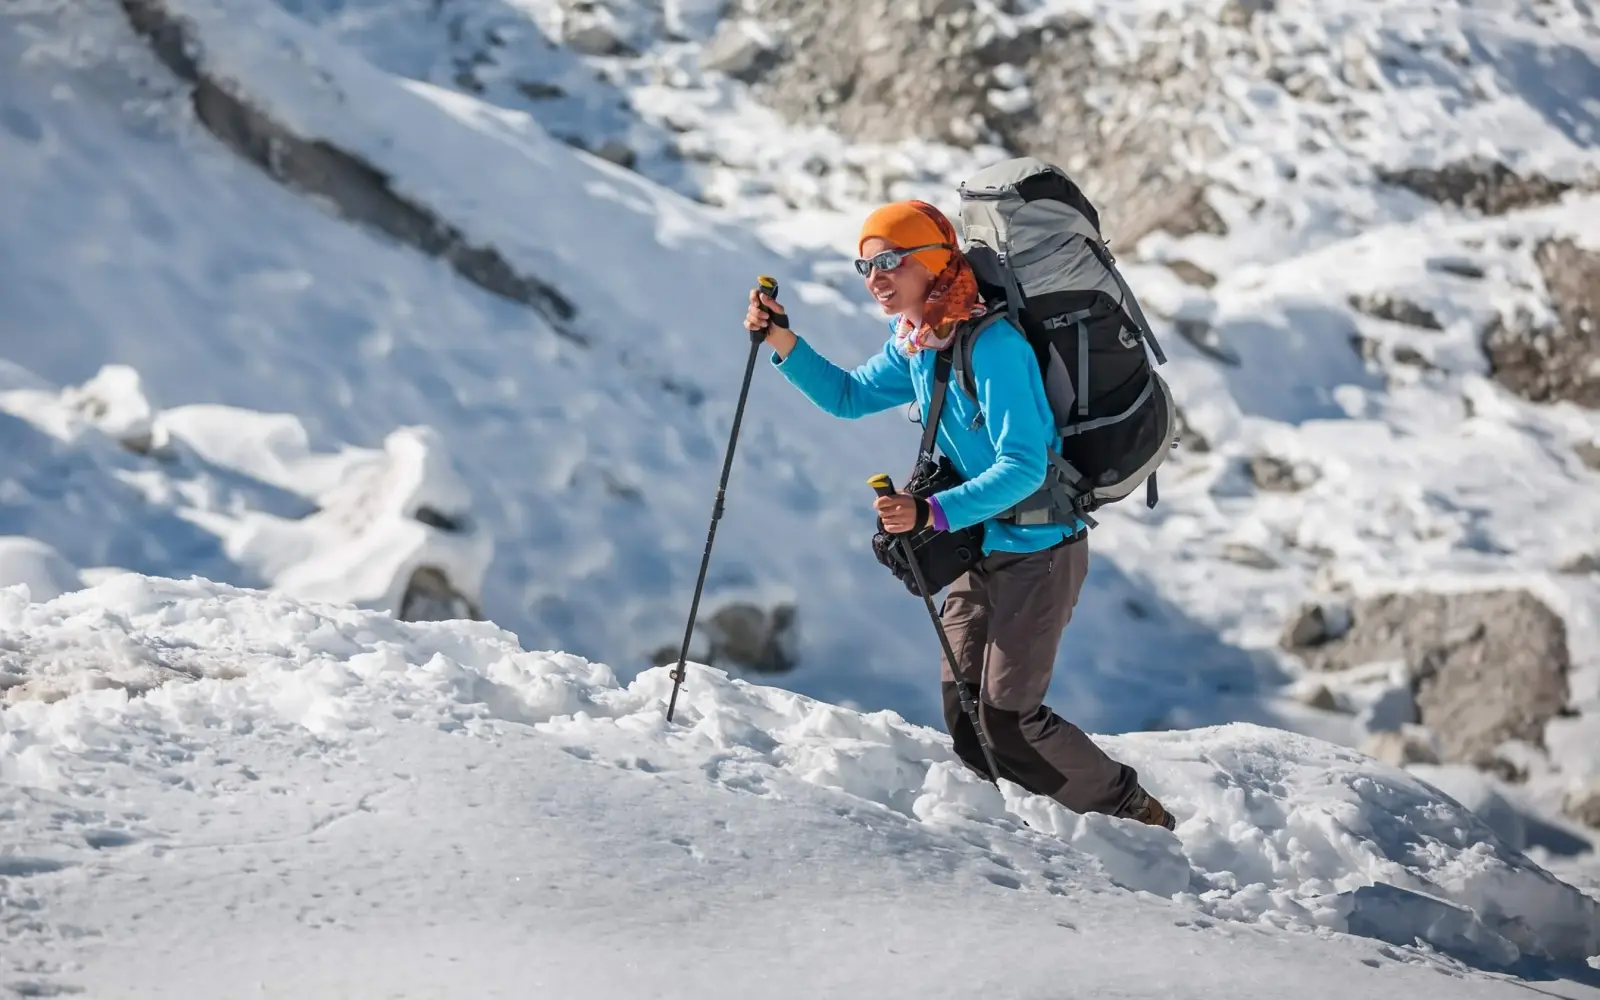
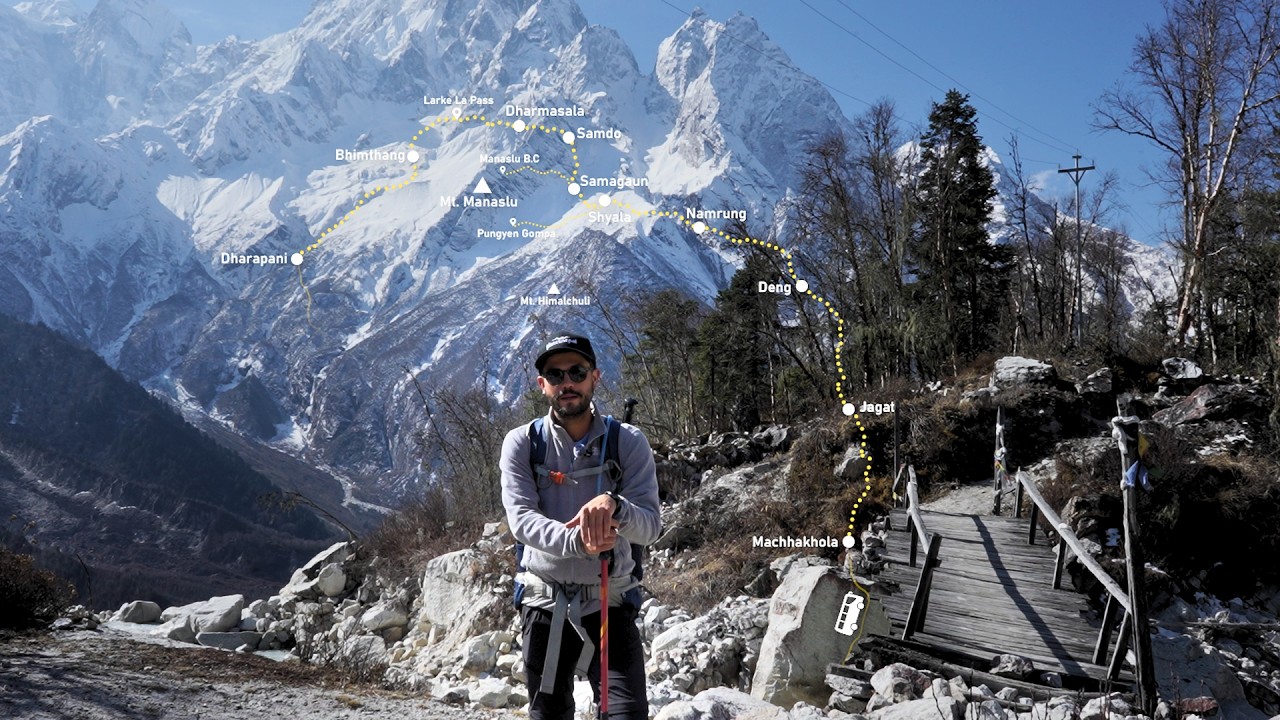
Preparing for Kongma La, Cho La and Renjo La takes more than general cardio. This practical Three Passes training plan covers hiking endurance, uphill and downhill strength, back-to-back trekking days, stair and hill training, backpack preparation, recovery and tapering—plus how to build fitness without confusing it with high-altitude acclimatization.
The Three Passes Trek requires strong hiking endurance rather than elite athletic fitness. The most useful preparation combines uphill hiking, downhill conditioning, long-duration walking, strength training and back-to-back hiking days.
The target is not to become a fast runner. It is to become someone who can:
- Walk for 5–8+ hours
- Climb for sustained periods without stopping every few minutes
- Descend for over an hour without your legs falling apart
- Recover overnight in a cold room with poor sleep
- Do it again two days later
- Do all of that while carrying a light daypack
That last point is the one most training plans miss. On the Everest Three Passes Trek, no single day is beyond a reasonably fit hiker. What breaks people is the accumulation — Days 7 to 10 in particular, where Kongma La, Everest Base Camp, Kala Patthar and Cho La arrive back-to-back with no rest day between them.
This guide is a training plan built around that specific problem.
A note before you start. This is general fitness guidance, not medical advice. If you have a heart, lung, joint or other medical condition, or you're unsure whether high-altitude trekking is appropriate for you, speak with an appropriately qualified professional before starting an intensive training program or booking the trek.
Trek the Everest Three Passes Trek
Conquer the Three Passes, Experience Everest’s Ultimate Trekking Adventure.
Three Passes Training
| Question | Short answer |
|---|
| How long should I train? | 8–12 weeks of focused training, on top of an existing base of regular activity |
| What's the single best exercise? | Hiking — uphill and downhill, on real terrain, with a pack |
| Do I need to run? | No. Running helps aerobic fitness but hiking transfers better |
| How many long hikes? | One per week, building toward 6–8 hours |
| Elevation gain target | Build toward 1,000–1,300 m of gain in a single hike |
| Should I train downhill? | Yes — this is the most neglected and most injury-relevant element |
| Pack weight | Whatever you'll actually carry on the trek, built up gradually |
| Back-to-back days | Yes — the defining requirement of this route |
| Can I train for altitude? | No. You can train fitness. Guided acclimatisation happens in Nepal |
| How do I know I'm ready? | A long hill hike followed by another substantial hike the next day, without severe fatigue or joint pain |
How Fit Do You Need to Be for the Three Passes Trek?
You need to be a competent, regular hiker — not an athlete.
A useful benchmark: if you can currently complete a 5-hour hike with 700–800 m of ascent, finish it feeling tired rather than destroyed, and repeat something similar the following weekend, you have a realistic starting point for an 8–10 week plan.
If you can't do that yet, you're not disqualified. You just need a longer runway — 12 weeks or more — and a plan that starts where you actually are.
What matters more than raw fitness on this route is repeatability. A very fit runner who has never done three consecutive long days on trails is less prepared than a moderately fit hiker who does a big weekend every month. The Three Passes route doesn't test your peak; it tests your floor after nine days of accumulating fatigue.
Who this plan is for
- Regular hikers preparing for their first Three Passes trek
- Recreationally active people with 10–12 weeks before departure
- First-time high-altitude trekkers who are otherwise fit and well-supported
- Experienced trekkers who want a structured peak-and-taper rather than just "doing more"
Who should get professional guidance first
If you have major mobility limitations, a significant medical condition, recent surgery, serious joint problems, or specific concerns about high-altitude exposure, get appropriate medical advice before starting an intensive training block or booking this trek. Places Nepal cannot and does not assess anyone's medical fitness.
Trek the Everest Three Passes Trek
Conquer the Three Passes, Experience Everest’s Ultimate Trekking Adventure.
What the Itinerary Actually Asks of You
Training in the abstract produces vague plans. Here's the real workload from the current 17-day Places Nepal itinerary, which is what you're actually training for.
| Day | Route | Walking time | Physical character |
|---|
| 1 | Lukla → Phakding | 2–3 hrs | Easy descent, 7 km |
| 2 | Phakding → Namche | 5–6 hrs | +830 m, sustained forest climb |
| 3 | Namche acclimatisation | Half day | Climb high, sleep low |
| 4 | Namche → Tengboche | 5–6 hrs | +420 m net, big descent then 600 m climb |
| 5 | Tengboche → Dingboche | 5–6 hrs | +550 m, crosses 4,000 m |
| 6 | Dingboche → Chhukung | 2–3 hrs | Short, positioning day |
| 7 | Chhukung → Kongma La → Lobuche | 7–9 hrs | +810 m to 5,535 m, long moraine descent |
| 8 | Lobuche → Gorak Shep → EBC | 7–9 hrs | 15 km round trip on glacial moraine |
| 9 | Kala Patthar → Dzongla | Long day | Pre-dawn climb to 5,545 m, then traverse |
| 10 | Dzongla → Cho La → Thagnak | 6–8 hrs | +590 m to 5,420 m, glaciated section |
| 11 | Thagnak → Gokyo | 2–3 hrs | Short recovery day |
| 12 | Gokyo Ri | 4–5 hrs | +607 m steep out-and-back to 5,357 m |
| 13 | Gokyo → Renjo La → Marulung | 7–8 hrs | +610 m, then 1,150 m descent |
| 14 | Marulung → Namche | 6–7 hrs | 20 km, the longest distance day |
| 15 | Namche → Phakding | 4–5 hrs | 830 m of descent |
| 16 | Phakding → Lukla | 3–4 hrs | Short final climb |
Total distance is around 170 km over 17 days. For the full sequence including acclimatisation structure, see the Everest Three Passes Trek itinerary.
Three things jump out of that table, and all three shape the training plan:
One. The standard day is 5–6 hours. That's your baseline, not your peak.
Two. Days 7, 8, 9 and 10 are four consecutive demanding days with no rest day between them, every one of them starting above 4,700 m. This part is the crux of the trek — not any individual pass.
Three. The descents are as significant as the climbs. Kongma La drops onto loose glacial moraine. Renjo La descends over 1,150 m on a less-maintained trail on Day 13, when you are at your most fatigued. Day 14 covers 20 km. Day 15 loses another 830 m.
If your training only goes uphill, you have prepared for roughly half of this trek.
Why You Need Stronger Preparation for Three Passes
The standard Everest Base Camp route and the Three Passes circuit share a trailhead, a Namche climb, and the same Kala Patthar sunrise. The difference is what gets added, and how it stacks.
The Three Passes route includes:
- Kongma La (5,535 m) — the highest of the three, with an 810 m climb from Chhukung
- Everest Base Camp (5,364 m)
- Kala Patthar (5,545 m) — the highest point you stand on
- Cho La (5,420 m) — the most technically involved, with a glaciated section
- Gokyo Lakes and Gokyo Ri (5,357 m)
- Renjo La (5,360 m) — crossed on Day 13, after twelve days of fatigue
The physical demand doesn't come from any one of those. It comes from the combination:
Repeated high-altitude efforts + cumulative fatigue + long descents + multiple pass days, with only two scheduled rest points across 17 days.
Compare it directly with the standard route in our Everest Base Camp vs Three Passes Trek comparison. The Three Passes circuit is rated Strenuous on the trip page's difficulty scale, and it's one of the routes discussed in our guide to the toughest treks in Nepal — though "hardest trek in Nepal" is a claim worth treating carefully, since remote routes like Kanchenjunga and Upper Dolpo present a different kind of difficulty entirely.
What's uncontroversial is this: if you trained adequately for Everest Base Camp, you need meaningfully more for Three Passes. Roughly: more long days, more descent work, and at least one extra layer of back-to-back conditioning.
What Fitness Do You Need for the Three Passes Trek?
Five qualities matter, in this order.
1. Aerobic endurance
The ability to keep moving at a moderate effort for hours without needing to stop. Not speed — duration. Most trek days are 5–6 hours; four or five of them are 6–9 hours.
Built by: long hikes, long walks, cycling, swimming, easy running, rowing — anything sustained and repeatable.
2. Uphill strength
Sustained climbing recruits quads, glutes and calves under continuous load while your heart rate sits near threshold. Kongma La asks for 810 m of continuous gain. Gokyo Ri asks for 607 m in about two hours, steeply.
Built by: hill repeats, stair climbing, incline treadmill, loaded step-ups, and simply hiking uphill a lot.
3. Downhill strength and control
This is the most under-trained quality among trekkers and the one most likely to end your trek early. Descending is an eccentric load — your quads lengthen under tension to control each step. That's the loading pattern that produces deep muscle soreness, and on this route you do it repeatedly, on loose rock, on tired legs.
Built by: deliberate downhill hiking, controlled step-downs, and progressive exposure. More on this below, because it deserves its own section.
4. Muscular endurance
Not maximal strength. The ability of your legs to keep producing force on Day 4 of a hard block. A trekker who can squat heavy but fades after two hours is worse off than one who can do a thousand unweighted step-ups' worth of climbing without their form collapsing.
Built by: higher-repetition strength work, and long time-on-feet sessions.
5. Recovery capacity
The ability to wake up the next morning and walk again. This is the quality the Three Passes Trek tests hardest and almost no training plan addresses directly.
You will sleep badly at Lobuche and Gorak Shep — poor sleep at 5,000 m is normal, not a failure. Your appetite will drop. Your rooms will be unheated. And then you'll get up and do 7–9 hours again.
Built by: back-to-back training days, deliberately performed while not fully fresh. This is the single most Three Passes-specific thing you can train.
Do I Need to Run to Train for Three Passes?
No.
Running builds general aerobic fitness efficiently, and if you already run and enjoy it, keep running. But running is not the most transferable preparation for this trek, and treating it as the core of your plan is a mistake.
The trek involves:
- Walking, for hours, at a pace far slower than you'd choose
- Climbing on uneven, rocky ground
- Descending on loose moraine and glaciated rock
- Long duration rather than high intensity
- Repeated days
Running trains one of those well — the aerobic engine. It does relatively little for eccentric quad strength under a pack, ankle stability on uneven ground, or the specific skill of walking slowly and efficiently for eight hours.
Plenty of people complete this route having never run a step. Nobody completes it comfortably without having walked a lot of hills.
Hiking Should Be the Foundation of Your Training
If you take one thing from this guide: the most transferable training for a trek is trekking.
Everything else in this plan — the gym work, the stairs, the treadmill — exists to support hiking or to substitute for it when hills aren't available. Hiking itself is the main event.
Train on:
- Hills, ideally with sustained climbs rather than rolling terrain
- Stairs, when hills aren't accessible
- Trails, specifically uneven ones — ankle proprioception matters
- Long walks, even flat ones, for time-on-feet
- Back-to-back hikes, at least twice a month in the build phase
And increase gradually across four variables:
- Duration
- Elevation gain
- Distance
- Pack weight
Do not increase every variable in the same week. Adding an hour, 300 m of gain, and 3 kg of pack weight simultaneously is how people arrive in Kathmandu with an inflamed knee. Pick one variable per week, hold the others steady.
8, 10 or 12 Weeks? Choosing Your Training Window
There's no universal answer, and anyone who tells you "8 weeks is enough" without knowing your starting point is guessing. The relationship is simple:
The shorter the preparation window, the stronger your starting fitness needs to be.
12-week plan — for people starting from lower fitness
You currently exercise occasionally, or you hike a few times a year. Twelve weeks gives you three or four weeks purely to build a consistent habit before the real training begins, which dramatically reduces injury risk.
Structure: Weeks 1–4 base, 5–8 build, 9–11 specific, 12 taper.
10-week plan — for reasonably active people
You're generally active — gym, cycling, running, or regular weekend walks — but not currently doing long hikes with elevation.
Structure: Weeks 1–3 base, 4–7 build, 8–9 specific, 10 taper.
8-week plan — for people who already hike regularly
You already do long hikes with real elevation gain most weekends. You don't need to build a base; you need to make what you have specific to this route, then taper.
Structure: Weeks 1–2 base/assessment, 3–5 build, 6–7 specific, 8 taper.
What if I have more than 12 weeks?
Use it. Sixteen weeks is genuinely better than twelve, particularly if you're building from a low base or you want to fit in a multi-day trek as a rehearsal. More time means smaller weekly increases, which means fewer injuries. The plan below stretches comfortably — just extend the base and build phases.
What extra time does not buy you is altitude adaptation. That stays firmly in Nepal.
Trek the Everest Three Passes Trek
Conquer the Three Passes, Experience Everest’s Ultimate Trekking Adventure.
Weekly Training Structure
A practical template that works for most people with jobs:
| Day | Training |
|---|
| Monday | Rest / mobility |
| Tuesday | Uphill cardio + strength |
| Wednesday | Easy aerobic activity |
| Thursday | Stairs or hills + strength |
| Friday | Rest |
| Saturday | Long hike |
| Sunday | Recovery hike / second hiking day |
That's two genuine rest days, two strength-plus-climbing sessions, one easy aerobic day, and a weekend that does the heavy lifting.
Adjust it to your life. If your long hike has to be on Wednesday, move everything. The specific days don't matter. What matters is:
- One long hike per week, non-negotiable
- At least one full rest day
- A second hiking day adjacent to the long one, from the build phase onward
- Strength work that doesn't leave you too sore to hike
A schedule you'll actually follow for ten weeks beats a perfect schedule you abandon in week three.
The Four Training Phases
Phase 1 — Base Fitness (Weeks 1–3 or 1–4)
Goal: consistency, not performance.
- Establish the weekly rhythm and stick to it
- Build an aerobic base with steady, unremarkable sessions
- Start basic strength work with bodyweight or light load
- Walk regularly, including on weekdays
- Long hike: 2–4 hours, 300–600 m of gain, light pack
This phase feels too easy. That's correct. Its job is to get your tendons, joints and habits ready for the load that follows. Most training injuries happen to people who skipped it.
Phase 2 — Build (Weeks 4–7 or 5–8)
Goal: progressive overload.
- Increase elevation gain in your long hike
- Extend hiking duration
- Add moderate pack weight
- Introduce the second hiking day
- Add load to your strength work
Long hikes move from 4–5 hours toward 6 hours; gain moves from 600 m toward 1,000 m. Increase one variable at a time.
Phase 3 — Specific Preparation (Weeks 8–10 or 9–11)
Goal: make it look like the trek.
- Long sustained climbs, 1,000 m+ in one push
- Long sustained descents, deliberately practised
- Two consecutive hiking days, both substantial
- Higher elevation if you have realistic access to it
- Your actual trekking gear: boots, socks, poles, daypack
This is where you find out whether your boots hotspot at hour five, whether your pack rubs, and whether your poles are the right length. Find out now, not at Chhukung.
Phase 4 — Taper (Final 7–10 days)
Goal: arrive fresh.
- Reduce total volume substantially
- Keep moving — easy walks, light mobility
- No new workouts, no heavy lifting, no record attempts
- Prioritise sleep
Fitness gained in the final week is negligible. Fatigue carried into Lukla is not.
Week-by-Week Training Progression
This is the 12-week version. Ranges, not fixed numbers — adjust to your starting point and the terrain you have access to.
| Week | Long hike | Elevation gain | Pack | Back-to-back | Main focus |
|---|
| 1 | 2–3 hrs | 300–400 m | Light (3–4 kg) | No | Base |
| 2 | 2.5–3.5 hrs | 400–500 m | Light | No | Base |
| 3 | 3–4 hrs | 500–600 m | Light | Optional short day | Endurance |
| 4 | 4–5 hrs | 600–800 m | Moderate (5–6 kg) | Yes — short second day | Build |
| 5 | 4–5 hrs | 700–900 m | Moderate | Yes | Strength |
| 6 | 5–6 hrs | 800–1,000 m | Moderate | Yes | Climbing |
| 7 | 5–6 hrs | 900–1,100 m | Trek-like (6–8 kg) | Yes | Specific |
| 8 | 6–7 hrs | 1,000–1,200 m | Trek-like | Yes | Peak |
| 9 | 6–7 hrs | 1,000–1,200 m | Trek-like | Yes — consider 3 days | Specific |
| 10 | 6–8 hrs | 1,100–1,300 m | Trek-like | Yes | Peak |
| 11 | 3–4 hrs | 400–600 m | Reduced | No | Taper |
| 12 | 1–2 hrs | Minimal | Minimal | No | Travel |
To compress to 10 weeks: skip weeks 1–2 and start at week 3, assuming you can already comfortably complete a 3–4 hour hike.
To compress to 8 weeks: start at week 4 and run weeks 4–10 with the taper moved to week 8, assuming you already hike 5 hours with 800 m of gain regularly.
Why the numbers look bigger than the trek. A 1,000–1,300 m training hike exceeds any single day's gain on the Three Passes route — Kongma La's 810 m from Chhukung is the biggest. That margin is deliberate. At 5,000 m you'll be working considerably harder for considerably less output, and you'll be doing it on tired legs. Training above the trek's numbers at sea level gives you headroom. It does not make you acclimatised.
If you can't reach these numbers where you live, substitute time-on-feet and stair volume. A trekker from the Netherlands who does four hours of stairs and long flat walks weekly is better prepared than one near the Alps who trains twice a month.
How Many Kilometers Should I Train for Three Passes?
There is no magic weekly mileage, and any figure presented as a requirement should be treated with suspicion.
Distance is the least useful of the three main metrics, because 20 km on a flat canal path and 20 km with 1,200 m of climbing are entirely different events. Elevation gain and time on feet are more useful indicators than distance alone.
Rough guidance for the build and specific phases:
| Metric | Build phase | Specific phase |
|---|
| Weekly time on feet | 6–9 hrs | 9–13 hrs |
| Weekly elevation gain | 1,000–1,800 m | 1,800–3,000 m |
| Weekly distance | 25–35 km | 35–50 km |
| Longest single hike | 4–6 hrs | 6–8 hrs |
Treat those as orientation, not targets to hit exactly. If you're consistently hitting the lower end and recovering well, you're in better shape than someone hitting the top end and limping into week eight.
The one number worth caring about: your longest single hike. Getting that to 6–8 hours with substantial gain, comfortably, tells you more than any weekly total.
How Much Elevation Should You Train For?
Build progressively toward being able to climb 1,000–1,300 m in a single hike without it being a maximal effort.
If you have hills, use them. If you don't, these substitute well:
- Stairs — the best low-tech option, see below
- Incline treadmill — controllable and weatherproof
- Stair machine / StairMaster — excellent for sustained climbing
- Hill repeats — one moderate hill climbed six times is 600 m of gain
- Multi-storey car parks and stadium steps — unglamorous, effective
A useful weekly progression in the build phase is adding roughly 10% to your total climbing, then holding for a week every third or fourth week rather than climbing indefinitely.
Trek the Everest Three Passes Trek
Conquer the Three Passes, Experience Everest’s Ultimate Trekking Adventure.
The thing elevation training cannot do
Fitness training does not reproduce high-altitude physiology.
Climbing 1,200 m at sea level and climbing 800 m at 5,300 m are different physiological events. At Kongma La the air holds roughly half the oxygen available at sea level. No amount of stair climbing at 200 m above sea level changes how your body responds to that.
What elevation training gives you is muscular and cardiovascular capacity, which means altitude takes a smaller proportional bite out of what you have. That's genuinely valuable. It is not acclimatisation, and it is not protection against altitude illness. More on this distinction below — it's the single most important thing in this guide.
Why Downhill Training Matters for Three Passes
This section matters more than most trekkers expect, so it's worth reading properly.
Every metre you climb on this route, you descend. Kongma La drops you onto the loose lateral moraine of the Khumbu Glacier. Cho La descends over glaciated then rocky ground into the Gokyo Valley. Renjo La loses over 1,150 m into the Bhote Koshi Valley on a less-maintained trail — on Day 13, after twelve days of accumulated fatigue. Then Day 14 covers 20 km, and Day 15 drops another 830 m.
Descending loads your quadriceps eccentrically — the muscle lengthens while resisting. This is the loading pattern that causes exercise-induced muscle damage and the deep, delayed soreness that makes stairs painful two days later. On the Three Passes Trek, "two days later" is another pass day.
The good news, and it's genuinely useful
Muscle adapts to eccentric loading through what exercise scientists call the repeated bout effect: after one session of downhill work, a subsequent similar session causes markedly less damage and soreness.
The practical detail that matters most: research on downhill walking has shown the protective effect can be conferred by relatively short, low-intensity sessions. In one study, a five-minute downhill walk performed a week before a 40-minute downhill walk significantly reduced the muscle-damage markers from the longer session — and researchers noted that actually damaging the muscle doesn't appear to be a prerequisite for protection to develop. Separate work found that repeated downhill walking sessions across roughly eight weeks reduced the strength loss caused by a standardised downhill walk.
Translation for trekkers: you do not need to destroy your legs to get the adaptation. You need to expose them to controlled downhill work, regularly, over about eight weeks. A moderate descent every week beats one brutal descent a month — and it beats no descent training at all by a wide margin.
How to train downhill
- Don't take the cable car down. If you climbed it, walk down it.
- Seek out descents deliberately rather than treating them as the boring part of the hike
- Use poles on descents in training, so the technique is automatic on the trek
- Shorten your stride going down — long strides increase impact and reduce control
- Build duration gradually: 20 minutes of continuous descent, then 40, then an hour, then 90 minutes
- Add step-downs in the gym between hikes (see below)
Do not train only uphill. It's the most common preparation error for this route, and the one that most often turns a trek into a survival exercise from Day 10 onward.
Knees and Descent
Long descents on uneven ground are demanding on the knees, and the Three Passes route has a lot of them. General strategies that help:
- Gradual exposure — increase downhill duration progressively rather than jumping into a 1,000 m descent
- Controlled step-down work to build eccentric quad strength
- Trekking poles, which reduce the load your legs absorb on descent
- Strengthen quads and glutes — stronger muscles absorb more of the load that would otherwise reach the joint
- Appropriate footwear with good tread and adequate support, properly broken in
- Shorter strides and a slightly softer knee on steep ground
This is general trekking preparation, not treatment for knee conditions. If you have existing knee problems, a diagnosed joint condition, or pain that recurs during training, see a physiotherapist or doctor. No training program prevents injury, and none of the above is a guarantee.
Are Stairs Good Training for Three Passes?
Yes — they're the best practical substitute when hills aren't available, and useful even when they are.
Stairs work because:
- Climbing stairs builds sustained climbing endurance with a movement pattern close to steep trail
- Descending stairs builds the eccentric quad control you need for pass descents — this is the part most people skip by taking the lift down
- Stair sessions are easily progressive — add flights, add time, add pack weight, reduce rest
A simple progression:
| Session type | How it works |
|---|
| Continuous | 20–45 min of steady up-and-down, conversational pace |
| Intervals | 5–10 × one flight-block hard, walk down as recovery |
| Loaded | Continuous stairs with your trek daypack |
| Long | 60–90 min, mixed pace, simulating a pass climb |
Walk down under control. Do not run down stairs fast — the injury risk isn't worth the marginal training benefit, and controlled descent is the quality you're actually training.
Can a Treadmill Prepare You for Three Passes?
Partially, and usefully.
An incline treadmill is good for:
- Steady incline walking at a controlled gradient
- Long-duration sessions regardless of weather or daylight
- Precise, repeatable progression — raise gradient or duration week by week
- Training in a pack without looking eccentric in public
A reasonable session: 45–75 minutes at 8–15% incline, walking pace, with your trek daypack on. Increase gradient before you increase speed. You're training walking uphill, not running.
What a treadmill cannot replicate:
- Uneven terrain and the constant micro-adjustments it demands
- Ankle stability work on rock and loose ground
- Descending — most treadmills don't decline, so your quads get nothing
- Weather, cold, wind, and the mental side of a long day outside
- Altitude
Treat the treadmill as a supplement that keeps your training consistent through bad weather, not a replacement for getting outside.
Strength Exercises for the Three Passes Trek
The goal is muscular endurance in trekking-specific patterns, not size or maximal strength. Two sessions per week is enough.
Focus on:
| Exercise | Why it matters |
|---|
| Squats | General leg strength and the base pattern for everything else |
| Step-ups | The closest gym analogue to climbing |
| Split squats | Single-leg strength and balance under load |
| Lunges | Strength through range, useful for high steps |
| Step-downs | Eccentric quad control for descents |
| Calf raises | Ascending, descending, and long days on rock |
| Glute bridges | Hip extension, which drives you uphill |
| Core work | Pack stability and posture on uneven ground |
Rep guidance: work in the 12–20 rep range for most movements, 2–4 sets. You're training legs that need to work for eight hours, not legs that need to move maximum load once. Keep the weight moderate and the quality high.
Timing: don't schedule heavy leg work the day before your long hike. Tuesday and Thursday strength with a Saturday long hike works well.
Taper strength too. Drop the load in the final 10 days along with everything else.
Trek the Everest Three Passes Trek
Conquer the Three Passes, Experience Everest’s Ultimate Trekking Adventure.
Step-ups deserve special attention
Step-ups are the single most useful gym exercise for this trek, because they replicate the actual movement of climbing: one leg drives your bodyweight up onto a raised surface, repeatedly.
- They mimic sustained climbing more closely than any machine
- They can be progressively loaded — bodyweight, then daypack, then dumbbells
- They need almost no equipment; a bench or sturdy box works
- They build single-leg endurance, which matters on high steps and rocky ground
Start with a knee-height box, 3 sets of 15 per leg. Progress by adding your loaded daypack, then increasing time rather than load — sets of 3–5 minutes of continuous alternating step-ups build the endurance quality you want.
They are not a substitute for real climbing. They replicate the muscular pattern, not the terrain, duration or heart-rate demand of a mountain trail.
Step-downs deserve special attention too
Step-downs are step-ups' neglected counterpart, and they're the most direct gym training for pass descents.
Stand on a box, lower yourself slowly under control to touch one heel to the floor, return. The point is the slowness — 3–4 seconds on the lowering phase. That's where the eccentric strength is built.
They train:
- Eccentric quad strength, directly transferable to descending
- Balance and single-leg control
- Knee tracking under load
- Confidence on steep ground
Start low — a 20–30 cm step is plenty — with 2–3 sets of 8–10 per leg, controlled. Don't chase high repetitions. Eccentric work produces significant soreness when you're unaccustomed to it. Build slowly and let your legs adapt.
Calves and Ankles
Lower legs take an unusual beating on this route:
- Ascending loads the calves continuously, especially on steep ground
- Descending loads them eccentrically alongside the quads
- Uneven terrain — moraine, loose rock, glaciated ground — demands constant ankle stabilisation
- Long walking days mean thousands of repetitions of all of the above
Keep the training simple:
- Calf raises — both straight-leg and bent-knee, 2–3 sets of 15–20, twice a week
- Single-leg balance — 30–60 seconds per leg, progressing to eyes closed or an unstable surface
- Ankle mobility — particularly dorsiflexion, which affects how efficiently you climb steep ground
Ten minutes twice a week covers it.
Core
Core strength has a real but modest role. It helps with:
- Backpack stability — a stable trunk means less energy wasted counteracting a swaying pack
- Posture over long days, particularly late in a 7–9 hour effort
- Balance on uneven terrain, where trunk control prevents small stumbles becoming falls
Planks, side planks, dead bugs, bird dogs, and loaded carries all work. Two short sessions a week, 10 minutes each.
That's the honest scope. Core training won't get you over Cho La, and a six-pack has no relevance to 5,420 m. Do a reasonable amount and spend your remaining energy on hiking.
Should You Train With a Backpack?
Yes, gradually.
The goal is straightforward: become comfortable carrying the daypack you will actually use, for the durations you'll actually carry it.
Training in a pack changes:
- Your centre of gravity and therefore your balance on uneven ground
- The load on your knees during descent
- Where your shoulders and hips get sore
- Your walking efficiency and pace
All of which you want to discover at home, not on Day 2 to Namche.
How to build up:
- Start with a light pack — 3–4 kg — on your long hike only
- Add 1 kg every two weeks or so, not every week
- From the build phase, wear it on stair and treadmill sessions too
- By the specific phase, be training in the exact pack you'll carry, loaded to roughly trek weight
- Use real gear as the load — water bottles, layers, a jacket — rather than dead weight, so you're also testing how things pack
Train in the actual daypack. Straps, hip belt fit, and where the frame sits against your back are all things you want dialled in before you're wearing it for 17 days.
How Much Pack Weight Should You Train With?
There's no universal number, and using one is how people over-train.
Your training pack weight should eventually resemble the realistic daypack weight you expect on the trek. That's it. That's the principle.
What that means in practice:
| Your setup | Realistic daypack | Train toward |
|---|
| With a porter (optional, USD 400 on this trek) | Water, layers, down jacket, snacks, camera, personal items | 5–8 kg |
| Carrying everything yourself | Full personal kit including sleeping bag | 12–15 kg, built up very gradually over the full training window |
The recommended pack for this route is a 35–45 L daypack with a rain cover.
Do not train with 15–20 kg simply because a porter could carry that much. You're not going to carry it, so training for it wastes recovery capacity and increases injury risk with no benefit. The point of pack training is specificity, not toughness.
If you're carrying everything yourself, be honest about the timeline: going from an unloaded hiker to comfortable with 14 kg takes the full 12 weeks, not six.
Trekking Poles
Poles are worth training with, not just packing.
They help with:
- Stability on loose rock, moraine and glaciated ground
- Descending — they take a meaningful share of the load off your knees on long drops like Renjo La to Marulung
- Uneven terrain, giving you two extra points of contact
- Rhythm on sustained climbs, where a steady pole cadence helps hold pace
Train with them so the technique is automatic. Set the length correctly — roughly 90° at the elbow on flat ground, shorter for climbing, longer for descending. Practise the adjustment until you can do it without stopping the group.
Poles reduce load and improve stability. They do not eliminate injury risk, and they're no substitute for leg strength — they work best alongside it, not instead of it.
Train for Back-to-Back Hiking Days
This is the most Three Passes-specific element of the entire plan, and the one most trekkers skip.
A single long Saturday hike tells you almost nothing about how you'll feel on Day 10. The route puts four demanding days in a row (Days 7–10) with no rest day, then asks for Renjo La on Day 13. The quality being tested is overnight recovery under fatigue.
Build it in stages
Stage 1 (Weeks 4–6)
- Day 1: Long hike, 4–5 hours
- Day 2: Easy hike, 1.5–2 hours, flat or gentle
The second day is short on purpose. You're teaching your body to move on tired legs, not doubling the training load.
Stage 2 (Weeks 7–9)
- Day 1: Long uphill day, 5–6 hours with substantial gain
- Day 2: Another substantial hike, 3–4 hours with real elevation
Stage 3 (Week 9 or 10, once)
- Three consecutive days, decreasing in size: long, moderate, easy
One three-day block in the whole training cycle is plenty. It's diagnostic — it tells you how you handle cumulative fatigue — rather than a weekly requirement.
Don't overdo it
Do not turn every weekend into an extreme two-day effort. That's a recipe for accumulated fatigue and injury, not adaptation. Two big back-to-back weekends per month, with lighter weekends between, is the right dose for most people.
If you can arrange a multi-day trek — a hut-to-hut route, a three-day trail section — that's the closest available rehearsal, and worth prioritising over any gym session.
Can You Train for High Altitude at Sea Level?
You can train your fitness at sea level. You cannot acclimatise at sea level through ordinary exercise.
These are two different physiological adaptations, and conflating them is the most consequential misunderstanding in trek preparation.
| Fitness training | Acclimatisation |
|---|
| What it is | Cardiovascular and muscular adaptation to exercise | Physiological adaptation to reduced oxygen availability |
| Where it happens | Anywhere — sea level is fine | Only through gradual exposure to altitude |
| How long it takes | 8–12+ weeks | Days, during the trek itself |
| What it gives you | Capacity to do the physical work | Ability to function with less available oxygen |
| Does it prevent altitude illness? | No | Reduces risk when done properly |
The medical position here is clear and worth stating precisely. Guidance drawn from the Wilderness Medical Society's clinical practice guidelines on acute altitude illness holds that although physical fitness allows greater exertion at altitude, it does not protect against any form of acute altitude illness. The most important protective measure is slow ascent.
Two practical consequences follow.
First: being fit does not make you immune. Strong, experienced, well-trained trekkers develop acute mountain sickness on this route every season. Fitness is not a shield, and treating it as one is dangerous.
Second — and this one is counterintuitive: fitness can work against you if it changes your behaviour. A fit trekker has the capacity to walk faster, arrive earlier, and push through the day when a less fit companion would naturally slow down. Slow ascent is the thing that actually protects you. The discipline to walk more slowly than you're capable of is more valuable at 5,000 m than the fitness that lets you walk fast.
Acclimatisation on this route is built into the itinerary: the two nights at Namche with the climb-high-sleep-low hike to Hotel Everest View on Day 3, the short positioning day to Chhukung, the gradual profile through Dingboche, and the Gokyo Ri day. Those days are not padding. They are the mechanism.
Do not attempt improvised hypoxic training, sleeping in a homemade altitude tent, or any other DIY approach to simulating altitude. Altitude simulation equipment used in sports science is used under supervision, and improvised versions are not a safe substitute for a properly paced ascent.
Training at Altitude If You Have Access to It
If you live near mountains, hiking at elevation is useful — but be precise about why it's useful.
What it genuinely gives you:
- Sport-specific practice on real mountain terrain
- Experience of how your body feels working at reduced oxygen
- Familiarity with cold, wind, weather changes and mountain conditions
- Psychological confidence, which is worth more than people admit
What it does not give you:
- Lasting acclimatisation for a trek weeks or months later
- Any protection against altitude illness on the Three Passes route
- A shortcut past the acclimatisation days in the itinerary
Fitness and acclimatisation are different adaptations. Acclimatisation gained on a weekend at 3,000 m fades within days to weeks of returning to sea level. It will not still be there when you land in Kathmandu.
Where prior altitude experience genuinely matters is knowing how you respond. Someone who has trekked above 4,000 m before — on Everest Base Camp, the Manaslu Circuit, or the Annapurna Circuit — arrives knowing whether they're someone who gets headaches at 4,500 m. That's genuinely useful information, and it's why prior high-altitude experience is strongly recommended before attempting this route. But it's knowledge, not physiological carry-over.
How to Train for Kongma La
Kongma La (5,535 m) is the highest of the three passes and, for most trekkers, the hardest day of the trek. Day 7 climbs 810 m from Chhukung over 7–9 hours, then descends onto the lateral moraine of the Khumbu Glacier.
Train for it with:
- Sustained climbing without stopping. The ascent is relentless and rocky. Practise long unbroken climbs rather than hill repeats with recovery between efforts.
- Long-day endurance. 7–9 hours is at the top end of the trek's range. Your longest training hikes should reach into that territory at least twice.
- Descent control on loose ground. The moraine descent is loose, rocky, and requires constant concentration. Train on scree, rough trail, or any surface that makes you place your feet deliberately.
- Pole technique. Poles are close to essential on this descent.
- Early starts. The crossing leaves Chhukung at 5:30–6:00 AM. Do a few training hikes starting before dawn so a pre-dawn departure isn't novel.
For the route itself — where it runs, crossing times and conditions — see our dedicated Kongma La Pass guide.
How to Train for Cho La
Cho La (5,420 m) is the most technically involved of the three, with a glaciated upper section and descent where snow and ice are common. It's crossed on Day 10, immediately after Kongma La, Everest Base Camp and Kala Patthar.
From a purely physical training standpoint, prepare with:
- Uphill endurance for the 590 m climb from Dzongla to the pass
- High-altitude walking capacity — the day sits above 4,800 m throughout
- Footing on uneven and slippery ground. You can't train on a glacier at home, but you can train on wet rock, snow, loose trail and anything else that demands careful placement.
- Controlled descent — the drop toward Thagnak is rocky and can be slippery once snow softens through the morning
- Long duration: 6–8 hours, most of it above 5,000 m
- Fatigue resistance. Cho La is never a fresh-legs day. This is precisely what back-to-back training prepares you for.
Conditions, crampon and microspike requirements, snow assessment and safety are covered separately in our Cho La Pass guide. Read it alongside this plan — it answers a different set of questions.
How to Train for Renjo La
Renjo La (5,360 m) is the least technically demanding of the three and, for many trekkers, still the hardest to get through — because it arrives on Day 13, after twelve days of accumulated fatigue.
Train for it with:
- A long ascent on tired legs. 610 m from Gokyo, steep but non-glaciated. The climb isn't the problem; doing it on Day 13 is.
- Sustained descent capacity. The drop to Marulung is over 1,150 m on a less-maintained trail — the longest single descent on the route. This is the clearest argument in the whole itinerary for downhill training.
- Recovery between hard days. Renjo La follows the Gokyo Ri climb on Day 12. Back-to-back training is the direct preparation.
- Mental endurance. By Day 13 the novelty has worn off, you've slept badly for a week, and you still have a 5,360 m pass and a 1,150 m descent to manage.
Route detail and conditions are covered in our Renjo La Pass guide.
Don't Forget EBC, Kala Patthar and Gokyo Ri
The passes get the attention, but they're three days out of seventeen.
Everest Base Camp (Day 8, 5,364 m). A 15 km round trip from Lobuche via Gorak Shep, 7–9 hours, on rocky undulating glacial moraine. It's not steep, but it's long and the footing is constantly awkward. Train time-on-feet on rough ground.
Kala Patthar (Day 9, 5,545 m). The highest point you stand on. A pre-dawn climb in temperatures that can reach −15°C to −20°C, then a full traverse to Dzongla afterwards. Train early starts and cold-weather walking.
Gokyo Ri (Day 12, 5,357 m). 607 m of steep, direct climbing in roughly two hours, then back down. A concentrated climbing effort — the closest thing on the route to a hill-repeat session, at 5,000 m.
All three are substantial efforts in their own right, and all three fall inside or immediately adjacent to the demanding Day 7–13 block. This is exactly why cumulative capacity, rather than single-day peak fitness, is the thing worth training.
Trek the Everest Three Passes Trek
Conquer the Three Passes, Experience Everest’s Ultimate Trekking Adventure.
Recovery Is Part of Training
Training is the stimulus. Recovery is where the adaptation actually happens. Skip it and you accumulate fatigue instead of fitness.
Sleep. The highest-value recovery tool available and the one most often sacrificed. If you're choosing between a 5:00 AM session on four hours' sleep or seven hours' sleep and a session later, choose the sleep.
Rest days. At least one full day off per week, every week, including peak weeks.
Nutrition. Eat enough to support the training load. A 12-week trek block is not the time to be in a significant calorie deficit — under-fuelling degrades both training quality and recovery. Adequate protein supports muscle repair, and carbohydrate supports long-duration training. Beyond those general principles, individual nutrition advice is outside the scope of a training article.
Hydration. Drink normally and adequately. Also useful: build the habit of drinking 3–4 litres a day during training, because that's the intake recommended above 4,000 m on the trek, and it's easier if it's already routine. Our Everest Base Camp water and hydration guide covers hydration at altitude in more detail.
Mobility. Ten minutes of stretching or mobility work after long hikes, focused on calves, hip flexors, quads and hamstrings.
Gradual progression. The best recovery strategy is not needing extraordinary recovery in the first place. Progress conservatively.
Rest Days Are Not Optional
Not every training day should be hard. A plan where every session is a maximum effort is a plan that ends in injury or burnout somewhere around week six.
Build in at least:
- One full rest day per week — no training, walking to the shops is fine
- Genuinely easy sessions — the Wednesday aerobic day should be conversational
- Recovery after long hikes — the day after a 7-hour hike is not the day for heavy squats
- A lighter week every third or fourth week — reduce volume by 30–40%, keep the rhythm
Do not train "no days off." It's not a badge of commitment; it's a failure to understand how adaptation works. The trek itself gives you two rest points in 17 days. Arriving already depleted is the worst possible way to start.
How to Taper Before the Three Passes Trek
The final 7–10 days before departure have one job: arrive fresh.
Do:
- Reduce total training volume by 50–70%
- Keep moving with easy walks and light mobility
- Maintain your normal sleep schedule, or improve it
- Do a final gear check with everything you'll actually carry
- Eat normally and stay hydrated
Don't:
- Attempt a final big hike to "prove" you're ready
- Start any new workout, class or exercise
- Do heavy or unfamiliar leg work
- Try to compensate for missed training in the last fortnight
- Stop moving entirely
That fourth point is worth emphasising. Trekkers who realise in week ten that they're behind schedule often try to cram, and cramming in the last two weeks does nothing except guarantee they start the trek tired. Fitness gained in the final ten days is negligible. Fatigue carried into Lukla is very real, and it compounds across 17 days.
Do not stop exercising entirely unless medically advised. Complete rest for two weeks makes you feel sluggish and stiff. Light, regular movement is the target.
Final Week Checklist
Practical, not physical:
- Feet healthy — no blisters, no hot spots, nails trimmed
- Boots broken in — the trip page recommends at least 100 km of walking in them before departure
- Socks tested — the exact pairs you'll wear, on long hikes, with your boots
- Pack fitted and adjusted — straps set, hip belt positioned, nothing rubbing
- Poles tested and adjustment mechanism working
- Blister kit packed — tape, dressings, whatever you know works for your feet
- Insurance confirmed — helicopter rescue cover to at least 6,000 m is mandatory on this route
- Layering system tested in cold conditions, including glove changes
- Sleep prioritised — particularly with a possible 1:00–3:00 AM start for a peak-season Manthali departure
- Nothing new — no new boots, no new pack, no new insoles
Foot problems end more treks than fitness ever does.
- Break boots in properly. Aim for 100 km of walking in them before you fly. Include descents — that's where boots reveal whether they'll bruise your toenails.
- Test your socks on long training hikes. Sock thickness changes boot fit, so test the exact combination.
- Identify hot spots early. If a specific area rubs consistently in training, it will rub worse over 17 days. Address it now — different lacing, a different sock, an insole, or different boots.
- Never debut new boots in Kathmandu or Lukla. Thamel's gear shops are well stocked and tempting. Buying boots there for a trek starting tomorrow is a reliably bad decision.
- Carry blister-management supplies and know how to use them before you need them.
- Trim your toenails a few days before departure — not the night before, and not too short. Long nails and steep descents are a painful combination.
Basic prevention is within scope here. Anything beyond that — treating an infected blister, managing an existing foot condition — is a medical question.
How Do You Know You're Fit Enough?
There's no test that certifies you for this trek, and any article offering one is overreaching. What you can use are practical indicators.
By the end of your specific-preparation phase, you should be able to:
- Hike for 6–8 hours without major problems
- Climb 1,000 m+ continuously at a steady pace without frequent stops
- Descend for over an hour on uneven ground with control, and walk normally the next day
- Complete back-to-back hiking days — a long one followed by another substantial one
- Carry your trek daypack all day without significant shoulder, hip or back discomfort
- Recover reasonably by the next morning — tired is fine, wrecked is not
Are You Ready for Three Passes?
You should be progressing toward:
Long hiking days — 6–8 hours, comfortably
Substantial uphill effort — 1,000 m+ of gain in one push
Controlled long descents — an hour or more, without your quads seizing up
Back-to-back hiking — two consecutive substantial days
Comfort carrying your daypack — the real one, at real weight
Reasonable next-day recovery — able to walk again, not just able to survive
This is a training benchmark, not a medical certification. Meeting it doesn't guarantee you'll complete the trek — altitude, weather and conditions all have a vote. Not meeting it doesn't mean you can't go, but it does mean you should have an honest conversation about your timeline.
A useful single benchmark
If you want one test: a reasonably prepared trekker should be comfortable completing a long hill hike followed by another substantial hike the next day, without severe fatigue or joint pain.
Not fast. Not impressively. Comfortably, and then again tomorrow. That's the quality the Three Passes Trek actually asks for.
8 Common Three Passes Training Mistakes
1. Doing only cardio. Running and cycling build the engine but neglect the eccentric leg strength that descents demand, and do little for pack-carrying capacity.
2. Only walking on flat roads. Distance without elevation misses the specific demand of the route. Ten flat kilometres and ten kilometres with 800 m of climbing are not the same training.
3. Ignoring downhill training. The most common and most consequential error. Every metre climbed on this route is descended, much of it on loose or glaciated ground.
4. Never training with a pack. Your first day carrying a loaded daypack should not be Day 1 in Lukla. Balance, knee loading and pressure points all change.
5. No back-to-back days. Single weekly long hikes tell you nothing about overnight recovery, which is the quality this route tests hardest.
6. Increasing volume too quickly. Adding duration, elevation and pack weight in the same week is how training injuries happen. Change one variable at a time.
7. Ignoring recovery. Training without rest days accumulates fatigue rather than fitness. You arrive at Lukla already depleted.
8. Trying to "make up" missed training with extreme workouts. Two weeks of cramming before departure produces fatigue, not fitness. If you fall behind, adjust your expectations rather than your final fortnight.
Gym-Only Training Plan
No trails nearby? This works, though it has real limitations.
| Element | Prescription |
|---|
| Incline treadmill | 2× per week, 45–75 min at 8–15% incline, with daypack |
| Stair machine | 1× per week, 30–60 min continuous |
| Step-ups | 2× per week, building to 3–5 min continuous sets |
| Leg strength | 2× per week — squats, split squats, lunges, step-downs |
| Calves | 2× per week, 2–3 sets of 15–20 |
| Core | 2× per week, 10 min |
| Stationary bike / rower | 1–2× per week for aerobic volume |
| Long session | 1× per week, 2–3 hrs combining treadmill and stair machine |
Add outdoor hikes whenever you possibly can, because terrain matters. A gym cannot give you uneven ground, real descents, weather, or the experience of being outside for eight hours. Even one hilly hike a month meaningfully improves gym-based preparation. If you have a single weekend to travel somewhere hilly, spend it on a two-day hike rather than a gym block.
Home Training Plan
No gym, no trails, limited equipment:
- Stairs — the cornerstone. Any building with multiple flights works. Up and down, under control.
- Step-ups — onto a sturdy chair, bench or bottom stair
- Split squats — bodyweight, then holding your loaded daypack
- Step-downs — off the bottom stair, slow and controlled
- Calf raises — on a stair edge for full range
- Long walks — the most accessible endurance training there is
- Hill repeats — even a modest road incline, repeated, accumulates real elevation gain
- Backpack walks — your normal walks, done with a loaded daypack
A workable home week: stairs twice, strength circuit twice, one long backpack walk, one easy walk, one rest day. Add outdoor hills whenever accessible.
If You're a Runner
Good news: your aerobic base is already strong, and that's the slowest quality to build.
Keep running if you enjoy it. But add:
- Hiking, especially long and slow — running fitness doesn't automatically produce walking efficiency at hiking pace
- Hills walked, not run — the muscular demand of walking uphill under pack differs from running
- Deliberate descending, walked and controlled
- Strength work — runners are frequently underpowered in single-leg strength and glute work
- Long-duration walking — six hours walking is a different stimulus from a two-hour run
- Pack training — running builds no tolerance for carrying load
Do not assume running fitness equals trekking fitness. Marathon runners get humbled on long descents with a pack because they've trained a different set of qualities. Your engine is excellent; your chassis needs specific work.
If You're a Cyclist
Cycling is excellent aerobic training with a significant specificity gap.
What cycling gives you: a strong aerobic base, good quad endurance in the concentric direction, and high training volume with low joint impact.
What it doesn't prepare:
- Feet — no impact conditioning, so blisters and foot fatigue arrive as a surprise
- Ankles — no uneven-terrain stabilisation
- Downhill control — no eccentric quad loading at all
- Long walking — walking for hours uses a different muscular pattern
- Load carrying — bikes carry the weight, not your shoulders and hips
Add: walking and hiking as the priority, deliberate descent training, single-leg strength work, and pack-carrying practice. Keep two cycling sessions a week for aerobic maintenance and shift the rest of your volume to feet.
Trek the Everest Three Passes Trek
Conquer the Three Passes, Experience Everest’s Ultimate Trekking Adventure.
If You're Starting From Zero
If you're currently inactive, the honest answer is that you need more than 12 weeks — and that's fine. Start now and plan your departure accordingly.
Do not jump into an aggressive plan. Start with:
- Frequent walking — 30 minutes daily, every day, before anything else
- Short hills — introduce gentle inclines once daily walking is established
- Basic strength — bodyweight squats, step-ups onto a low step, calf raises, twice a week
- Gradual progression — add 10% per week and take a lighter week every fourth week
- Patience — the first four to six weeks are about habit and joint conditioning, not fitness
Once you can comfortably walk for two hours with some elevation, you can join this plan at Week 1 and follow the 12-week structure. That might mean a five- or six-month total runway. That's a realistic timeline, not a discouraging one.
Unfit does not mean you can't do the Three Passes Trek. It means you need a longer runway and an honest schedule. If you have any health concerns, get professional guidance before starting.
Training by Fitness Level
| Starting fitness | Training approach |
|---|
| Inactive | Build a walking habit first — 4–8 weeks — then start the 12-week plan |
| Moderately active | 10–12 week plan, with emphasis on building hiking-specific volume |
| Regular hiker | 8–10 week specific plan focused on descents, back-to-back days and pack work |
| Experienced mountain hiker | 8 weeks of specific strength and endurance peaking, then a full taper |
Whatever your level, the last ten days look the same: reduce volume, keep moving, arrive fresh.
A Note on Medical Fitness
This training plan is general fitness guidance, not medical advice. If you have a heart, lung, joint or other medical condition, or you're unsure whether high-altitude trekking is appropriate for you, speak with an appropriately qualified professional before starting an intensive training program or booking the trek.
No training program prevents altitude sickness, guarantees you'll cross any pass, or eliminates injury risk. There is no fitness benchmark — not a 10 km time, not a VO2 max figure — that determines whether someone can complete a 5,500 m pass crossing. Places Nepal provides trekking guidance and does not assess individual medical fitness.
Anyone with a history of severe altitude illness, a significant relevant medical history, or major mobility limitations should consult a doctor with travel medicine or altitude experience before booking.
Trek the Everest Three Passes Trek
Conquer the Three Passes, Experience Everest’s Ultimate Trekking Adventure.
Prepare for the Everest Three Passes Trek With Places Nepal
The current Places Nepal Everest Three Passes Trek runs 17 days from Kathmandu and includes:
- Kongma La (5,535 m) — Day 7, the highest of the three passes
- Everest Base Camp (5,364 m) — Day 8
- Kala Patthar (5,545 m) — Day 9, the highest point on the route
- Cho La (5,420 m) — Day 10, the glaciated crossing
- Gokyo Lakes and Gokyo Ri (5,357 m) — Days 11–12
- Renjo La (5,360 m) — Day 13, with the long descent to Marulung
What our team provides:
- A licensed, experienced high-altitude guide for all 17 days — legally required across Sagarmatha National Park and, on a route with a glaciated pass, worth considerably more than the legal minimum
- Fixed-departure group joining, with group pricing for two or more travellers — solo trekkers can join an existing departure
- Private and customised options, including flexibility around pace and buffer days
- Current itinerary guidance — realistic walking hours, daily distances and elevation profiles you can build your training around
- An optional porter service, which changes what you carry and therefore what pack weight you should train with
What we can't do is assess whether you're medically fit for this route. That's a conversation for you and a qualified professional. What we can do is tell you honestly what each day demands, and help you decide whether the timing works for your training window.
If you're still deciding between routes, our Everest Base Camp vs Three Passes comparison and the Three Passes trek cost breakdown are both worth reading. For timing, see the best time for the Three Passes Trek, and for route direction, clockwise or anticlockwise.
Once your training base is solid, review the current 17-day Three Passes itinerary and choose between a fixed departure or a private/customised trek with Places Nepal.
View the Everest Three Passes Trek →
Frequently Asked Questions
How long should you train for the Three Passes Trek? 8–12 weeks of focused, specific training, on top of an existing base of regular activity. If you're starting from inactive, allow four to eight weeks of habit-building first.
Is 8 weeks enough to train for Three Passes? It can be, if you already hike regularly with real elevation gain. Eight weeks is a specificity block, not a from-scratch plan. If you're starting from low fitness, eight weeks is not enough.
Is 12 weeks better? For most people, yes. Twelve weeks allows smaller weekly increases, which reduces injury risk and lets you build a genuine base before the demanding phases. Sixteen weeks is better still.
How fit do you need to be for the Three Passes Trek? Fit enough to hike 6–8 hours with 1,000 m+ of ascent, descend for an hour under control, and repeat something substantial the next day. Not athlete-level, but genuinely above casual-hiker level.
Is running necessary to prepare for Three Passes? No. Running builds aerobic fitness efficiently but hiking transfers far better. Plenty of people complete this route having never run.
Is hiking better than running for Three Passes? Yes, for this purpose. Hiking trains the exact movement patterns, the eccentric descent load, pack tolerance and terrain skills. Running trains only the aerobic component.
How much should I walk each week? In the build phase, 6–9 hours on feet; in the specific phase, 9–13 hours. Time and elevation matter more than distance.
How much elevation should I train for? Build toward 1,000–1,300 m of gain in a single hike, and 1,800–3,000 m per week in the specific phase. Use stairs or incline treadmill if you don't have hills.
Why is downhill training important for the Three Passes Trek? Because descents are half the trek and the most common source of trek-ending leg problems. Renjo La alone drops over 1,150 m on Day 13. Descending loads the quads eccentrically, which causes the deep soreness that makes subsequent days miserable — and your legs adapt to that only if you train it.
Should I train with a backpack? Yes, gradually. Build toward the realistic weight of the daypack you'll actually carry — typically 5–8 kg with a porter, more if you're carrying everything. Add weight every couple of weeks, not every week.
What strength exercises help most for Three Passes? Step-ups, step-downs, split squats, squats, lunges, calf raises and glute bridges — in the 12–20 rep range, twice a week. Muscular endurance, not maximal strength.
Are squats useful? Yes, as a foundation. But single-leg work — step-ups, step-downs, split squats — transfers more directly to trail movement.
Are step-ups useful? Very. They're the closest gym equivalent to climbing: single-leg, loadable, and easy to make progressive. Build toward continuous 3–5 minute sets with your loaded daypack.
Are stairs good training for Three Passes? Yes — they're the best practical substitute when hills aren't available. Stairs build climbing endurance going up and eccentric quad control coming down. Walk down under control rather than running.
How do I prepare for Kongma La? Sustained continuous climbing (810 m from Chhukung), long-day endurance for a 7–9 hour effort, and descent control on loose moraine. Practise pole technique and pre-dawn starts.
How do I prepare for Cho La? Uphill endurance for the 590 m climb from Dzongla, careful footing on uneven and slippery ground, and controlled descent — all performed on legs already tired from the preceding days. Glacier conditions and equipment are a separate topic.
How do I prepare for Renjo La? Long ascent capacity on tired legs, and above all sustained descent training — the drop to Marulung is over 1,150 m on Day 13.
How do I train for consecutive trekking days? Start with a long hike followed by a short easy one. Progress to two substantial days. Do one three-day block in the whole cycle. The goal is training overnight recovery, not doubling your weekly load.
Can I train for Three Passes at sea level? Yes, for fitness. Stairs, incline treadmill, long walks and strength work all build genuine capacity at sea level. What you can't build at sea level is acclimatisation.
Can exercise acclimatise me to 5,000 m? No. Acclimatisation comes only from gradual exposure to altitude, which happens during the trek. Guidance from the Wilderness Medical Society is explicit that physical fitness allows greater exertion at altitude but does not protect against any form of acute altitude illness.
Does being fit prevent altitude sickness? No. Fit trekkers get acute mountain sickness. Slow ascent is the protective factor, not fitness — and fitness can even work against you if it tempts you to ascend faster than you should.
Should I taper before the Three Passes Trek? Yes. Reduce volume by 50–70% over the final 7–10 days, keep moving lightly, and avoid any new or heavy training. Arrive fresh.
What should I do in the final week? Light walking, mobility, sleep, and a gear check. No new workouts, no final big hike, no new boots.
Can beginners train for the Three Passes Trek? Beginners to training can. Beginners to high altitude should think carefully — prior experience above 4,000 m is strongly recommended before this route, and Everest Base Camp or the Manaslu Circuit are better first Himalayan treks.
How do I know when I'm ready? When you can complete a long hill hike and follow it with another substantial hike the next day, without severe fatigue or joint pain, carrying your actual daypack.
What if I miss a week of training? Nothing. Resume where you left off rather than trying to compress the missed work into the following week. Missing one week costs you almost nothing; cramming to compensate can cost you the trek.
Can I train for Three Passes in a gym? Yes, with limitations. Incline treadmill, stair machine, step-ups and leg strength cover most of it. Add outdoor hikes whenever possible — a gym can't replicate uneven terrain, real descents or eight hours outside.
Can runners use this plan? Yes. Keep your running for aerobic maintenance and add hiking, walked hills, deliberate descents, strength work and pack training.
Can cyclists use this plan? Yes. Keep two rides a week and shift the rest of your volume to walking and hiking. Cycling does nothing for feet, ankles, descent control or load carrying.
Do I need trekking poles, and should I train with them? Poles are strongly recommended on this route, particularly for the Kongma La and Renjo La descents. Train with them so the technique and length adjustment are automatic.
Should I hire a porter, and does it change my training? It's optional on this trek (USD 400) and it directly changes your training pack weight — 5–8 kg with a porter versus 12–15 kg without. Decide early so you train for what you'll actually carry.
Three Passes Training in One Minute
Train hiking, not just cardio. Train uphill and downhill — the descents are half the trek and the part most people neglect. Train consecutive days, because overnight recovery under fatigue is what this route tests hardest. Build pack familiarity gradually, toward the weight you'll actually carry. Use strength training for muscular endurance, not size. Treat recovery as part of the plan rather than an interruption to it.
And keep the two things separate in your head: fitness and acclimatisation are different adaptations. You can build fitness anywhere over 8–12 weeks. Acclimatisation happens in Nepal, on the itinerary's schedule, and no workout at sea level can guarantee how you'll respond above 5,000 m.
The goal isn't to arrive in Kathmandu having simulated the Himalaya. It's to arrive fit enough to handle the workload repeatedly — and rested enough to enjoy it.