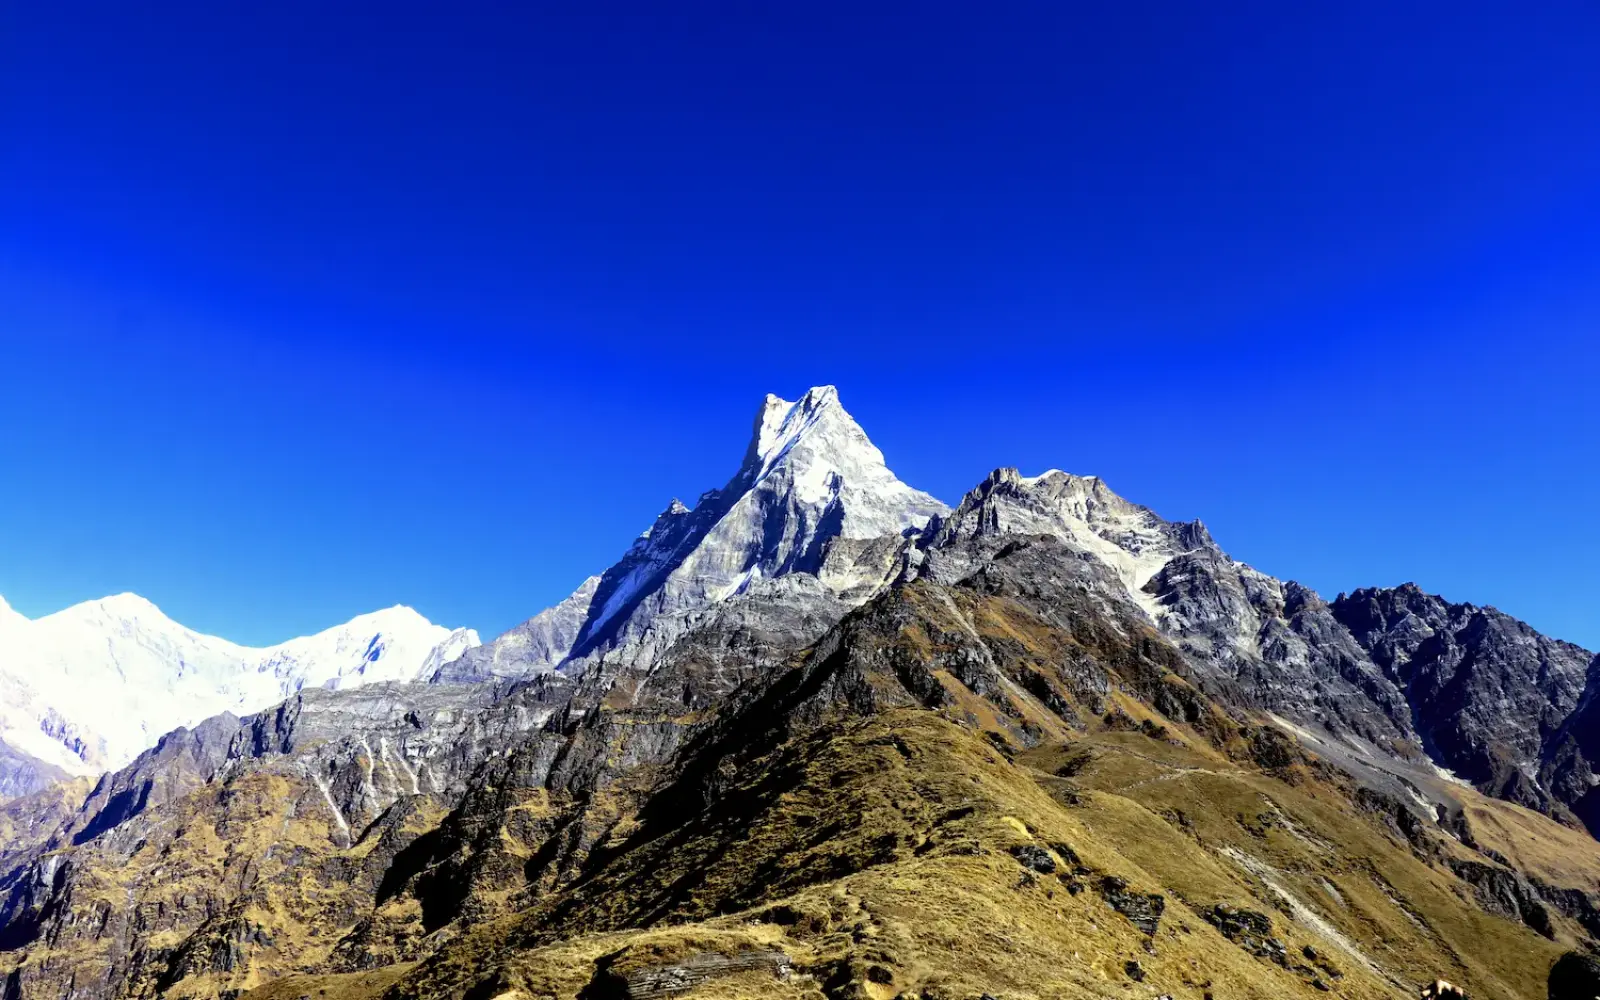
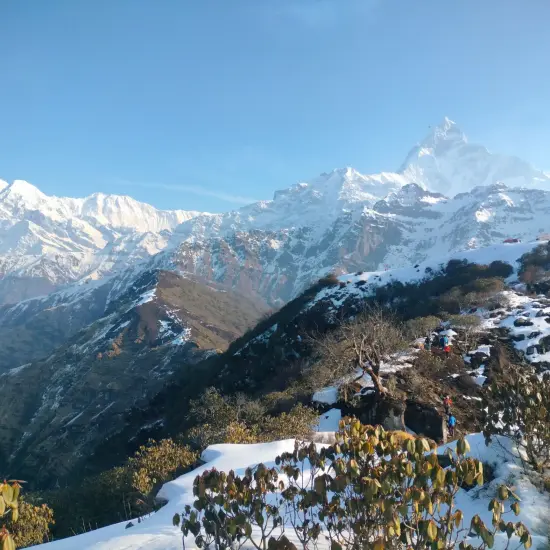
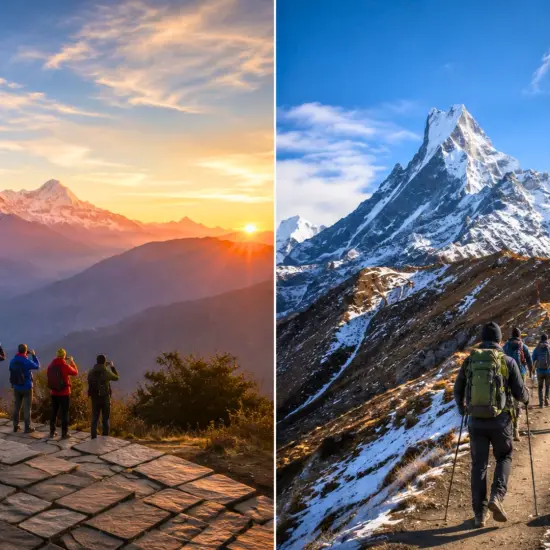
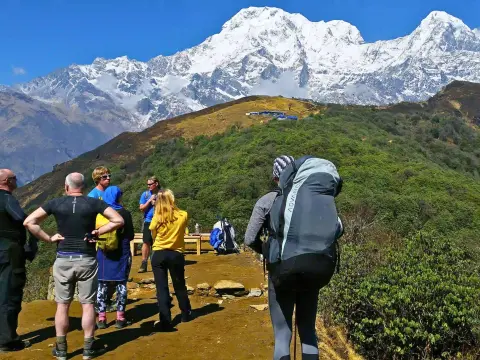
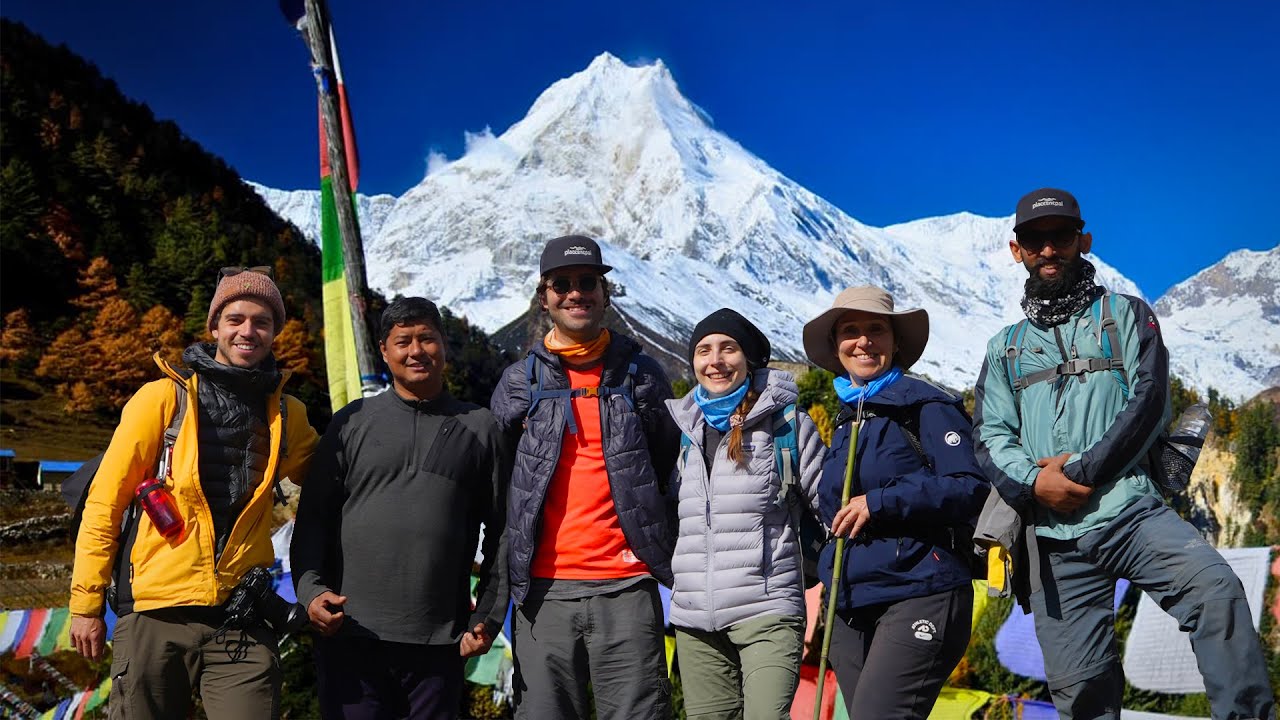
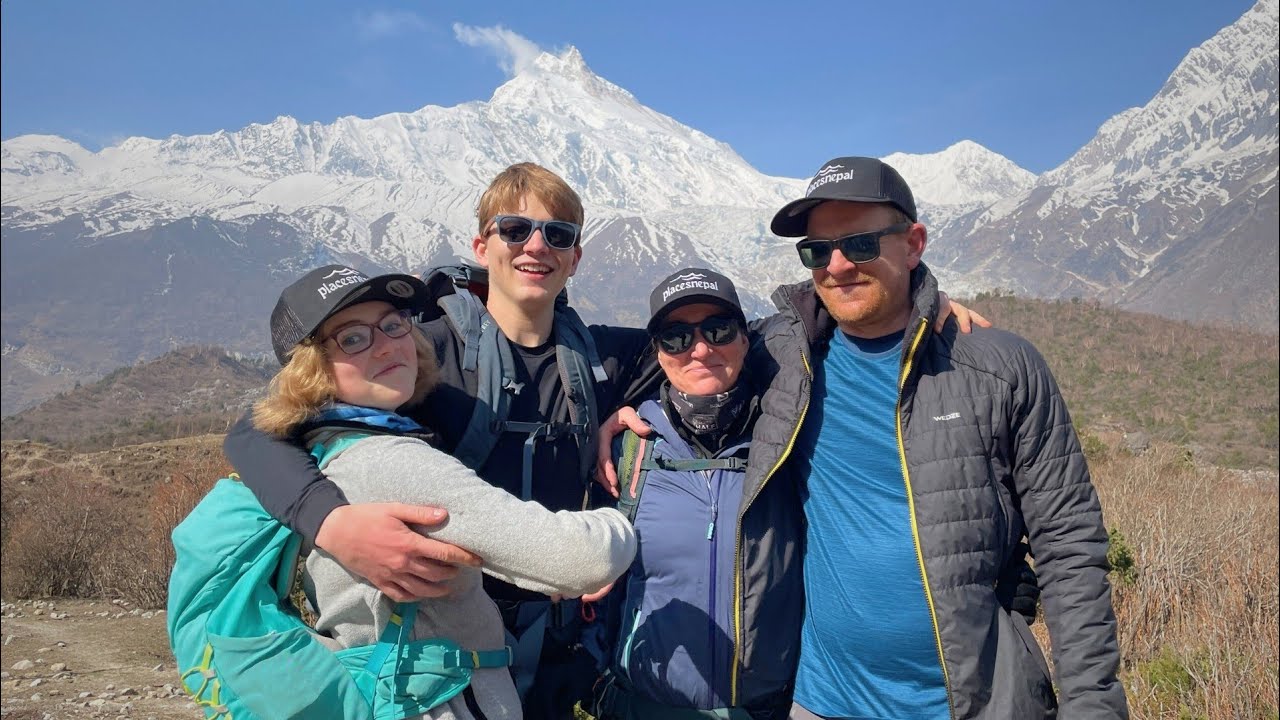
Mardi Himal suits beginners who are reasonably active and prepared to train, but it is not an easy walk. Three of the five days are comfortable at 2.5–4 hours. Day 2 climbs over 1,000 m, and Day 4 covers 950 m up and 1,515 m down at 4,500 m. Fitness matters more than trekking experience.
You've probably already read that Mardi Himal is "the perfect beginner trek." You've also read that it reaches 4,500 metres, which doesn't sound like a beginner anything.
Both are true, and neither is useful on its own. Here's the version that actually helps: Mardi Himal is a good first Himalayan trek for a reasonably active person who trains for it, and a hard week for someone who books it because it's only five days. The trek doesn't care how much experience you have. It cares whether your legs can climb stairs for four hours on the second day and absorb 1,515 metres of descent on the fourth.
This article is written for the person thinking "I've never done this before — can I realistically handle it?" We'll work through who this trek suits, where it gets hard, how to know whether you're ready, and what to do about it if you're not yet.
Is the Mardi Himal Trek suitable for beginners?
Mardi Himal suits beginners who are reasonably active and willing to train, but it is not an easy walk. Three of the five days are comfortable — 2.5 to 4 hours of walking. Day 2 climbs over 1,000 metres through forest. Day 4 covers 950 metres up to 4,500 m and 1,515 metres back down, in 7–8 hours. Fitness matters more than trekking experience.
What makes it manageable for a first-timer:
- It's five days, not two weeks. The commitment is small enough to justify a first attempt.
- It starts an hour from Pokhara — no mountain flights, no long approach, no Lukla weather roulette.
- There's no technical ground. No ropes, no crampons in normal season, no scrambling.
- You sleep in teahouses every night with hot food and a bed.
- The itinerary builds in a night at Low Camp before High Camp, which is a real acclimatisation step rather than a scheduling accident.
What makes it hard:
- Roughly 3,700 m of cumulative climbing packed into five days.
- Day 2 gains 1,060 m through rooted forest with almost nothing flat to recover on.
- Day 4 is a pre-dawn start in freezing temperatures, a climb to 4,500 m, and a knee-punishing descent — all in one day.
- You reach real altitude. High Camp sleeps at 3,550 m; the high point is 4,500 m.
- The descent hurts more than the climb, and almost nobody trains for that.
If you want the objective difficulty rating and the day-by-day numbers, we've done that properly in the Mardi Himal Trek difficulty guide. This article is about a different question: whether you should choose it as your first one. 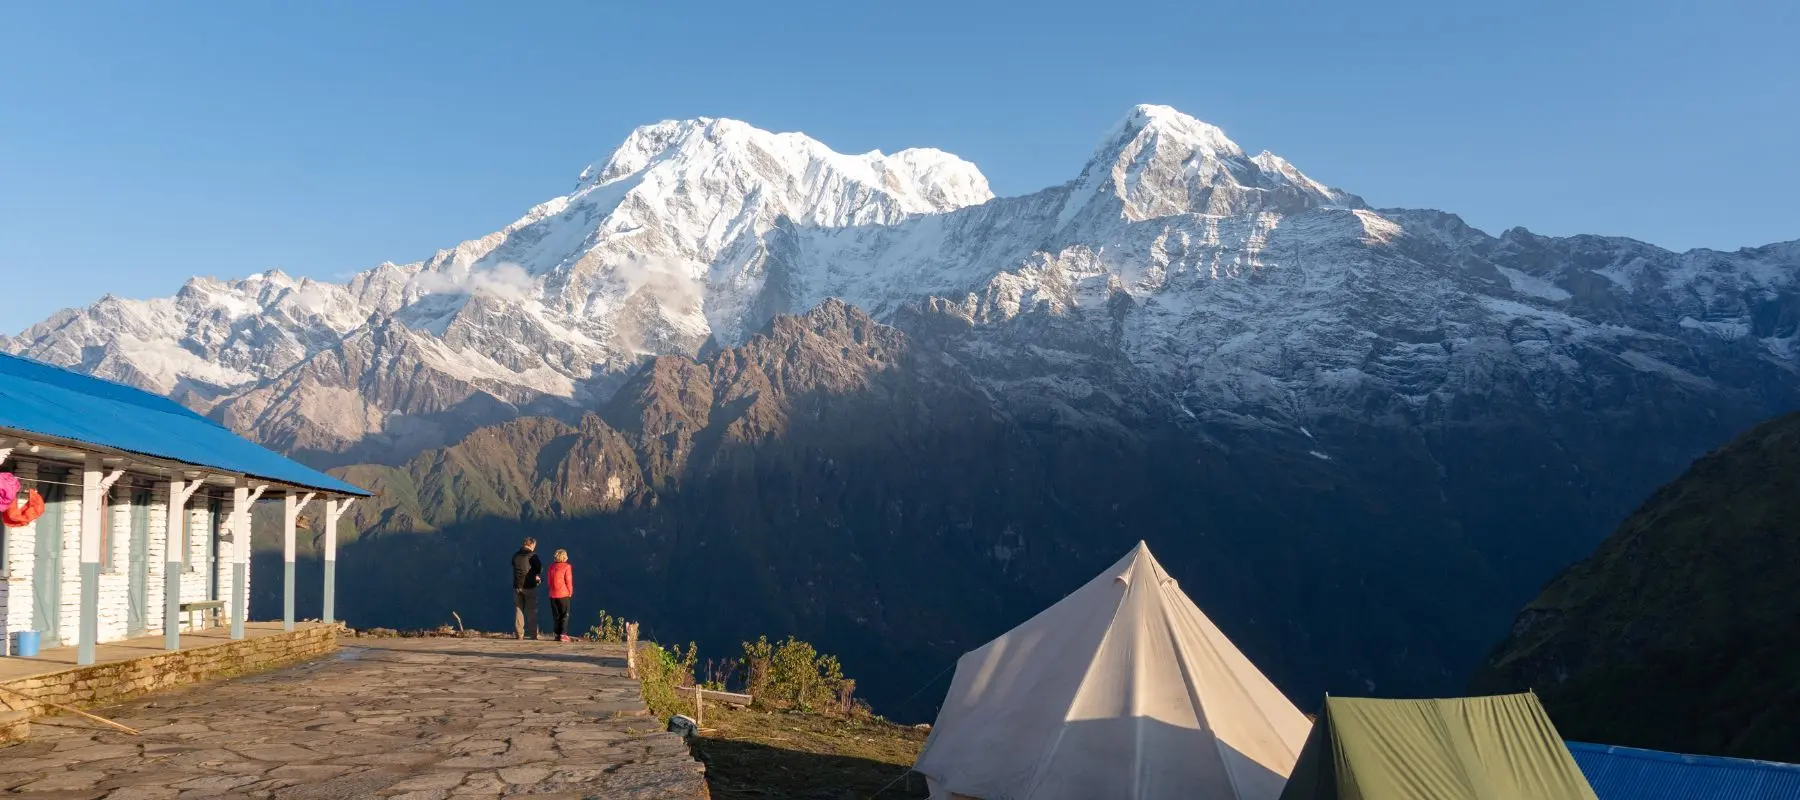
First, what kind of "beginner" are you?
"Beginner" covers four very different people, and the honest answer changes for each. Find yourself here.
Profile 1 — Active, but never trekked
You run, cycle, play a sport, or train at the gym two or three times a week. You've never done a multi-day trek and never slept above 3,000 m.
Verdict: good fit. You have the aerobic base. What you're missing is trail-specific conditioning — sustained stair climbing and controlled descent — and both are trainable in 6–8 weeks. Your risk isn't collapsing on Day 2; it's arriving with quads that have never braked downhill for three hours and discovering that on Day 4.
Profile 2 — Weekend day hiker, no multi-day experience
You do 3–5 hour hikes reasonably often. You know what a hill feels like. You've just never strung several days together or gone high.
Verdict: the best-positioned beginner there is. Your two unknowns are consecutive days — walking again on tired legs, four mornings running — and altitude, which nothing at low elevation prepares you for. Train back-to-back walking days and you'll be fine.
Profile 3 — Complete beginner, sedentary baseline
Desk job, little regular exercise, and stairs already register as effort.
Verdict: possible, but not in six weeks, and not on the standard 5-day itinerary without preparation. Give yourself 10–12 weeks of consistent training before you fly. If your dates are fixed and close, be honest with yourself and pick either the gentler 7-day Mardi variant or the Ghorepani Poon Hill Trek instead. That's not a downgrade — it's picking the trek you'll actually enjoy.
Profile 4 — Fit, but with a relevant history
You're in decent shape, but you have knee problems, a previous bad reaction to altitude, or a heart or lung condition.
Verdict: this is a conversation with a doctor before it's a conversation with us. Fitness doesn't override any of those. If you get medical clearance, the practical adjustments are a longer itinerary, a porter so you're carrying nothing but a daypack, and a guide who knows to check on you early rather than at the summit. 
When the honest answer is "not this trek, not yet"
We'd rather say this than sell you a hard week. Reconsider Mardi Himal, at least for now, if:
- You can't currently walk uphill for two hours without stopping repeatedly.
- You have a known heart or serious lung condition and haven't been cleared for altitude.
- You've previously had severe altitude sickness above 3,000 m.
- You have significant knee problems or a recent leg injury — Day 4's descent is unforgiving.
- Your only available dates fall in the monsoon, June to August.
None of those rules out the Himalayas. They rule out this itinerary, this year, and there are better first treks for each of those situations.
How difficult is Mardi Himal for a beginner, really?
Forget the word "moderate." Here's what your body actually does.
Your lungs work hardest on Day 2 and on the Day 4 ascent. Above about 3,000 m you'll be breathing noticeably harder for the same effort than you do at home — that's normal physiology, not a warning sign, provided you're not pushing through a headache to keep up with someone.
Your quads and calves take the load on the stone steps. A meaningful stretch of the lower trail out of Phedi is built from stone stairs rather than a graded path, and stairs load your legs differently than an incline — there's no rhythm to settle into. This is the single most-underestimated feature of the trek.
Your knees meet the trek's real crux on Day 4's afternoon: 1,515 m of descent in one go, on tired legs, on loose rock and tree roots. Most trekkers report the descent as harder on the body than the climb that preceded it. If you take one thing from this article, take that.
Your balance and ankles get tested in the forest between Pitam Deurali and Low Camp, where roots crisscross the path constantly.
Your hands and face feel the cold on summit morning. Leaving High Camp at 04:30 in autumn means temperatures around or below freezing; in winter, well below.
Your appetite will probably drop above Low Camp. Eating anyway is part of the work. 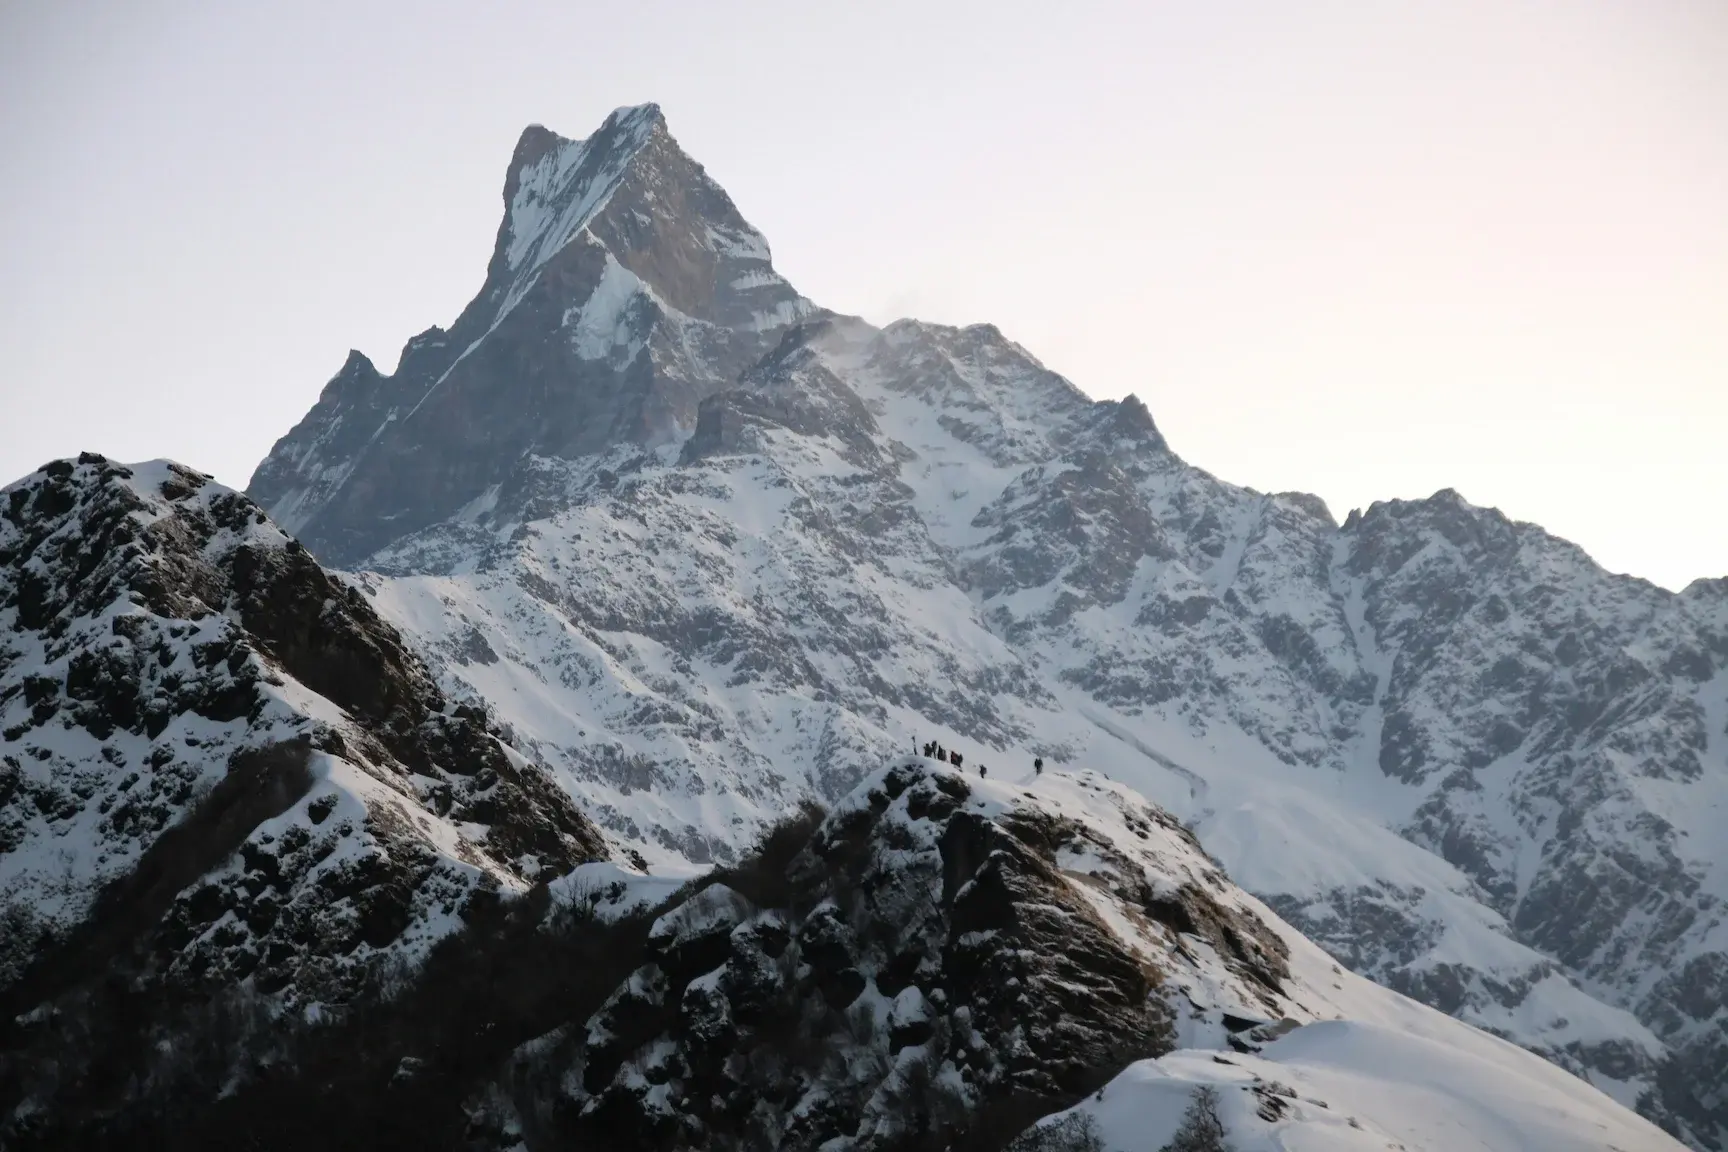
Beginner difficulty table
| Factor | What a beginner should expect |
|---|
| Walking duration | 4 hrs on Day 1, 6 hrs on Day 2, 4 hrs on Day 3, 7–8 hrs on Day 4, 2.5 hrs on Day 5. Three of five days are comfortable; build your expectations around Day 4 |
| Elevation | Sleep as high as 3,550 m at High Camp; reach 4,500 m at Base Camp. Roughly 3,700 m of cumulative climbing over the trek |
| Trail | Well-defined and well-marked throughout. Stone steps low down, tree roots and mossy ground in the forest, open ridge up high |
| Steep climbs | Sustained rather than brutal. Day 2 gains 1,060 m and Day 4's ascent gains 950 m — neither has much flat ground to recover on |
| Descents | The hardest single element for beginners. 1,515 m down on Day 4 afternoon, plus 1,285 m on Day 5. Trekking poles are effectively required |
| Altitude | Genuine. The final three nights sit at or above 2,985 m. Fitness does not protect you from altitude sickness |
| Technical climbing | None under normal dry conditions. No ropes, no ice axe, no scrambling. Microspikes only from around December or after early snowfall |
| Navigation | Not your problem. The trail is clear, and foreign trekkers are required to have a licensed guide anyway |
| Accommodation | Teahouses every night. Comfort drops as you climb — good lower down, basic at High Camp |
| Overall | Manageable for a trained, reasonably active beginner. Hard for an untrained one. Slow and prepared beats fast and unprepared on this route |
Mardi Himal Trek for beginners: day-by-day
This is the standard Places Nepal 5-day itinerary. Other Mardi Himal itineraries exist online — 3-day and 4-day compressed versions, 7 to 9-day extended ones — and they're covered in our Mardi Himal itinerary comparison. Everything below refers to the 5-day route. 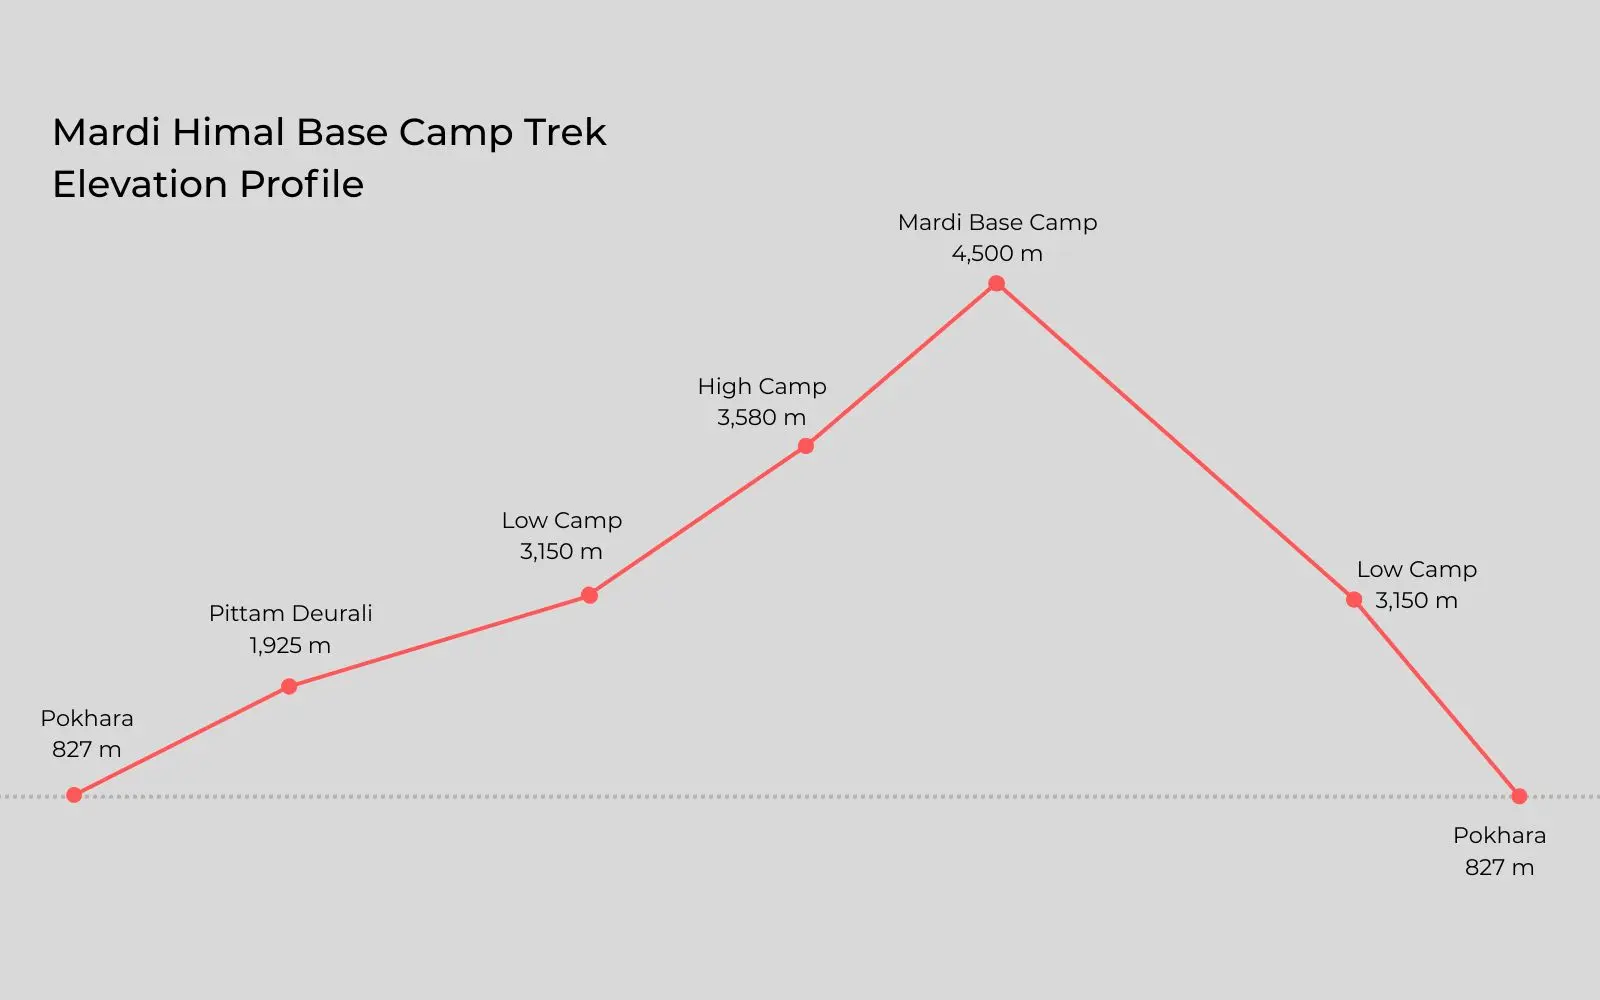
Day 1 — Pokhara → Phedi → Pitam Deurali (1,925 m)
A 30-minute drive from Lakeside to Phedi at 1,130 m, then you start walking. The trail climbs almost immediately through Gurung farmland and terraced fields to Dhampus at 1,650 m, then continues along the ridge to Pitam Deurali. About 4 hours of walking and 1,098 m of gain from Pokhara.
What it feels like: harder than you expected for a "first day." The climb out of Phedi is steep from the first few minutes, and there's no gentle warm-up section.
What beginners get wrong here: treating Day 1 as a test. You'll be fresh, the group will be enthusiastic, and someone will set a fast pace out of Phedi. Don't follow it. The cost of going too hard today doesn't land today — it lands on Day 2.
What to do instead: aim to reach Phedi by 08:00 so you climb before the midday heat. Walk at a pace where you can hold a conversation. Drink 3–4 litres across the day. Skip alcohol. Get to bed early.
Altitude isn't a factor at 1,925 m, but the 1,098 m of gain in half a day is tiring, and it's the foundation for everything after.
Day 2 — Pitam Deurali → Forest Camp → Low Camp (2,985 m)
The longest walking day: around 6 hours, 10 km, and 1,060 m of climbing through dense rhododendron and oak forest. Forest Camp at 2,550 m is the natural halfway stop and the last reliable food before Low Camp.
What it feels like: relentless in a quiet way. No single section is desperate, but the trail almost never flattens out, tree roots make every step slightly uneven, and the canopy means you can't see progress. This is the day most beginners describe as the surprise.
How your body reacts on day two: stiffer than yesterday, and that's expected. It usually loosens within the first hour. What matters is that you slept and ate properly.
Practical rules for today: start early. Eat a full lunch at Forest Camp — appetite drops as you climb, so fuel while you still want to. Keep drinking; the air is noticeably drier by 2,500 m. Have your fleece accessible before you break out of the trees at Low Camp, where the ridge wind can be sharp even in October.
Low Camp is where the mountains finally appear — Annapurna South, Hiunchuli, and Machhapuchhre across the northern skyline. It's also the first night where altitude starts to matter.
Day 3 — Low Camp → High Camp (3,550 m)
The shortest full walking day at around 4 hours and 565 m of gain, past Middle Camp and Badal Danda, onto increasingly open ridge above the treeline.
This day is deliberately easy, and that's the point. The schedule isn't being generous — it's giving your body a controlled step up before the highest night of the trek. Arriving at High Camp with energy left over is worth more than arriving early.
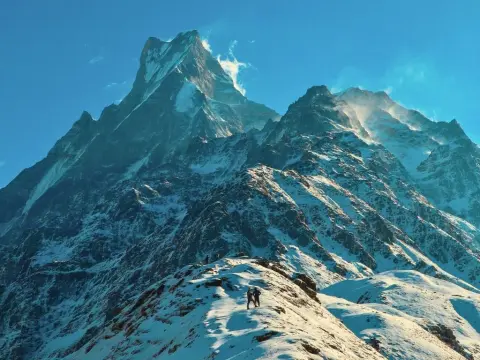
What changes today: the forest lets go and you step onto exposed ridge. Views become extraordinary — Machhapuchhre sits close enough to feel intrusive — and the weather becomes a factor. Cloud builds from the valley by late morning and can bring wind and a sharp temperature drop with little warning.
Why beginners should take an "easy" day seriously: this is the acclimatisation day disguised as a short walk. At 3,550 m, acute mountain sickness becomes a real consideration — persistent headache, nausea, dizziness, difficulty sleeping. Spend the afternoon resting, not exploring. Eat a carbohydrate-heavy dinner. Prepare your summit pack tonight: headlamp with fresh batteries, warm layers, snacks, water, camera. Sleep by 20:00.
The distinction that matters most on this trek: being physically capable of walking to High Camp and being able to adapt to sleeping there are two different things, and the second one isn't determined by fitness. Very fit people get altitude sickness. The variable you control is ascent rate, hydration, and honesty about symptoms — not how strong your legs are.
Day 4 — High Camp → Mardi Himal Base Camp → Low Camp
This is the day. Treat everything else as preparation for it.
You leave High Camp at 04:30 by headlamp, climb the exposed ridge northeast to the Upper Viewpoint at 4,200 m for sunrise, then continue to Mardi Himal Base Camp at 4,500 m. Then you turn around: back through High Camp to collect bags and eat, and all the way down to Low Camp at 2,985 m. Total: +950 m, −1,515 m, 7–8 hours.
Why it's the hardest day for beginners: four stressors stack that never overlap anywhere else on the trek. A pre-dawn start in freezing cold. The highest altitude of the trip. A long descent. And accumulated fatigue from three days of climbing. Any one alone would be a moderate day.
The cold is underrated. Autumn nights at High Camp sit around −5 to 0 °C, and you're walking into wind on an exposed ridge before sunrise. Trekkers who trained for distance but never for cold starts feel this.
There's no food or water between High Camp and Base Camp. Carry at least 1.5 litres per person and something to eat at the viewpoint. Don't assume anything is available up there, because nothing is.
Turning around at the Upper Viewpoint is a completely legitimate outcome. The 4,200 m viewpoint gives you essentially the same panorama as Base Camp — Machhapuchhre, Annapurna I through IV, Hiunchuli. The extra 300 vertical metres is real effort for a marginal visual gain. Weather, energy, and how your body is handling the altitude should decide that on the morning, not a plan you made at sea level. Reaching the viewpoint is a complete trek, not a partial one.
And then the descent, which is the actual crux. 1,515 m down to Low Camp on legs that already did a summit push, on loose rock and roots. Most trail injuries on this route happen here, not on the way up. Use poles from the top, not from the point at which your knees start complaining. Go slower than the "hard part's over" instinct wants you to.
Day 5 — Low Camp → Siding Village → Pokhara
A 2.5-hour descent southwest to Siding at 1,700 m — 1,285 m of downhill through progressively warmer, greener country — then a 1.5-hour drive back to Pokhara.
What it feels like: your quads will tell you about Day 4. The trail is easy in gradient terms but tired legs plus loose gravel is exactly the combination that causes late-trek slips. Keep the poles out.
The route exits through a different valley rather than retracing your steps, so the last morning is new ground: terraced fields, fruit orchards, and a Gurung village at the base of the ridge you just came down. Then Lakeside, a hot shower, and a proper meal.
One post-trek note: you've spent five days at altitude and worked hard. Give yourself a rest day in Pokhara before a long bus ride or a flight.
Trek the Mardi Himal Trek
Five days, one ridge, and the closest you'll legally get to Machhapuchhre.
How fit do you need to be for Mardi Himal?
Not marathon fit. Specifically fit.
The practical benchmark: can you walk 5–7 hours on uneven ground with a daypack, climb steep stairs without stopping every few minutes, handle a long descent without your knees giving out, and then get up and do it again tomorrow — five days running?
Break that into what it actually requires:
- Cardiovascular base — enough to hold moderate effort for several hours, not to sprint.
- Leg strength — quads and glutes for climbing, and for braking on the way down.
- Balance — for roots and loose rock, which is a skill, not a fitness metric.
- Recovery — the ability to be functional the next morning. This is the one people miss.
Trekking fitness is not gym fitness, and this trek exposes the difference. Someone who walks uphill regularly often finds Mardi Himal easier than someone who is strong on machines but has never done a five-hour day on a trail. Treadmills don't teach your ankles to handle roots, and leg-press machines don't train the eccentric loading your quads do on a 1,500 m descent. If you're gym-strong but trail-inexperienced, weight your training toward stairs and loaded hill walks specifically.
A self-test before you book: put 6–8 kg in a pack, find the longest set of stairs you can, and go up and down for 45 minutes. If that's uncomfortable but doable, you have a workable baseline. If it's awful, you have your answer about how much training you need — which is useful information, not a verdict.
How should a beginner train for Mardi Himal?
The best training for walking uphill for hours is walking uphill for hours. Everything else supports that.
Timeline: 6–8 weeks if you're already reasonably active. 10–12 weeks if you're currently sedentary. Four weeks is workable only if you hike regularly already.
8–12 weeks out: build the base
Brisk walking and general cardio, 3–4 sessions a week, 30–60 minutes. Cycling, swimming and jogging all count. Add leg strength twice a week: squats, lunges, step-ups, calf raises. Start wearing your trekking boots on every walk from week one — boots need 30–40 hours of use before you rely on them for five days.
6–8 weeks out: add elevation
Longer walks, 2–3 hours, with real hills. Introduce stair climbing as a dedicated session — stadium steps, a multi-storey car park, anything continuous — building toward 30–45 minutes. Stairs are the single closest match to what this trail does to your legs.
4–6 weeks out: back-to-back days and load
This is the phase most people skip, and it's the one that matters. Walk on consecutive days — Saturday and Sunday — so your body learns to start a hike on legs that aren't fresh. Carry the 6–8 kg you'll actually carry. And train the descent deliberately: walk down hills and steps on purpose. Untrained descent muscles are the main reason Day 4 hurts more than it should.
If you plan to use trekking poles, start using them now. Poles are a technique, and summit morning at 4 a.m. is not when to learn it.
Final 1–2 weeks: back off
Reduce volume, keep some movement, prioritise sleep. Fitness is built during recovery, not during the sessions. Arriving fresh beats arriving with a personal best two days before you fly.
The exercises that matter most, in order
- Stair climbing — highest priority, closest match to the trail
- Loaded hill walks — with the pack weight you'll carry
- Downhill practice — the commonly skipped one
- Leg strength — squats, lunges, step-ups, single-leg work, 2–3x/week
- Cardio base — anything sustained, 30–60 minutes
- Core and balance — planks, single-leg work, for rooted trail
We've written a fuller version of this for other routes — see the Everest Base Camp training plan if you want a longer structured programme to adapt.
Trek the Mardi Himal Trek
Five days, one ridge, and the closest you'll legally get to Machhapuchhre.
Can I do Mardi Himal without trekking experience?
Yes — and this is the distinction that decides it:
No trekking experience and no physical preparation are two completely different situations, and only one of them is disqualifying.
- No Himalayan experience, decent general fitness — you'll be fine. Experience mainly teaches pacing instinct and altitude awareness, both of which a good guide supplies.
- No hiking experience at all, but you exercise — manageable with 8 weeks of trail-specific training. Prioritise stairs and descent.
- Plenty of gym time, no trail time — the most commonly overconfident group. Train for balance, stairs and downhill, not more cardio.
- No exercise at all — this is the one that needs addressing before you book, not after. 10–12 weeks, or a gentler trek.
Fitness matters considerably more than experience on this specific route. That's good news for beginners, because fitness is the variable you can change in eight weeks.
Is Mardi Himal a good first trek in Nepal?
For a lot of people, yes — it's one of the better-designed first Himalayan treks available.
What works in its favour:
- Five days. Short enough to fit a normal holiday and to attempt without a huge commitment.
- Starts from Pokhara. No domestic flight, no weather-dependent airstrip, no long approach trek. A 30-minute drive to the trailhead.
- No technical ground. Nothing on the standard route requires skills you don't have.
- Teahouses every night. A bed, a hot meal, a dining room with a stove.
- A clear objective. Base Camp at 4,500 m is a real summit-day experience, not a viewpoint you drive to.
- Quiet. Far less foot traffic than Annapurna Base Camp or Poon Hill.
What to be clear-eyed about:
- The altitude is real. 4,500 m is not a beginner number in any absolute sense — it's manageable here because you only go up there for a few hours.
- The Base Camp day is demanding, and it isn't optional if reaching Base Camp is why you came.
- Weather changes the trek. The same route in wet or icy conditions is a different, harder walk.
- This isn't a lowland hike with better scenery. Stone steps, roots, an exposed ridge, cold, and thin air are all part of it.
Comparing Mardi Himal with other beginner treks in Nepal
Use this to choose honestly rather than ambitiously.
| Trek | Beginner friendliness | Difficulty | Highest point | Time |
|---|
| Ghorepani Poon Hill | The gentlest real introduction. Well-established, busy, well-serviced trail with modest altitude. If you're unsure whether trekking is for you, start here | Easy | ~3,210 m | 4–6 days |
| Mardi Himal | A strong first trek for an active, trained beginner. Short, non-technical, but with genuine altitude and one hard day | Moderate–challenging (3.5/5) | 4,500 m | 5 days |
| Langtang Valley | Gentler daily gradient than Mardi and a longer, more gradual profile. A good choice if the compressed 5-day schedule worries you | Moderate | ~3,870 m | 7–8 days |
| Annapurna Base Camp | Similar altitude to Mardi but spread over more days, so less compressed. Busier and more developed. Good beginner option if you have the time | Moderate (3.0/5) | 4,130 m | 7–10 days |
The pattern worth noticing: Mardi Himal isn't rated harder than Annapurna Base Camp because the terrain is worse. It's harder because it does comparable vertical work in half the days. Compression is the whole story. If you have more time than fitness, a longer trek is easier than a shorter one.
Mardi Himal or Poon Hill for a first trek?
Short version: Poon Hill is the gentler introduction; Mardi Himal is the step up.
Poon Hill tops out around 3,210 m over four days on a heavily used, well-serviced trail with no summit-day equivalent. Mardi Himal reaches 4,500 m over five days on a quieter route with a genuine pre-dawn push and a long descent. Poon Hill has more villages and a more social trail; Mardi has more mountain and more silence.
Choose Poon Hill if you've never walked a full day with a pack, your dates are tight, you're travelling with children or older family members, or you want to find out whether you enjoy trekking before committing to a hard day.
Choose Mardi Himal if you're reasonably active, you've trained, and a 4,500 m morning is the point of the trip rather than a bonus.
Can't decide? You can also combine Poon Hill and Mardi Himal in one trek, giving you the classic Poon Hill experience and the higher-altitude adventure of Mardi Himal in the same trip.
We've compared the two properly on scenery, cost, crowds and recovery in Mardi Himal or Poon Hill Trek.
Trek the Ghorepani Poon Hill and Mardi Himal Trek
Discover the Best of the Annapurna Region in One Trek.
Mardi Himal or Everest Base Camp for a first trek?
These are different categories of commitment, and it's worth being precise about why — not because EBC is impossible for beginners, because it isn't. Plenty of first-timers complete it every season.
Duration: 5 days versus 12–14. That's a fortnight of your life and a materially different budget.
Altitude: 4,500 m at the highest point, reached for a couple of hours, versus 5,364 m at Everest Base Camp with nights spent above 4,000 m repeatedly. That's the biggest single difference.
Acclimatisation: Mardi has one deliberate buffer night at Low Camp. EBC itineraries build in dedicated acclimatisation days at Namche and Dingboche because the profile requires them.
Daily walking: broadly similar per day. EBC just does it for far longer, and the cumulative fatigue is the real challenge.
Logistics: Mardi starts with a 30-minute drive from Pokhara. EBC involves a flight to Lukla that's frequently weather-delayed, which means buffer days in your schedule.
Remoteness: both are teahouse routes, but EBC takes you considerably further from a road.
The reasonable read: Mardi Himal is the better first trek for most people; EBC is a better first trek for someone with two weeks, a bigger budget, and the willingness to train for it seriously. Full breakdown in Everest Base Camp vs Mardi Himal Trek, and if EBC is what you actually want, we've addressed that directly in Can beginners trek Everest Base Camp?.
Is the altitude dangerous for beginners?
Altitude deserves a straight answer rather than either reassurance or alarm.
The numbers: High Camp, your highest night, is 3,550 m. Mardi Himal Base Camp, the highest point you reach, is 4,500 m — but you don't sleep there. You go up for a few hours on Day 4 and come back down to 2,985 m the same afternoon. That "climb high, sleep lower" structure is deliberate and it's a large part of why a 4,500 m day works on a five-day schedule.
What's true about altitude, and applies to you regardless of fitness:
- Altitude sickness becomes relevant above roughly 2,500–3,000 m. This trek spends its final three nights in that zone.
- Fitness does not protect you. Very fit people get AMS, sometimes because fitness lets them ascend faster than their body adapts. Ascent rate is the risk factor, not weakness.
- It affects individuals differently and unpredictably. Doing fine at altitude once doesn't guarantee it next time.
- Hydration, a slow pace, and eating properly all help. None of them are guarantees.
Symptoms to know: persistent headache, nausea, dizziness, unusual fatigue, and difficulty sleeping. Mild versions of these are common above 3,000 m. What's not acceptable is a headache that doesn't improve with rest and fluids, loss of coordination, confusion, or breathlessness at rest — those mean descend, immediately.
The rule that matters: never ascend with active AMS symptoms. Descending is always the answer, and on this trek descending is easy — you're never far from a lower camp.
We can't and won't diagnose anything here. This isn't medical advice, and Mardi Himal is not "safe for everyone" — nowhere at this altitude is. For a fuller treatment of how altitude works and what to do about it, see Altitude sickness in Nepal treks, and for the specific altitude profile of this route, Mardi Himal Trek altitude explained.
How should beginners pace themselves?
The single highest-value skill on this trek, and it costs nothing to learn.
- Walk slower than feels necessary. The correct altitude pace is one where you can breathe fully through your nose the entire time. It will feel embarrassingly slow. It is correct.
- Keep it conversational. If you can't talk in full sentences, you're going too fast for the altitude.
- Don't race the strongest person in the group. Their pace is not a standard. On a five-day trek with a summit day, matching someone fitter is how beginners arrive at Day 4 already depleted.
- Take short, regular breaks rather than long ones. Five minutes every 45 works better than twenty minutes every two hours.
- Drink consistently, not when thirsty. 3–4 litres a day, more as you climb.
- Eat even when you don't want to. Appetite drops with altitude while your body burns more just staying warm. Skipping dinner before summit day is one of the most common mistakes on this route.
- Tell your guide early. Not when it's bad. When it's mildly off.
- Bank energy for tomorrow. Every day is a deposit toward Day 4.
The point isn't modesty. The fastest person in the group is usually not the one doing this trek correctly. Slow and prepared beats fast and unprepared on this route, in every season.
What should beginners pack?
The full list is on the Mardi Himal Trek page. These are the items that specifically make a first trek go well or badly.
- Broken-in waterproof trekking boots with ankle support. New boots on the trail is the most common self-inflicted problem on this route.
- Trekking poles. Not optional on Day 4's descent, and useful from Day 1.
- A layering system, not one warm coat. Base layer, fleece, insulated down jacket, windproof shell — the temperature range across a single day can exceed 25 °C.
- A sleeping bag rated to −5 to −10 °C. High Camp nights drop below freezing from October onward.
- Waterproof jacket and trousers. This trail sees genuine rain, unlike the rain-shadow regions.
- Headlamp with spare batteries. Non-negotiable for the 04:30 start.
- Water bottles or bladder, 2–3 L, plus purification. No safe unboiled water on the trail.
- SPF 50 sunscreen and UV sunglasses. UV at 4,500 m runs roughly 45% higher than at sea level.
- Gloves — light for daytime, insulated for summit morning.
- Cash in Nepali rupees. No ATMs after Pokhara. Budget NPR 15,000–18,000 per person for snacks, drinks, hot showers, charging and Wi-Fi.
- Power bank, personal medication, and basic blister kit.
What to leave behind: jeans, full-size toiletries, a laptop, more than one book, and spare clothing you won't wear. Aim for 6–8 kg total pack weight. Anything over 10 kg makes every climb harder than it needs to be.
How much should a beginner carry?
You have two options and the choice matters more for first-timers than for anyone else.
Carry everything yourself: a 30–40 L pack at 6–8 kg. Fine if you've trained with that weight.
Hire a porter: one porter carries your main duffel between camps, shared between two trekkers, up to 20 kg total. You walk with a light daypack — water, layers, snacks, camera. Porter service is US$130 for the 5-day trek and is an optional add-on at checkout, not included in the package. We provide the duffel bag.
Who should take the porter: first-time trekkers who haven't trained specifically with a loaded pack, anyone with a history of knee, hip or back issues, and anyone whose bag comes out over 10 kg after packing. Carrying less on Day 4's descent is one of the few variables you fully control.
The honest test: pack your bag at home, put it on, and walk up and down a flight of stairs ten times. Manageable and knees happy? You're ready. Feels like a punishment? Take the porter. Nobody gets an award for suffering unnecessarily on a mountain.
Should a beginner hire a guide for Mardi Himal?
There are two separate answers, and they're often mixed up.
The legal position: since 1 April 2023, foreign trekkers must be accompanied by a licensed guide from a registered agency in Nepal's national parks and conservation areas. Mardi Himal sits entirely inside the Annapurna Conservation Area and is named on the Nepal Tourism Board's published list of routes covered by that rule. So for a foreign national this isn't a recommendation — it's how the trek is legally done. Nepali citizens are not covered by the guide requirement.
The practical case, which stands independently of the rule and matters more for a first trek:
- Pacing. A guide sets a sustainable speed on Day 2 and the Day 4 ascent, which is precisely where beginners overcook it.
- Altitude monitoring. Guides notice AMS symptoms that trekkers talk themselves out of.
- Weather judgement. The ridge above High Camp clouds over most afternoons. Knowing when it's passing cloud and when to turn around is a decision built from hundreds of repetitions — and it's very hard to make objectively about yourself at 4 a.m. at 4,200 m.
- Teahouse beds. High Camp has few rooms and no booking system. In October your guide is on the phone from Low Camp while you're photographing rhododendrons.
- Communication. Language, ordering food, and dealing with anything unexpected.
A guide doesn't prevent altitude sickness — nothing does. What a guide does is reduce the chance that a manageable symptom becomes a serious one.
What if you can't keep up?
Something worth knowing before you go: struggling on this trek is normal, and it's not a reason to hide it.
Your guide should be watching your walking pace and whether it's changing, signs of fatigue beyond the ordinary, altitude symptoms, whether you're drinking, whether you're eating, and how you're sleeping. Say something early. The difference between "I've had a headache since lunch" and "I've had a headache since yesterday" is the difference between a rest and a descent.
What can actually be adjusted mid-trek:
- Slowing the pace and adding breaks
- Turning around at the Upper Viewpoint instead of continuing to Base Camp
- Descending to a lower camp — always available on this route
- Redistributing pack weight, or arranging a porter in the lower villages if one's available, though that's not guaranteed on the trail
What we won't promise: helicopter evacuation and emergency medical services are not included in the trek package. That's exactly why we require travel insurance covering trekking to 4,500 m and helicopter evacuation before you start. Arrange it properly — it's the difference between a bad day and a financially serious one.
Turning back is a legitimate outcome, not a failure. Reaching the Upper Viewpoint at 4,200 m and calling it there is a complete trek.
How weather changes the difficulty for beginners
The same route can feel like two different treks. Distance never tells you how hard a week will be.
Autumn (October–November) — the best window and the easiest conditions for a beginner. Clean air, stable high pressure, reliable mornings. Also the busiest, so teahouse beds need booking ahead. High Camp nights sit around −5 to 0 °C.
Spring (March–April) — nearly as good, with rhododendron forest in bloom on the lower trail. Afternoon cloud builds more readily than in autumn, so the early summit start matters even more. Snow can linger above 3,500 m into early March.
Monsoon (June–August) — avoid. Not primarily because of effort, but because of risk. The rooted forest sections turn slick, the Day 4 descent becomes a genuine injury hazard on wet ground, mountain visibility disappears for days at a time, and leeches are unavoidable on the lower trail. Reaching Base Camp in a whiteout after five days of effort is a poor return on the work.
Winter (December–February) — clear skies, empty trails, and conditions that are not a beginner window. Snow above Low Camp means microspikes become safety equipment rather than a nice-to-have, High Camp drops to −10 °C or below, and some teahouses close.
The variables that make it harder in any season: wind on the exposed ridge above 3,500 m, which turns manageable temperatures dangerous fast; mud on the forest sections; fog reducing visibility on the ridge; and ice on the upper trail after early snowfall.
If your dates are flexible at all, pick October, November, March or April. It's the single easiest thing you can do to make this trek beginner-friendly.
The Mardi Himal Trek route, for beginners
The whole route, in one line:
Pokhara (827 m) → Phedi (1,130 m) → Pitam Deurali (1,925 m) → Forest Camp (2,550 m) → Low Camp (2,985 m) → High Camp (3,550 m) → Mardi Himal Base Camp (4,500 m) → back to Low Camp → Siding (1,700 m) → Pokhara
Three things a beginner should read off that map:
- It's one ridge. You go up a single spur and come back down a different side. There's no navigation problem and no complicated route-finding — which removes an entire category of first-trek anxiety.
- The camps are the elevation ladder. Each night is a step: 1,925 → 2,985 → 3,550. Base Camp is the one point you touch without sleeping at it.
- You never retrace your steps. Entering at Phedi and exiting at Siding makes it a circuit, so Day 5 is new ground rather than a repeat.
For the full route breakdown with distances and trail detail, see the Mardi Himal Trek map guide.
10 beginner mistakes on Mardi Himal
- Setting the pace on Day 1. The climb out of Phedi is steep and you'll be fresh. Going hard here doesn't cost you today — it costs you on Day 2, when you have 1,060 m to climb on legs you already spent.
- Training only in the gym. Machines build strength but not balance on roots, not stair-specific endurance, and not the eccentric loading of a 1,500 m descent. Get outside on hills.
- Never training downhill. The most-skipped element and the one that determines how Day 4 afternoon feels. Descending trains different muscles than climbing, and untrained ones announce themselves loudly.
- New boots. Boots need 30–40 hours before you trust them for five days. Blisters on Day 2 make Days 3 to 5 an endurance test for the wrong reason.
- Overpacking. Every kilogram over 8 gets carried up every climb and down every descent. If you can't answer "will I actually use this?" with a clear yes, leave it.
- Under-drinking. The air is drier than you expect above 2,500 m and thirst lags behind need. Dehydration mimics and worsens altitude symptoms.
- Skipping meals when appetite drops. Your body is burning more than usual just staying warm at 3,550 m. Force the dal bhat.
- Waiting to mention a headache. Early symptoms are easy to manage and cheap to act on. Late ones aren't. Nobody on the trail thinks less of you for saying something.
- Matching a fitter trekker. Their comfortable pace may be your unsustainable one. Group treks make this tempting; a good guide will stop it.
- Treating Day 4 like a normal hike. It isn't. Prepare the pack the night before, eat properly at dinner, sleep by 20:00, start at 04:30, and accept that the Upper Viewpoint is a legitimate finish line.
Beginner myths about Mardi Himal
"It's easy because it's only five days." Duration and difficulty aren't the same axis. Five days is exactly why it's demanding — roughly 3,700 m of cumulative climbing compressed into that window, where a longer trek would spread it out. Short is not gentle.
"If I'm fit, I won't get altitude sickness." Fitness offers no protection. AMS is driven by ascent rate relative to how fast your body adapts, and fit trekkers sometimes fare worse precisely because they climb faster. This is one of the most persistent and most dangerous beliefs in trekking.
"No climbing gear means no hard terrain." Technical difficulty and physical difficulty are separate. Mardi Himal is low on the first and moderate-to-high on the second. Stone steps, tree roots, an exposed ridge, and a 1,515 m descent don't require any equipment and will still test you.
"I can push hard now and recover later." On a five-day trek there is no later. Every hard day feeds directly into the next one, and Day 4 arrives whether you've banked energy or spent it.
"A guide is just for navigation." Navigation is the least of it — the trail is obvious. The value is pacing, altitude monitoring, weather calls, and securing a bed at High Camp in peak season. It's also a legal requirement for foreign trekkers.
"You need years of trekking experience." You don't. Fitness matters more than experience on this route, and fitness is buildable in eight weeks. Plenty of people do Mardi Himal as their first multi-day trek.
Beginner safety on Mardi Himal
Nothing here is unusual for a Himalayan trek. It's just worth knowing before rather than during.
- Weather shifts fast above 3,000 m. A clear morning can turn to wind and sleet in under 90 minutes. Keep a shell accessible in your daypack every day, not buried in the duffel.
- Cold on the exposed ridge is the thing that catches people out on summit morning. Wind matters more than temperature — a windproof layer and neck gaiter are as important as insulation.
- Slippery ground on the forest sections and on descent. Tired legs plus loose gravel causes most trail injuries here.
- Dehydration compounds altitude symptoms. Drink on a schedule.
- Altitude — covered above. Descend rather than push through.
- Fatigue accumulates over five days. Manage it on Days 1–3, not on Day 4.
- Footwear — broken-in boots with grip. This is prevention, not gear-shopping.
- Sun — UV at 4,500 m is roughly 45% higher than at sea level, and snow reflection multiplies it. SPF 50 on face, neck and hands before summit morning.
- Descend responsibly. Poles out, controlled pace, and resist the urge to hurry once the climbing is done.
Permits, briefly
Two documents apply: the ACAP permit (Annapurna Conservation Area Permit) and a TIMS card, plus a licensed guide for foreign trekkers. Both permits are included in the Places Nepal package, along with the government fees, so you don't need to visit a permit office or navigate the process yourself. Send a passport copy and your dates.
That's all a beginner needs to know here. The full detail — costs by nationality, where to get them, what's checked on the trail, and which widely-repeated permit claims are out of date — is in our Mardi Himal Trek permits guide.
Where you'll sleep: teahouses for first-time trekkers
If you've never done a teahouse trek, here's the honest picture.
A teahouse is a family-run lodge with simple rooms and a kitchen and dining room attached. You sleep, eat and spend the evening in the same building. Rooms are twin-share with a bed, a mattress and blankets — bring your own sleeping bag for warmth. Bathrooms are usually shared.
Comfort drops as you climb. That's a function of logistics, not service: everything up there arrived on someone's back.
| Camp | Elevation | What to expect |
|---|
| Pitam Deurali | 1,925 m | Good — cosy lodges, more choice |
| Forest Camp | 2,550 m | Good — small cluster in the trees |
| Low Camp | 2,985 m | Fair |
| High Camp | 3,550 m | Basic — few lodges, functional and spartan |
Practical realities:
- Hot showers are limited above Low Camp and cost extra where available — around NPR 300–500.
- Charging is usually paid, NPR 200–500 per device, and some lodges run on solar. Bring a power bank.
- Wi-Fi exists at some lodges for a fee, NPR 200–400. Mobile signal becomes unreliable above Forest Camp.
- Cash only, Nepali rupees only. No cards, no foreign currency, no mobile payments anywhere on the trail.
- Book ahead in October. High Camp has very few beds and no booking system beyond your guide phoning ahead.
One piece of trail etiquette worth knowing: you're expected to eat at the lodge where you sleep. Rooms are cheap because meal revenue subsidises them. Bringing your own food and skipping teahouse meals is poor form and can result in a room surcharge.
Manage expectations to "functional, warm, and friendly" rather than "hotel," and you'll be pleasantly surprised rather than disappointed.
What you'll eat
Every meal on the trek is included in the Places Nepal package — breakfast, lunch and dinner.
Breakfast: porridge, Tibetan bread with honey or jam, omelette and toast, pancakes at lower camps, or a full dal bhat if you want the calories.
Lunch: vegetable noodle soup, thukpa, fried rice with egg, momos at lower camps, chapati with dal.
Dinner: dal bhat, vegetable curry with rice, pasta at lower camps. Garlic soup as a starter is a standard order above 2,500 m.
Drinks: ginger lemon honey tea is the trek's staple. Masala tea, instant coffee, hot chocolate lower down. Buy boiled water from teahouses rather than drinking untreated stream water — stomach illness at altitude is considerably more serious than at home.
The dal bhat rule: order it for dinner every night above 2,500 m. It comes with unlimited refills of rice, lentil soup, vegetable curry and pickle, and Nepali trekking culture fully expects you to ask for seconds. No other dish on the menu delivers the same calories, warmth or value.
Why eating enough matters more than usual: at altitude your appetite drops while your energy expenditure rises — your body burns extra just maintaining temperature and basic function. Eating a full meal when you don't feel like it is part of the preparation for the next day, particularly the night before summit morning. Vegetarian options are available throughout.
Avoid alcohol above 2,500 m. It accelerates dehydration and interferes with acclimatisation. Save it for Lakeside.
Booking your first Himalayan trek
If Mardi Himal is the one, here's what the Places Nepal package covers so you can compare it honestly against doing it yourself.
Included:
- Government-licensed, English-speaking trekking guide
- All required permits — ACAP and TIMS — plus government fees and local taxes
- Teahouse accommodation throughout
- All meals on the trek: breakfast, lunch and dinner
- Private transfer Pokhara → Phedi, shared jeep Siding → Pokhara
- All guide and porter expenses — wages, insurance, food, accommodation, equipment
- Duffel bag if you hire a porter
Not included:
- Travel insurance with trekking cover to 4,500 m and helicopter evacuation — required, and your responsibility
- Porter service — US$130 for the trek, one porter shared between two trekkers, 20 kg
- Hotels and meals in Kathmandu or Pokhara before and after
- Nepal visa — around US$30 for 15 days on arrival
- Personal expenses: hot showers, Wi-Fi, charging, drinks, snacks, laundry
- Tips
Current rates: Joining a fixed group departure is US$360 per person, and for a solo beginner it's the cheapest option, since the guide cost is shared across the group. US$470 for a solo private trek, US$360 per person for 2–5 trekkers, US$340 for 6–10, US$300 for 11–15.
Taking your first Himalayan trek? See the current Places Nepal Mardi Himal Trek itinerary, group departures and inclusions.
If you're still deciding between routes, tell us your dates and your honest fitness level and we'll tell you which trek fits — including when the answer is Poon Hill rather than Mardi.
Mardi Himal Trek for beginners: FAQs
Is the Mardi Himal Trek good for beginners? Yes, for beginners who are reasonably active and train beforehand. It's short, non-technical and starts near Pokhara, but it reaches 4,500 m and includes one hard day. Preparation matters more than experience.
Can a complete beginner do Mardi Himal? Yes, if you have a reasonable fitness base. Someone who exercises regularly but has never trekked will manage it with 6–8 weeks of training. Someone currently sedentary needs 10–12 weeks or a gentler route.
Is Mardi Himal harder than Poon Hill? Considerably. Poon Hill tops out around 3,210 m over four days on a well-serviced trail. Mardi Himal reaches 4,500 m over five days with a pre-dawn summit push and a 1,515 m descent.
Is Mardi Himal harder than Everest Base Camp? No. EBC reaches 5,364 m over 12–14 days with repeated nights above 4,000 m. Mardi Himal is shorter, lower, and reached from Pokhara without a mountain flight.
How fit do I need to be for Mardi Himal? Fit enough to walk 5–7 hours on uneven terrain with a daypack, climb steep stairs without frequent stops, handle a long descent, and repeat it for five consecutive days.
How many hours do beginners walk each day? Around 4 hours on Day 1, 6 on Day 2, 4 on Day 3, 7–8 on Day 4, and 2.5 on Day 5. Pace slows at altitude, so treat these as guides rather than guarantees.
Is Mardi Himal suitable for first-time trekkers? It's one of the better first Himalayan treks available — short, non-technical, teahouse-based, with a real summit day. It suits trained first-timers, not unprepared ones.
Do I need previous trekking experience? No. Fitness matters more than experience on this route. Experience mainly teaches pacing and altitude awareness, and a licensed guide supplies both.
Is there a lot of uphill walking? Yes. Roughly 3,700 m of cumulative ascent over five days, including 1,060 m on Day 2 and 950 m on the Day 4 summit push, much of it on stone steps and forest trail.
Is the Mardi Himal Trek dangerous for beginners? It carries the normal risks of a high-altitude teahouse trek — altitude sickness, cold on an exposed ridge, and slips on a long descent. It's not technically dangerous, but it isn't risk-free, and it isn't suitable for everyone.
How high does the Mardi Himal Trek go? The highest point is Mardi Himal Base Camp at 4,500 m. The highest point you sleep at is High Camp at 3,550 m.
Can beginners handle 3,550 m? Most trained beginners handle sleeping at 3,550 m without serious problems, particularly with the built-in night at Low Camp beforehand. Altitude affects individuals unpredictably, so symptoms should always be reported to your guide.
Can beginners reach Mardi Himal Base Camp? Many do. It's a sustained walk on a defined trail, not a climb. Stopping at the Upper Viewpoint at 4,200 m is a legitimate alternative with an almost identical panorama.
What is the hardest day of the Mardi Himal Trek? Day 4 — High Camp to Base Camp and down to Low Camp. A 04:30 start in freezing temperatures, 950 m of ascent to 4,500 m, 1,515 m of descent, and 7–8 hours of walking.
Can I hire a porter? Yes. Porter service is US$130 for the trek, with one porter shared between two trekkers carrying up to 20 kg. Add it at booking. Worth it for most first-timers.
Should a beginner hire a guide for Mardi Himal? Foreign trekkers are legally required to have a licensed guide in the Annapurna Conservation Area. Beyond the rule, a guide manages pacing, watches for altitude symptoms, makes weather calls, and secures beds at High Camp.
What should a beginner pack? Broken-in boots, trekking poles, a full layering system, a sleeping bag rated to −5 to −10 °C, waterproofs, a headlamp, water purification, SPF 50, and cash in Nepali rupees. Aim for 6–8 kg in the daypack.
How long should I train before Mardi Himal? 6–8 weeks if you're reasonably active, 10–12 weeks if you're currently sedentary, and around 4 weeks if you already hike regularly.
What is the easiest season for a beginner? October and November, followed by March and April. Avoid the monsoon from June to August, and treat December to February as an experienced-trekker window.
Should I choose Mardi Himal or Poon Hill for my first trek? Poon Hill if you're unsure whether you enjoy multi-day trekking, have tight dates, or are travelling with children or older family. Mardi Himal if you're active, have trained, and want a genuine high-altitude day.