The Everest Base Camp trek from Lukla is the most popular trekking route in Nepal and one of the most iconic mountain adventures in the world.
Every year, over 35,000 trekkers walk this trail to stand at the base of Mount Everest (8,848.86 meters), the world's highest peak.
This comprehensive guide covers everything you need to know about trekking from Lukla to Everest Base Camp, written by experienced trekkers who know the Khumbu region well.
Quick Facts About the Lukla to EBC Trek
| Total Distance | 65 kilometers one way, 130 kilometers round trip |
| Trek Duration | 12-14 days (including acclimatization days) |
| Starting Point | Lukla (2,860 meters) |
| Highest Point | Kala Patthar (5,545 meters) or EBC (5,364 meters) |
| Difficulty Level | Moderate to challenging |
| Best Seasons | March-May and September-November |
| Daily Walking | 5-8 hours per day |
Highlights of Lukla to Everest Base Camp
The Everest Base Camp trek from Lukla offers experiences that create memories for a lifetime:
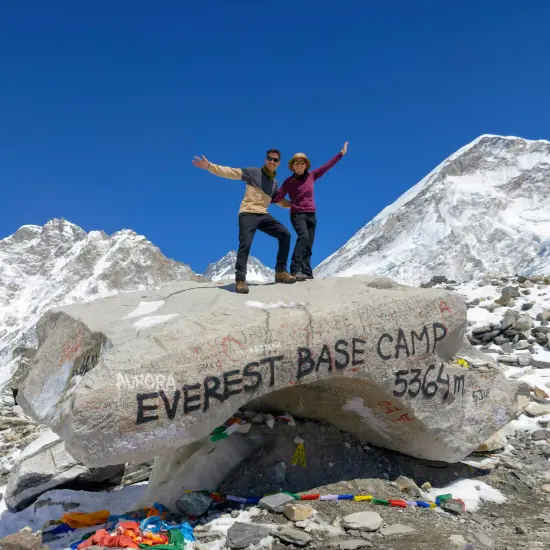
Reach Everest Base Camp at 5,364 meters - the starting point for mountaineers attempting to summit the world's highest peak
Watch sunrise from Kala Patthar at 5,545 meters - the highest point of the trek with the best panoramic views of Mount Everest and surrounding peaks
Visit Tengboche Monastery - the largest and most important Buddhist monastery in the Khumbu region, set against a stunning Himalayan backdrop
Experience Namche Bazaar - the vibrant Sherpa capital with colorful markets, cozy bakeries, and breathtaking mountain views
Trek through Sagarmatha National Park - a UNESCO World Heritage Site home to unique Himalayan wildlife and vegetation
See the world's highest mountains up close - including Everest, Lhotse, Nuptse, Ama Dablam, Pumori, Thamserku, and many more
Walk through authentic Sherpa villages - experience the warm hospitality and rich culture of mountain communities
Cross dramatic suspension bridges - some over 100 meters long, swaying high above the rushing Dudh Kosi River
Immerse in Buddhist culture - see colorful prayer flags, ancient stupas, carved mani walls, and spinning prayer wheels
Experience diverse landscapes - from lush rhododendron forests at lower elevations to barren, rocky high-altitude terrain
Understanding the Route
Why Start from Lukla?
Lukla became the standard starting point for Everest Base Camp treks after Tenzing Hillary Airport was built in 1964. Before that, trekkers had to walk from Jiri, which took an additional 6-7 days. Today, the Lukla route is the most efficient way to reach EBC, though some trekkers still prefer the classic Jiri route for better acclimatization.
The Lukla to Everest Base Camp route takes you through the heart of the Khumbu region, also called the Everest region. You'll walk through Sherpa villages, cross suspension bridges over the Dudh Kosi River, pass ancient Buddhist monasteries, and gradually climb into the high Himalayas.
Day-by-Day Route Breakdown
Day 1: Lukla to Phakding
| Distance | 8-9 kilometers |
| Walking Time | 3-4 hours |
| Altitude | 2,860m to 2,610m |
| Trail Description | Mostly downhill through pine forests |
After landing at Lukla airport, you begin trekking right away. The trail descends gently to Phakding, following the Dudh Kosi River valley. This is an easy first day designed to help you adjust to the trekking routine.
Day 2: Phakding to Namche Bazaar
| Distance | 11-12 kilometers |
| Walking Time | 6-7 hours |
| Altitude | 2,610m to 3,440m |
| Trail Description | Steep uphill climb in the last section |
This is one of the toughest days of the trek. You'll cross several suspension bridges and enter Sagarmatha National Park at Monjo. The final climb to Namche Bazaar is steep and challenging, gaining about 600 meters in elevation. Take your time and walk slowly.
Day 3: Acclimatization Day in Namche Bazaar
| Altitude | 3,440 meters |
| Activities | Day hike to Everest View Hotel (3,962m) or Khumjung village |
This rest day is crucial for acclimatization. Don't just stay in your room. The best approach is to "climb high, sleep low" by hiking to a higher altitude during the day, then returning to Namche to sleep. The hike to Everest View Hotel takes about 2-3 hours and offers your first clear views of Mount Everest.
Day 4: Namche Bazaar to Tengboche
| Distance | 10 kilometers |
| Walking Time | 5-6 hours |
| Altitude | 3,440m to 3,867m |
| Trail Description | Moderate ups and downs |
The trail passes through beautiful rhododendron and pine forests. Tengboche is home to the largest monastery in the Khumbu region, called Tengboche Monastery or Dawa Choling Gompa. The views of Everest, Ama Dablam, and other peaks from here are spectacular.
Day 5: Tengboche to Dingboche
| Distance | 11-12 kilometers |
| Walking Time | 5-6 hours |
| Altitude | 3,867m to 4,410m |
| Trail Description | Gradual ascent through open valleys |
You'll pass through Pangboche and continue up the Imja Khola valley. The landscape starts to change as you climb higher. Trees become scarce, and you enter the alpine zone.
Day 6: Acclimatization Day in Dingboche
| Altitude | 4,410 meters |
| Activities | Day hike to Nagartsang Peak (5,083m) |
This is your second acclimatization day. A popular hike is to Nagartsang Peak, which takes about 3-4 hours round trip and offers amazing views of the surrounding mountains including Makalu, Lhotse, and Ama Dablam.
Day 7: Dingboche to Lobuche
| Distance | 8-9 kilometers |
| Walking Time | 5-6 hours |
| Altitude | 4,410m to 4,940m |
| Trail Description | Rocky trail with steady climb |
You'll pass through Dughla (also called Thukla) where there's a memorial area for climbers who died on Everest. The climb from Dughla to Lobuche is steep and can be challenging due to the altitude.
Day 8: Lobuche to Gorak Shep to Everest Base Camp and back to Gorak Shep
| Distance | 15 kilometers total |
| Walking Time | 7-9 hours |
| Altitude | 4,940m to 5,164m (Gorak Shep) to 5,364m (EBC) |
| Trail Description | Rocky moraine trail |
This is the big day. You'll trek to Gorak Shep first, drop your bags at the teahouse, then continue to Everest Base Camp. The trail to EBC crosses the Khumbu Glacier on rocky, uneven terrain. After reaching base camp and taking photos, you return to Gorak Shep for the night.
Day 9: Gorak Shep to Kala Patthar and back to Pheriche
| Distance | 12-13 kilometers total |
| Walking Time | 7-8 hours |
| Altitude | Kala Patthar at 5,545m |
| Trail Description | Steep climb to Kala Patthar, then long descent |
Wake up early (around 4 AM) to hike to Kala Patthar for sunrise. This is the highest point of the trek and offers the best views of Mount Everest. The sunrise on Everest is unforgettable. After sunrise, descend back to Gorak Shep for breakfast, then continue down to Pheriche.
Days 10-12: Return to Lukla
Day 10: Pheriche to Namche Bazaar (6-7 hours)
Day 11: Namche Bazaar to Phakding (5-6 hours)
Day 12: Phakding to Lukla (3-4 hours)
The return journey is much faster because you're descending and already acclimatized. Most trekkers complete the return to Lukla in 3 days.
Trek the Everest Base Camp Trek
This classic trek takes you through the heart of the Khumbu region, past vibrant Sherpa villages, ancient monasteries, and towering Himalayan peaks.
Detailed Itinerary of Lukla to EBC
Day 1: Take a Short Flight to Lukla, Followed by a Trek to Phakding
Your Everest Base Camp adventure begins with an exciting mountain flight from Kathmandu to Lukla. The flight takes about 30-35 minutes and offers spectacular aerial views of the Himalayan ranges.
Landing at Tenzing Hillary Airport is thrilling - the runway is just 527 meters long, sits at a steep incline, and ends at a cliff edge. This is consistently rated as one of the world's most dangerous airports, but experienced pilots make this flight safely hundreds of times each week.
After landing at 2,860 meters, you'll meet your trekking guide and porter, organize your gear, and have breakfast in Lukla town. The trek to Phakding is a gentle introduction to Himalayan trekking. The trail mostly descends through beautiful pine forests alongside the Dudh Kosi River.
You'll pass through small villages like Chheplung, Thado Koshi, and Ghat, crossing several small suspension bridges along the way.
The path is well-maintained with stone steps in many sections. You'll see your first mani walls (stone walls carved with Buddhist prayers) and prayer flags fluttering in the wind. Phakding is a small village with several lodges located right beside the river. The sound of rushing water will be your companion for the night.
Trail Details:
| Walking time | 3-4 hours |
| Distance | 8-9 kilometers |
| Altitude | 2,860m to 2,610m (descending 250 meters) |
| Difficulty level | Easy |
| Trail type | Mostly downhill on stone-paved paths |
Important tips for Day 1:
Don't walk too fast despite the excitement - save energy for upcoming days
Drink plenty of water to start acclimatization
Take time to enjoy the scenery and take photos
Check your gear in the evening and repack if needed
Get to bed early as tomorrow is a challenging day
Day 2: Trek to Namche Bazaar via Monjo
Day 2 is one of the most challenging days of the entire trek. You'll gain significant altitude and many trekkers experience their first symptoms of altitude exposure. The day starts with a pleasant walk along the Dudh Kosi valley, following the river upstream.
You'll cross several suspension bridges, including the famous Hillary Bridge (also called Larja Dobhan bridge), which is the highest suspension bridge on this section at about 120 meters above the river.
Before reaching the bridge, you'll arrive at Monjo village where you enter Sagarmatha National Park. You'll need to show your permits here and register at the checkpoint. From this point, the landscape becomes more dramatic with towering cliffs on both sides of the valley.
After crossing the Hillary Bridge, the real challenge begins. The trail climbs steeply uphill for about 600 vertical meters over the next 2-3 hours. This section is nicknamed "Namche Hill" and it tests every trekker's determination. The path zigzags up through pine and fir forests. Take it very slowly, rest frequently, and don't compare your pace with others.
On clear days, just before reaching Namche, you'll see your first glimpse of Mount Everest peeking between the Lhotse-Nuptse ridge - this view gives many trekkers an emotional boost for the final push. Namche Bazaar appears suddenly as you round the final corner. This horseshoe-shaped town built into the hillside is the largest settlement in the Khumbu region and serves as the gateway to Everest.
Namche has everything you need: comfortable lodges, restaurants serving diverse cuisines, bakeries with fresh pastries, gear shops, money exchange, ATMs, internet cafes, and even Irish pubs. It's a fascinating place where Sherpa traders have conducted business for centuries.
Trail Details:
| Walking time | 6-7 hours |
| Distance | 11-12 kilometers |
| Altitude | 2,610m to 3,440m (gaining 830 meters) |
| Difficulty level | Moderate to challenging |
| Trail type | Gentle at first, then very steep uphill |
Important tips for Day 2:
Start early (around 7-8 AM) to avoid the heat
Walk slowly on the uphill section - "pole pole" (slowly slowly)
Take breaks every 15-20 minutes on the steep section
Stay hydrated - drink water even if you don't feel thirsty
If you feel dizzy or have a headache, inform your guide immediately
Many people experience mild altitude symptoms tonight - this is normal
Day 3: Acclimatization Day - Hike to Everest View Hotel, Explore Khumjung and Back to Namche
This rest day is crucial for proper acclimatization, but "rest day" doesn't mean staying in bed. The golden rule of altitude acclimatization is "climb high, sleep low." You'll hike to higher elevations during the day, then return to Namche to sleep at the same altitude.
The most popular acclimatization hike is to the Everest View Hotel at 3,962 meters, which takes about 2 hours uphill. This hotel holds the Guinness World Record as the highest placed hotel in the world. From here, you get spectacular panoramic views of Mount Everest, Lhotse, Ama Dablam, Thamserku, and other peaks. The sunrise and sunset views from here are magnificent.
After enjoying the views and perhaps having tea or coffee at the hotel, you can continue to Khumjung village, one of the largest Sherpa villages in the region. Khumjung sits at 3,790 meters on a plateau with Mount Khumbila (the sacred mountain) rising behind it. The village has a famous monastery that houses what locals claim is a yeti scalp, and a school built by Sir Edmund Hillary.
You can also visit the neighboring village of Khunde, which has a hospital also established by the Himalayan Trust. Walking through these villages gives you insight into traditional Sherpa life. You'll see stone houses, potato fields, yak pastures, and friendly locals going about their daily activities.
Return to Namche Bazaar by afternoon. Spend the evening exploring Namche's shops and bakeries, or simply rest at your lodge. This is a good time to try fresh-baked goods and warm soups.
Trail Details:
| Walking time | 4-5 hours total |
| Distance | 6-8 kilometers round trip |
| Altitude | Hike from 3,440m to 3,962m (Everest View Hotel) or 3,790m (Khumjung) |
| Difficulty level | Easy to moderate |
| Trail type | Uphill to hotels/villages, then back down |
Important tips for Day 3:
Don't skip the acclimatization hike - it's essential for your success
Drink at least 3-4 liters of water today
Eat well even if you don't feel very hungry
Watch for symptoms: headache, nausea, dizziness, loss of appetite
Visit a bakery for morale-boosting treats
Charge all your devices - electricity becomes expensive higher up
Organize your gear and repack your bags
Day 4: Trek to Tengboche
Today's trek takes you to Tengboche, home to the largest and most famous monastery in the Khumbu region. The day starts with a traverse along the hillside, offering great views of Everest, Lhotse, and Ama Dablam. The trail gradually descends through rhododendron and magnolia forests to the village of Phunki Tenga at 3,250 meters, located beside the Imja Khola (river).
This is your lunch stop where you'll find several teahouses. After lunch, the trail climbs steeply uphill for about 1.5-2 hours to reach Tengboche. This ascent can be tiring, especially after lunch, but take your time and maintain a steady pace.
Tengboche sits at 3,867 meters on a ridge with jaw-dropping views. The Tengboche Monastery (also called Dawa Choling Gompa) was built in 1916 and rebuilt after an earthquake destroyed the original structure. If you arrive before 3 PM, you can attend the evening prayer ceremony, which is a memorable cultural experience with monks chanting prayers accompanied by drums and horns.
The view from Tengboche is considered by many to be the best mountain panorama on the entire trek. Ama Dablam (6,812m) dominates the landscape, appearing close enough to touch. Everest, Lhotse, and Nuptse are clearly visible, along with countless other peaks.
Tengboche has limited accommodation compared to other stops, so lodges here tend to be more basic. The altitude also makes it noticeably colder at night.
Trail Details:
| Walking time | 5-6 hours |
| Distance | 10 kilometers |
| Altitude | 3,440m to 3,867m (gaining 427 meters, but with descent and re-ascent) |
| Difficulty level | Moderate |
| Trail type | Descent then steep ascent through forests |
Important tips for Day 4:
Enjoy the monastery visit if timing works out
Dress warmly - it gets cold here
The sunset view of Ama Dablam is spectacular
Some lodges have yak-dung burning stoves for heat
Mobile phone signal is available but expensive
Day 5: Trek from Tengboche to Dingboche
The trail descends through birch and rhododendron forests to Deboche, then continues down to the bridge over the Imja Khola at Pangboche. This village is one of the highest year-round settlements in the Khumbu and home to Pangboche Monastery, believed to be the oldest monastery in the region at over 300 years old.
From Pangboche, the trail climbs gradually up the Imja Khola valley. The landscape starts changing noticeably - trees become scarce and you enter the alpine zone with low shrubs and grassland. The views open up dramatically with Ama Dablam towering above and the massive walls of Lhotse appearing ahead.
You'll pass through Somare village before reaching Dingboche. The trail here crosses through traditional stone-walled fields where locals grow barley, buckwheat, and potatoes during the short summer growing season. Dingboche sits in a wide valley surrounded by impressive peaks including Island Peak (6,189m), Lhotse (8,516m), and the dramatic north face of Ama Dablam.
Dingboche is a good-sized village with many lodges and offers more comfortable accommodation than some higher stops. It's an important acclimatization point before going higher.
Trail Details:
| Walking time | 5-6 hours |
| Distance | 11-12 kilometers |
| Altitude | 3,867m to 4,410m (gaining 543 meters) |
| Difficulty level | Moderate |
| Trail type | Descent then gradual ascent through the valley |
Important tips for Day 5:
The landscape becomes more barren from here
Wind can be strong in the afternoon - bring a windproof jacket
Drink extra water as the air is very dry
Some people start feeling altitude effects more clearly
Wash clothes if needed - this is the last comfortable place to do laundry
Day 6: Hike to Nagartsang Peak and Back to Dingboche
This is your second crucial acclimatization day. The most popular hike is to Nagartsang Peak (also called Nagarjun Hill) at 5,083 meters. This hike takes 3-4 hours to reach the top and offers phenomenal 360-degree views of the Himalayas.
The trail climbs steadily behind Dingboche through a rocky landscape. As you gain altitude, the views become increasingly spectacular. From the summit, you can see Makalu (8,463m, the world's fifth highest peak), Lhotse, Ama Dablam, Thamserku, Kantega, and many other peaks. The view of the massive south face of Lhotse is particularly impressive.
Another option is to hike to Chhukung village at 4,730 meters, which lies at the base of Island Peak. This hike takes about 2-3 hours one way and offers different perspectives of the mountains. Some trekkers do both hikes if they have the energy.
After returning to Dingboche by lunch or early afternoon, rest at your lodge. Your body is working hard to produce more red blood cells to carry oxygen more efficiently. This is why rest days are so important - they give your body time to adapt.
Trail Details:
| Walking time | 4-5 hours round trip to Nagartsang Peak |
| Distance | 6-7 kilometers round trip |
| Altitude | Hike from 4,410m to 5,083m (gaining 673 meters) |
| Difficulty level | Moderate to challenging |
| Trail type | Rocky uphill path |
Important tips for Day 6:
Start your hike early to avoid afternoon winds
This is now high altitude - walk very slowly
Some people experience headaches at this elevation
Take Diamox if recommended by your doctor
Eat carbohydrate-rich foods (rice, pasta, potatoes)
Stay warm and hydrated
Day 7: Trek to Lobuche
Today you continue higher into increasingly barren landscape. The trail climbs gradually from Dingboche, following the lateral moraine of the Khumbu Glacier. The vegetation is now almost completely gone - just rocks, ice, and snow.
The first stop is Dughla (also called Thukla) at 4,620 meters, where most trekkers stop for lunch. From Dughla, there's a steep climb up the terminal moraine of the Khumbu Glacier. This section gains about 200 meters in less than an hour and can be quite challenging at this altitude. Take frequent breaks.
At the top of the climb, you reach a flat area with memorials to climbers who died on Everest and other peaks in the region. This sobering place is covered with stone cairns and prayer flags, each memorial dedicated to someone who lost their life in the mountains. Take a moment here to reflect on the serious nature of high-altitude mountaineering.
From the memorials, the trail continues along the moraine with dramatic views of the Khumbu Glacier below and the peaks of Pumori and Nuptse ahead. Lobuche sits at the base of Lobuche peak in a very exposed location. It's cold, windy, and stark, but the mountain views are tremendous.
Accommodation in Lobuche is more basic than lower villages. Expect dormitory-style rooms and limited facilities. Many trekkers find it difficult to sleep well here due to the altitude.
Trail Details:
| Walking time | 5-6 hours |
| Distance | 8-9 kilometers |
| Altitude | 4,410m to 4,940m (gaining 530 meters) |
| Difficulty level | Challenging |
| Trail type | Rocky moraine trail with steep section from Dughla |
Important tips for Day 7:
The climb from Dughla is tough - rest every few minutes
Altitude symptoms become more common here
Lobuche is cold - bring all your warm layers for sleeping
Some people take sleeping pills, but check with your guide first
Don't push yourself if you're feeling unwell
Day 8: Trek to Gorak Shep and Return Trip to Everest Base Camp
This is the biggest day of your trek - you'll reach Everest Base Camp! The day starts with a 2-3 hour trek from Lobuche to Gorak Shep, the last settlement before base camp. The trail continues along the Khumbu Glacier moraine with increasingly wild and rocky terrain.
Gorak Shep sits at 5,164 meters on a frozen lakebed. This was actually the site of the original Everest Base Camp used by the 1952 Swiss expedition. The village consists of just a few lodges, and it's an inhospitable place - cold, windy, and surrounded by rocks and ice.
You'll drop your main bag at your lodge in Gorak Shep and have lunch. Then starts the trek to Everest Base Camp itself. This takes about 2-3 hours of walking over rocky, uneven terrain. The trail crosses the Khumbu Glacier, walking on top of rocks covering the ice. The path can be confusing as it changes each season when the ice melts and shifts.
Everest Base Camp at 5,364 meters isn't actually a single location but rather an area where expedition teams set up their tents from March to May. If you trek outside climbing season, you'll only see prayer flags and stone cairns. During climbing season (April-May), you'll see dozens of colorful tents, kitchen areas, and climbers preparing for summit attempts.
The view from base camp itself doesn't include the summit of Everest - it's blocked by the massive Khumbu Icefall and the surrounding walls. But standing here, knowing this is where the world's highest mountain begins, is an emotional experience. Take photos with the base camp sign and prayer flags.
Return to Gorak Shep the same way, which takes about 2 hours. You'll sleep in Gorak Shep tonight - one of the highest and most uncomfortable nights of the trek.
Trail Details:
| Walking time | 7-9 hours total (3 hours to Gorak Shep, 2-3 hours to EBC, 2 hours return to Gorak Shep) |
| Distance | 15 kilometers total |
| Altitude | 4,940m to 5,164m (Gorak Shep) to 5,364m (EBC) |
| Difficulty level | Very challenging |
| Trail type | Rocky moraine, glacier walking |
Important tips for Day 8:
Start early from Lobuche
Pack light for EBC - just bring water, snacks, camera
The trail to EBC can be slippery on ice - bring trekking poles
Many people feel euphoric at base camp but remember you still need to walk back
Sleep is difficult at Gorak Shep due to altitude
Some people experience Cheyne-Stokes breathing (irregular breathing during sleep) - this is normal
Day 9: Sunrise Viewing Hike to Kala Patthar and Return to Pheriche
Wake up around 4 AM for the predawn hike to Kala Patthar. This is the highest point of the standard EBC trek at 5,545 meters and offers the best views of Mount Everest. The climb takes about 1.5-2 hours from Gorak Shep and is very steep and challenging in the dark with headlamps.
Most trekkers find this climb harder than reaching base camp because of the altitude, the steepness, and the early morning start. You'll be tired from yesterday and may not have slept well. But push on slowly - the reward is worth it.
Reaching the summit of Kala Patthar for sunrise is one of the great moments in trekking. As the first rays of sun hit the peaks, Mount Everest, Nuptse, Changtse, and Pumori turn golden pink. The view is unobstructed and you can see the entire south face and summit pyramid of Everest clearly. This is what you came for. Many trekkers become emotional at this moment.
Spend 30-45 minutes at the summit, taking photos and absorbing the view. Then descend back to Gorak Shep for breakfast. After breakfast, begin the long descent to Pheriche. This drops you back below 4,500 meters, and you'll immediately feel the difference in oxygen levels - breathing becomes noticeably easier.
The descent retraces your steps through Lobuche, then down to Pheriche village at 4,371 meters. Pheriche has the Himalayan Rescue Association clinic where doctors treat altitude sickness. It's a relief to sleep at this lower elevation after two nights above 5,000 meters.
Trail Details:
| Walking time | 7-8 hours total (2 hours up Kala Patthar, 1 hour down, 5 hours to Pheriche) |
| Distance | 12-13 kilometers |
| Altitude | Start at 5,164m, climb to 5,545m, descend to 4,371m |
| Difficulty level | Very challenging (altitude and fatigue) |
| Trail type | Very steep rocky climb, then long descent |
Important tips for Day 9:
Bring warm layers - it's freezing at 4 AM
Headlamp is essential
Some people skip Kala Patthar if they're struggling with altitude
Take it very slowly on the climb
The descent to Pheriche feels much easier than going up
You'll sleep much better at Pheriche's lower altitude
Day 10: Trek Back to Namche Bazaar
After the challenging high-altitude days, today's trek feels relatively easy. You're descending and your body is now well acclimatized. The trail descends from Pheriche through Pangboche, then crosses the bridge at Deboche and climbs back up to Tengboche.
Many trekkers stop at Tengboche for lunch and to revisit the monastery. From Tengboche, the trail descends through forests to Phunki Tenga, then climbs back up to the ridge trail leading to Namche Bazaar.
The descent is much faster than the ascent, and you'll cover in one day what took you two days going up. Arriving back in Namche Bazaar feels like returning to civilization after the barren high-altitude landscape. The town, which seemed remote on Day 2, now feels bustling and almost luxurious.
This is a good night to celebrate your success with a hot shower (you'll actually feel warm enough to shower), a good meal at a restaurant, and maybe a beer or glass of wine. You've accomplished something remarkable.
Trail Details:
| Walking time | 6-7 hours |
| Distance | 18-20 kilometers |
| Altitude | 4,371m to 3,440m (descending 931 meters) |
| Difficulty level | Easy to moderate |
| Trail type | Mostly downhill with one uphill section |
Important tips for Day 10:
Your knees might be sore from descending - trekking poles help
Take your time even though you're descending
Enjoy being back in thicker air with more oxygen
Namche's bakeries will taste even better than before
This is your chance for a proper hot shower
Day 11: Trek to Lukla
The final day of trekking retraces your steps down the valley to Lukla. You'll descend from Namche through the steep section you climbed on Day 2 - it's much easier going down, though hard on the knees. The trail passes back through Monjo and continues down the Dudh Kosi valley.
You'll pass Phakding, where you stayed on Night 1, and continue to Lukla. The last section climbs uphill from the river valley back to Lukla airport. After 10 days of trekking, this final uphill can feel surprisingly tough, but you're almost done.
Arriving in Lukla marks the end of your trek. Most groups have a celebration dinner tonight with the trekking crew. This is when you'll tip your guide and porters (typically 10-15% of what you paid for their services). These tips are an important part of their income, so be generous if the service was good.
Pack your bags tonight for tomorrow's flight, and be prepared for possible flight delays. Mountain weather is unpredictable, and Lukla flights are often delayed or canceled. Having a flexible schedule with 1-2 buffer days in Kathmandu is wise.
Trail Details:
| Walking time | 6-7 hours |
| Distance | 18-19 kilometers |
| Altitude | 3,440m to 2,860m (descending 580 meters) |
| Difficulty level | Easy to moderate |
| Trail type | Steep downhill then river valley walking with final uphill |
Important tips for Day 11:
Watch your footing on the steep descent from Namche
Enjoy your last day in the mountains
Thank your guides and porters properly
Get to bed early - flights leave very early
Have cash ready for tips
Day 12: Flight Back to Kathmandu
Wake up early for your flight back to Kathmandu. Flights usually start around 6-7 AM when weather conditions are best. You'll need to check in at the tiny Lukla airport terminal. The flight back offers the same spectacular mountain views, and landing at Kathmandu's large, flat runway feels surreal after Lukla's dramatic approach.
Most flights arrive in Kathmandu before 9 AM. You'll have the rest of the day to rest, shower properly, and enjoy Kathmandu's restaurants and comfort. Many trekkers spend this day shopping for souvenirs, getting massages, or simply recovering.
Important note about Lukla flights: Delays and cancellations are common due to weather, especially in the afternoon. Morning flights have the highest success rate. If your flight is delayed, you may need to wait in Lukla for 1-2 days. This is why having buffer days in your schedule is essential. Some trekking companies offer helicopter backup as an option if flights are canceled.
Trek the Everest Base Camp Trek
This classic trek takes you through the heart of the Khumbu region, past vibrant Sherpa villages, ancient monasteries, and towering Himalayan peaks.
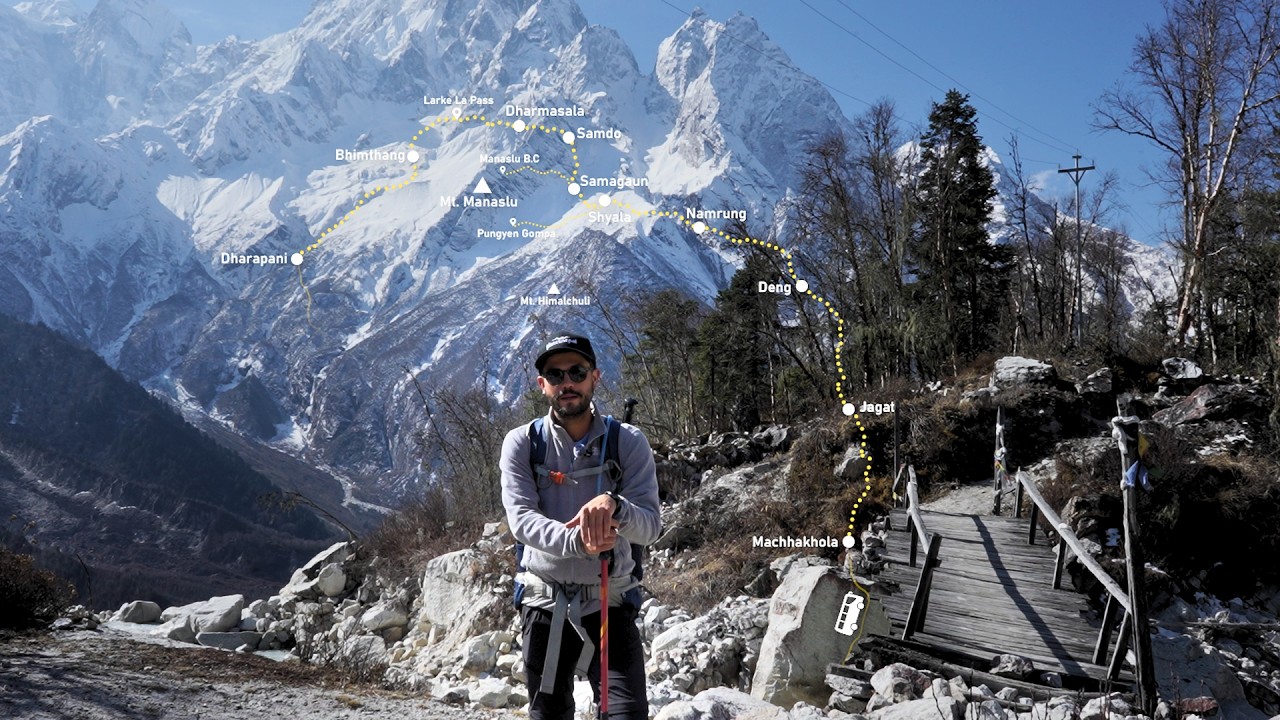
Lukla to Everest Base Camp Trek Map
The Everest Base Camp trek route follows a clear path through the Khumbu valley. Here's the route overview:
Main Route Path:
Lukla (2,860m) → Phakding (2,610m) → Monjo (2,835m) → Namche Bazaar (3,440m) → Tengboche (3,867m) → Pangboche (3,930m) → Dingboche (4,410m) → Dughla (4,620m) → Lobuche (4,940m) → Gorak Shep (5,164m) → Everest Base Camp (5,364m) → Kala Patthar (5,545m)
The trek follows the Dudh Kosi River valley northward, entering Sagarmatha National Park at Monjo, then continuing up through the Sherpa heartland. After Namche, the route splits briefly at Sanasa, with both paths meeting again at Tengboche. From Dingboche, the trail continues up the Khumbu valley to the glacier and base camp.
Key geographic features along the route:
Dudh Kosi River - the main river, meaning "milk river" in Nepali
Hillary Bridge - the highest suspension bridge on the route
Khumbu Glacier - you walk alongside and on this glacier
Sagarmatha National Park - covers 1,148 square kilometers
For detailed trekking maps, most guides carry laminated maps showing the daily route, altitudes, and villages. You can also purchase maps in Kathmandu or Namche Bazaar. The route is well-marked with signs and is impossible to get lost on during trekking season.
Lukla to Everest Base Camp Cost
The cost of the Everest Base Camp trek varies significantly depending on how you organize it. Here's a detailed breakdown:
Independent/Budget Trek
Total cost: $800-1,200 per person
This includes:
Permits (NPR 5,000-6,000 / $40-50)
Kathmandu-Lukla-Kathmandu flights ($350-450)
Accommodation in teahouses ($5-25 per night)
Meals (approximately $30-35 per day)
Hot drinks and bottled water ($3-5 per item, increasing with altitude)
Personal expenses
Trek with Local Agency
Total cost: $1,200-2,000 per person
This includes:
All permits arranged
Domestic flights
Professional English-speaking guide ($25-30 per day)
Porter service ($20-25 per day per porter)
Accommodation in teahouses
Three meals per day during the trek
Guide and porter salaries, food, accommodation, insurance
First aid kit and emergency arrangements
Premium Package with International Agency
Total cost: $2,500-4,000 per person
This includes:
All of the above
Better quality lodges where available
More comprehensive support
Satellite phone for emergencies
Better guide-to-trekker ratio
More thorough pre-trek briefing and support
Better emergency evacuation insurance
Detailed Cost Breakdown by Category
Flights:
Kathmandu to Lukla: $170-220 one way (foreigners)
Nepali passport holders: NPR 7,500 one way
Note: Prices increase during peak season (March-May, October-November)
Permits:
Sagarmatha National Park Entry Permit: NPR 3,000 + 13% VAT ($35-40)
Khumbu Pasang Lhamu Rural Municipality Permit: NPR 2,000 ($15-18)
Note: TIMS card is no longer required as of 2023
Accommodation:
Phakding/Lukla: $3-10 per night
Namche Bazaar: $5-15 per night
Tengboche/Dingboche: $5-10 per night
Lobuche/Gorak Shep: $10-15 per night
Private rooms cost extra ($10-20)
Food:
Breakfast: $3-7 (porridge, pancakes, eggs)
Lunch: $5-10 (fried rice, noodles, soup)
Dinner: $5-12 (Dal bhat, pasta, pizza)
Dal bhat typically $8-12 (unlimited refills)
Hot drinks: $1-4 (price increases with altitude)
Bottled water: $1-5 per liter (avoid plastic, use purification instead)
Snacks and chocolate: $2-8
Guide and Porter:
Licensed trekking guide: $25-30 per day
Porter (carries up to 25kg for 2 trekkers): $20-25 per day
Guide-porter (combined role): $22-28 per day
Tips: 10-15% of total service cost
Additional Costs:
Hot shower: NPR 200-500 ($2-5, more expensive at higher altitude)
Battery charging: NPR 200-500 per device ($2-5)
WiFi: NPR 500-1,000 per day ($4-10)
Gear rental in Kathmandu: $10-20 per item
Travel insurance: $50-150 (must cover up to 6,000m altitude)
Money-Saving Tips:
Order dal bhat (unlimited servings for one price)
Eat where you sleep (cheaper than eating elsewhere)
Carry water purification tablets instead of buying bottled water
Share a porter with another trekker
Book directly with local agencies in Kathmandu rather than international operators
Trek in shoulder season (early March or late November) for lower prices
Lukla to Everest Base Camp Distance
Understanding the EBC distances helps with planning and pacing:
Total Round-Trip Distance: Approximately 130 kilometers (80 miles)
One-Way Distance Breakdown:
Lukla to Phakding: 8-9 km
Phakding to Namche Bazaar: 11-12 km
Namche to Tengboche: 10 km
Tengboche to Dingboche: 11-12 km
Dingboche to Lobuche: 8-9 km
Lobuche to Gorak Shep: 3-4 km
Gorak Shep to Everest Base Camp: 3-4 km (return trip)
Gorak Shep to Kala Patthar: 2 km (return trip)
Total one-way distance to Gorak Shep: Approximately 62-65 kilometers
Important notes about distance:
At high altitude, elevation gain is a more important factor than distance when assessing the difficulty of a trek, as steep climbs greatly affect physical effort.
Walking time does not directly correspond to the number of kilometers covered because ascents slow the pace, while descents allow for faster movement.
For this reason, the return journey usually takes less time even though the distance remains the same.
In addition, optional side trips to places such as Everest View Hotel, Khumjung, Nagartsang Peak, and Kala Patthar add extra kilometers to the overall route.
Lukla to Everest Base Camp by Car Price
Trek the Everest Base Camp Trek by Road
Experience Everest—No Flights, Just Pure Adventure.
Important clarification: You cannot drive from Lukla to Everest Base Camp. There is no road connecting these locations. The entire Everest Base Camp trek is a walking trail with no vehicle access.
However, you CAN drive part of the way from Kathmandu:
Option 1: Drive to Salleri/Phaplu, Then Trek
Drive from Kathmandu to Salleri: 8-10 hours by jeep
Cost: $150-250 per jeep (can accommodate 4-5 people)
From Salleri, trek to Lukla: 2-3 days
Then continue the standard EBC trek
This option adds 5-6 days to your total trek but offers better acclimatization and fewer crowds. It's also useful if Lukla flights are fully booked or you want to avoid flying into Lukla.
Option 2: Drive to Jiri, Then Trek
Drive from Kathmandu to Jiri: 7-8 hours
Cost: $100-180 per jeep
From Jiri, trek to Lukla: 4-5 days
Then continue the standard EBC trek
This is the classic route used before Lukla airport was built. Sir Edmund Hillary and Tenzing Norgay started from Jiri in 1953. This route is less crowded and offers excellent acclimatization but adds about 10 days to your total trek.
Why people choose the driving option:
Fear of flying into Lukla's dangerous airport
Flight cancellations during bad weather
Fully booked flights during peak season
Better acclimatization by starting at lower altitude
More authentic, less touristy experience
Lower overall cost (no flight expense)
Note: Although road construction is continuing in the Everest region, there is still no direct road access to the classic Everest Base Camp trekking route beyond Lukla as of 2024–2025.
However, vehicles can now reach Surke, a village located just below Lukla, allowing trekkers to begin their journey on foot from there.
With this development, an alternative itinerary involves driving to Salleri on the first day, followed by a drive to Surke on the second day and then trekking onward to Phakding.
Lukla to Everest Base Camp Helicopter Price
Helicopter services offer a faster, more luxurious alternative to trekking, though they miss the acclimatization process and cultural immersion.
Full Helicopter Tour Options
1. Kathmandu to EBC and Return (5-6 hours total)
Price: $4,500-6,000 per helicopter (5-6 passengers)
Per person in shared flight: $800-1,200
Route: Kathmandu → Lukla (refuel) → Pheriche (breakfast) → Kala Patthar (landing for 10-15 minutes) → Return
Includes: All flights, breakfast at Pheriche, landing at Kala Patthar
2. Lukla to EBC Helicopter Tour
Price: $2,500-3,500 per helicopter
Per person in shared flight: $500-700
Duration: 2-3 hours round trip
Useful if you're already in Lukla and want to see EBC without trekking
3. One-Way Helicopter Services
For trekkers who want to trek one direction and fly back:
Gorak Shep/EBC to Lukla: $3,000-4,000 per helicopter
Lukla to Kathmandu: $3,500-4,500 per helicopter
Per person on shared flight: $800-1000
4. Emergency Evacuation
Cost: $5,000-10,000 depending on pickup location and destination
Your travel insurance should cover this (make sure policy covers up to 6,000m)
Helicopter rescues happen regularly for serious altitude sickness, injuries, or medical emergencies
Weight and Altitude Limitations:
Helicopters can typically carry 5-6 passengers at lower elevations
At high altitude (above 5,000m), only 3 passengers maximum due to thin air
Weight restrictions are strict - you may need to leave bags behind
Weather Dependency:
Helicopter flights are even more weather-dependent than fixed-wing flights
Morning flights (6-9 AM) have highest success rate
Cloud, wind, or precipitation cancels flights immediately
Best Landing Points:
Kala Patthar (5,545m) - best views, most common landing spot
Hotel Everest View (3,962m) - lower, more reliable weather
Syangboche (3,748m) - alternate landing near Namche
Pheriche (4,371m) - common refueling stop
Booking Helicopter Tours:
Book through licensed operators in Kathmandu
Shared flights are much cheaper than private charters
Peak season (October, April) requires advance booking
Some tour operators combine helicopter with a short trek
Environmental Consideration:
Helicopters disturb the peace of the mountains
They contribute to noise pollution in the national park
If you can trek, that's the more environmentally responsible choice
Lukla to Everest Base Camp Elevation
Understanding the elevation profile is crucial for acclimatization planning. Here's the complete altitude breakdown:
Complete Elevation Profile
Starting Point:
Day 1 Destination:
Phakding: 2,610 meters (8,563 feet)
Elevation change: -250 meters (descending)
Day 2 Destination:
Namche Bazaar: 3,440 meters (11,286 feet)
Elevation gain from Phakding: +830 meters
Cumulative gain from Lukla: +580 meters
Day 3 Side Trips:
Everest View Hotel: 3,962 meters (13,000 feet)
Khumjung Village: 3,790 meters (12,434 feet)
Sleep at Namche: 3,440 meters
Day 4 Destination:
Tengboche: 3,867 meters (12,687 feet)
Elevation gain: +427 meters
Note: You descend to 3,250m then climb back up
Day 5 Destination:
Dingboche: 4,410 meters (14,468 feet)
Elevation gain: +543 meters
Day 6 Side Trip:
Nagartsang Peak: 5,083 meters (16,677 feet)
Sleep at Dingboche: 4,410 meters
Day 7 Destination:
Lobuche: 4,940 meters (16,207 feet)
Elevation gain: +530 meters
Day 8 Destinations:
Gorak Shep: 5,164 meters (16,942 feet)
Everest Base Camp: 5,364 meters (17,598 feet)
Sleep at Gorak Shep: 5,164 meters
Day 9 Peak:
Kala Patthar Summit: 5,545 meters (18,192 feet) - highest point of the trek
Sleep at Pheriche: 4,371 meters (14,340 feet)
Understanding Altitude Zones
Low Altitude (Below 2,500m):
Moderate Altitude (2,500m - 3,500m):
Lukla to Namche range
Oxygen level: About 75% of sea level
Mild altitude effects possible
First acclimatization needed
High Altitude (3,500m - 5,500m):
Namche to Kala Patthar range
Oxygen level: 50-60% of sea level
Significant altitude effects common
Careful acclimatization essential
Risk of altitude sickness increases
Extreme Altitude (Above 5,500m):
Elevation Gain Summary
Total elevation gain (Lukla to Kala Patthar): Approximately 2,685 meters
Largest single-day gains:
Day 2 (Phakding to Namche): +830 meters
Day 7 (Dingboche to Lobuche): +530 meters
Day 5 (Tengboche to Dingboche): +543 meters
Key acclimatization principle: After reaching 3,000 meters, you should not gain more than 300-500 meters of sleeping altitude per day. This is why rest days at Namche and Dingboche are built into the itinerary.
Trek the Everest Base Camp Trek by Road
Experience Everest—No Flights, Just Pure Adventure.
Best Time to Trek from Lukla to Everest Base Camp
Choosing the right season dramatically affects your trekking experience. Here's a detailed breakdown of each season:
Spring Season (March, April, May)
Spring is the most popular time for the Everest Base Camp trek.
Weather Conditions:
Clear, stable weather with minimal precipitation
Daytime temperatures: 10-15°C at lower elevations, -5 to -10°C at higher elevations
Nighttime temperatures: Can drop to -15°C at high altitude
Mostly clear mountain views
Rhododendron forests bloom in March and April
Advantages:
Best weather stability
Clear mountain views almost daily
Warm daytime temperatures
Colorful blooming forests
This is Everest climbing season, so you'll see expedition teams
Longer daylight hours
Disadvantages:
Most crowded season (especially April)
Teahouses book up quickly
Flights to Lukla often fully booked
Higher prices for everything
Dusty trails from heavy foot traffic
Can feel commercialized
Best months: April is peak, March is slightly less crowded, May starts getting warmer at lower elevations
Autumn Season (September, October, November)
Autumn is considered by many experienced trekkers to be the best season.
Weather Conditions:
Crystal clear skies after monsoon washes the air
Daytime temperatures: 8-12°C at lower elevations, -10 to -15°C at higher elevations
Nighttime temperatures: Can drop to -20°C at high altitude in November
Best visibility for mountain photography
Dry, stable weather
Advantages:
Best mountain visibility of the year
Stable, dry weather
Comfortable temperatures
Harvest season in mountain villages
Festival season (Dashain, Tihar celebrations)
Less dusty than spring
Still busy but slightly less crowded than April
Disadvantages:
Still quite crowded, especially October
Cold nights, particularly November
Higher prices during peak times
Flights can be fully booked
Best months: October is peak, September is warmer, November is colder but clearer
Winter Season (December, January, February)
Winter trekking is for experienced trekkers who don't mind extreme cold.
Weather Conditions:
Very clear skies
Daytime temperatures: 5-10°C at lower elevations, -15 to -20°C at higher elevations
Nighttime temperatures: Can drop below -25°C at high altitude
Snow likely above 4,000 meters
Very dry air
Advantages:
Almost empty trails - genuine solitude
Lowest prices of the year
Crystal clear mountain views
Blue skies almost guaranteed
Peaceful, authentic experience
Strong sense of adventure
Disadvantages:
Extremely cold, especially at night
Many high-altitude teahouses close (Lobuche, Gorak Shep may have limited options)
Risk of heavy snowfall blocking trails
Shorter daylight hours
Higher risk of frostbite
Lukla flights more frequently canceled
Need expensive winter gear
Best months: December is coldest but clearest, February starts warming slightly
Monsoon Season (June, July, August)
Monsoon is the off-season when few trekkers visit.
Weather Conditions:
Heavy afternoon rains common
Daytime temperatures: 15-20°C at lower elevations
Cloudy, misty conditions
Mountains often hidden by clouds
Muddy, slippery trails
Advantages:
Disadvantages:
Frequent heavy rain
Mountain views often blocked by clouds
Muddy, slippery trails
Leeches at lower elevations
Higher risk of flight cancellations
Some teahouses closed
Trail damage from landslides possible
Difficult photography conditions
Note: The Everest region gets less monsoon rain than other parts of Nepal due to being in a rain shadow, so it's actually more feasible than other treks during this season.
Month-by-Month Breakdown
March: Spring begins, weather improving, rhododendrons blooming, increasingly busy
April: Peak spring season, best weather, most crowded, highest prices
May: Still good but getting warmer at low altitude, pre-monsoon clouds possible
June: Monsoon starts, rain increasing, very few trekkers
July: Peak monsoon, heavy rains, not recommended
August: Monsoon continues, very quiet, lush landscapes
September: Monsoon ending, weather improving, starting to get busy
October: Peak autumn season, best visibility, crowded, higher prices
November: Still excellent weather but getting colder, fewer crowds than October
December: Winter begins, very cold, very quiet, crystal clear
January: Coldest month, extreme cold at altitude, very few trekkers
February: Still very cold but slightly warming, longest days approaching
Trek the Everest Base Camp Trek
This classic trek takes you through the heart of the Khumbu region, past vibrant Sherpa villages, ancient monasteries, and towering Himalayan peaks.
Our Recommendation
- For first-time trekkers: October or April - stable weather, full services, easier logistics despite crowds
- For experienced trekkers seeking solitude: December or February - winter beauty without extreme crowds
- For budget travelers: June or January - significant discounts but challenging conditions
- For photography: October or November - clearest air and best visibility
- For cultural experience: October (Dashain/Tihar festivals) or April (Everest climbing season)
Accommodation on Lukla to Everest Base Camp Trek
The Everest Base Camp trek is a "teahouse trek," meaning you stay in locally-run mountain lodges rather than camping.
What are Teahouses?
Teahouses are simple mountain lodges run by local Sherpa families. They serve both as guesthouses (providing rooms) and restaurants (serving meals). The term "teahouse" comes from when these establishments mainly served tea to passing traders and porters. Today, they're full-service lodges providing accommodation, food, and social spaces for trekkers.
History: Teahouses developed along traditional trading routes between Tibet and Nepal. When tourism started in the 1960s and 70s, locals began upgrading their homes to accommodate trekkers. Now, teahouse trekking is the primary income source for many Khumbu families.
What to Expect in Teahouses
Room Features:
Two single beds with mattresses and pillows
Thin foam mattresses (bring a sleeping bag)
Basic wooden construction
Small windows
Simple furniture (sometimes a small table and hooks for clothes)
Shared bathrooms in most locations
No heating in rooms (common areas have stoves)
Bathroom Facilities:
Shared squat toilets or western-style toilets
Cold water for washing (buckets provided)
Hot showers available for extra fee (NPR 200-500)
Toilets are outside the main building in many lodges
Toilet paper not always provided - bring your own
At higher altitudes, toilets are less maintained
Common Areas:
Dining hall with tables and benches
Central stove (usually yak-dung burning or kerosene)
Charging stations (paid service)
Bookshelves with book exchanges
Menu boards on walls
Solar panels for limited electricity
Electricity:
Available in most teahouses but limited
Charging devices costs NPR 200-500 per item
Outlets often shared among many trekkers
Charging can be slow
Power cuts common
Solar power at higher altitudes means charging only works during sunny days
Accommodation Quality by Location
Lower Region (Lukla, Phakding, Monjo):
Better quality teahouses
Some rooms with attached bathrooms
Hot showers usually available
Reliable electricity
WiFi available
More comfortable mattresses
Wooden floors
Mid Region (Namche, Tengboche, Pangboche):
Upper Region (Dingboche, Lobuche):
Basic teahouses
Mostly shared bathrooms
Limited hot water
Expensive electricity
Cold rooms
Thinner mattresses
High Region (Gorak Shep):
Teahouse Etiquette and Rules
- Eat Where You Sleep: The most important rule is to eat your meals at the teahouse where you're staying. Room prices are kept very low (sometimes just $3-5) because teahouses make their profit from food. It's considered very rude to sleep at one lodge and eat at another.
- Common Area Seating: Areas near the stove are most valued. Don't hog the warmest spots - share them with others. The stove typically lights around 5-6 PM.
- Shoes Off: Remove shoes before entering dining areas and rooms. Slippers or camp shoes are essential.
- Water Conservation: Water is scarce at high altitude. Don't waste water washing or showering. Many lodges ask you to minimize water use.
- Electricity Use: Use charging services sparingly. Don't leave devices charging overnight. Electricity is expensive and limited at altitude.
- Noise: Walls are thin. Keep noise down, especially in the morning and evening. Other trekkers need rest.
- Respect Private Spaces: Kitchens and family areas are usually off-limits unless invited.
Booking and Reservations
Low Season (June-August, January-February): No advance booking needed. Just walk in and ask for a room. Many lodges are empty.
Shoulder Season (March, May, September, November): Popular lodges might fill up but alternatives are always available. Your guide can call ahead.
Peak Season (April, October): Advance booking recommended, especially for higher altitudes where options are limited. Your trekking agency should handle this. If trekking independently, arrive early (by 2-3 PM) to secure rooms.
Cost and Payment
Room Rates:
Lower elevations: NPR 300-1,000 ($3-10) per person
Mid elevations: NPR 500-1,500 ($5-15) per person
High elevations: NPR 1,000-2,000 ($10-20) per person
Private rooms: Add NPR 500-1,500 extra
Additional Costs:
Hot shower: NPR 200-500
WiFi: NPR 500-1,000 per day
Charging: NPR 200-500 per device
Laundry: Not commonly available above Namche
Payment:
Cash only at most teahouses (Nepali Rupees)
Some larger lodges in Namche accept cards with heavy fees
Bring enough cash - ATMs only in Namche
Tips for Comfortable Stays
Bring a good sleeping bag rated to -15°C minimum
Pack a sleeping bag liner for extra warmth and hygiene
Bring camp shoes or slippers for evening comfort
Carry wet wipes - substitute for showers at high altitude
Use earplugs - walls are thin and people snore
Bring a headlamp - for bathroom visits at night
Layer up in the evening - rooms are cold
Arrive early - best rooms go to early arrivals
Be social - dining halls are where friendships form
Stay flexible - don't expect hotel standards
Alternative: Camping Trek
Some trekkers prefer camping treks with full support (tents, kitchen crew, dining tent). This costs significantly more ($2,500-3,500) but offers:
However, camping misses the cultural interaction with Sherpa families and the social atmosphere of teahouses.
Packing Guideline
Packing properly is crucial for comfort and safety on the trek. Here's a comprehensive packing list broken down by category:
Head and Hands
Sun Protection:
Wide-brimmed sun hat or baseball cap (essential - high altitude sun is intense)
Sunglasses with UV protection (Category 4 recommended, mandatory for glacier)
Sunscreen SPF 50+ (at least 100ml)
Lip balm with SPF (bring extra - you'll use it constantly)
Buff or neck gaiter (protects from sun and dust)
Warmth:
Gloves:
Lightweight liner gloves (for daytime trekking)
Heavyweight insulated gloves or mittens (essential for early mornings, Kala Patthar)
Waterproof outer gloves (if trekking in monsoon or winter)
Clothing
Upper Body - Base Layers:
2-3 short-sleeve moisture-wicking t-shirts
2-3 long-sleeve base layer tops (merino wool or synthetic)
1 thermal underwear top (for sleeping and high altitude)
Upper Body - Insulation:
1-2 fleece jackets or pullovers (mid-weight)
1 down jacket or synthetic insulated jacket (essential - you'll wear this daily at high altitude)
1 lightweight insulating layer (optional but useful)
Upper Body - Outer Layer:
1 waterproof and windproof jacket (hard-shell, essential)
1 soft-shell jacket (optional but comfortable)
Lower Body:
2-3 trekking pants (quick-dry, comfortable)
1 pair of thermal/base layer pants (for sleeping and cold days)
1 pair waterproof rain pants (essential)
1 pair of shorts (optional, for lower elevations)
1 pair of comfortable pants for evenings in teahouses
Underwear and Socks:
5-6 pairs of underwear (quick-dry material)
5-6 pairs of good quality trekking socks (wool or synthetic blend)
2 pairs of thick wool socks (for high altitude and sleeping)
1-2 pairs of sock liners (helps prevent blisters)
Important Notes on Clothing:
Avoid cotton - it stays wet and doesn't provide warmth
Layering is key - you'll add and remove layers throughout the day
Merino wool is ideal but synthetic also works well
Dark colors hide dirt better than light colors
Bring enough socks - wet socks cause blisters
Trekking Boots:
1 pair of quality, waterproof trekking boots (broken in before the trek!)
Must be ankle-supporting
Should be worn for at least 50+ kilometers before the trek
Leather or synthetic waterproof material
Good traction sole (Vibram or similar)
Camp Shoes:
1 pair of lightweight shoes/sandals for evenings at teahouses
Down booties (optional but increase comfort at high altitude)
Gaiters (optional, useful in snow or monsoon)
Crampon Note: Micro-spikes or crampons are not needed for the standard EBC trek during normal seasons. Only necessary for winter treks or if attempting technical peaks.
Toiletries and Personal Hygiene
Essential Toiletries:
Toothbrush and toothpaste (small tubes)
Biodegradable soap (small bar or small bottle)
Quick-dry towel (small size sufficient)
Wet wipes/baby wipes (essential - substitute for showers)
Hand sanitizer (multiple small bottles)
Toilet paper (at least 1-2 rolls - not all teahouses provide it)
Feminine hygiene products (if applicable - bring plenty, not available on trail)
Small mirror
Deodorant (optional - most people skip this)
Medications and First Aid:
Personal prescription medications (bring extra)
Diamox/Acetazolamide for altitude (consult doctor)
Pain relievers (Ibuprofen, Paracetamol)
Altitude sickness medication
Diarrhea medication (Imodium)
Antibiotics (prescribed by doctor)
Throat lozenges
Antacids
Blister treatment (moleskin, second skin, tape)
Band-aids and gauze
Antiseptic ointment
Water purification tablets or drops
Rehydration salts (ORS packets)
Important Medical Note: Your guide will carry a comprehensive first-aid kit, but bring personal medications and basics.
Accessories
Essential Gear:
Backpack/daypack (25-35 liters for carrying daily essentials)
Sleeping bag (rated to -15°C or -20°C)
Sleeping bag liner (adds warmth and hygiene)
Trekking poles (highly recommended - reduces knee strain by 25%)
Water bottles or hydration system (2 liters total capacity minimum)
Headlamp with extra batteries (essential)
Portable charger/power bank (10,000+ mAh recommended)
Ziplock bags (various sizes - keep items dry)
Dry bags or waterproof stuff sacks (protect electronics and clothes)
Documents and Money:
Passport (with valid Nepal visa)
Passport photocopies (keep separate from original)
Passport photos (4-6 for permits)
Travel insurance documents (must cover up to 6,000m)
Cash in Nepali Rupees (enough for whole trek - at least NPR 30,000-40,000)
Credit card (backup)
Emergency contact information
Electronics:
Camera with extra batteries
Smartphone
Charging cables
Universal adapter (Nepal uses Type C, D, and M plugs)
Memory cards (extra)
Waterproof cases or ziplock bags for electronics
Personal Items:
Book or e-reader (evenings can be long)
Journal and pen (document your journey)
Playing cards (social activity in teahouses)
Earplugs (essential - teahouses are noisy)
Eye mask (for sleep)
Additional Recommended Items
Comfort Items:
Thermos flask (keeps water from freezing, good for hot drinks)
Duct tape (wrapped around trekking pole - fixes everything)
Safety pins
Small sewing kit
Lighter (for burning toilet paper if needed)
Plastic bags for trash
Clothesline (for drying clothes)
Carabiners (for hanging items)
Photography:
Entertainment:
Download podcasts, audiobooks, or music before the trek
Portable speaker (small, for teahouse evenings - be considerate of volume)
Food and Snacks:
Energy bars (10-15 for the trek)
Chocolate bars (available on trail but expensive)
Trail mix or nuts
Electrolyte powder (for adding to water)
Tea bags or instant coffee (if you're picky about your morning drink)
Optional Luxury Items:
Small pillow or inflatable pillow (teahouse pillows are hard)
Buff or bandana (extra - they're versatile)
Down pants (for extremely cold evenings at high altitude)
What NOT to Bring
Excessive clothing (you can wash clothes on rest days)
Heavy books (bring e-reader instead)
Cotton clothing (doesn't dry fast, doesn't insulate when wet)
Valuable jewelry
Expensive electronics you can't afford to lose or break
Hair dryer
Full-size toiletries (bring travel sizes)
Perfume or cologne (unnecessary in the mountains)
Sleeping mat (teahouses provide mattresses)
Packing Tips
Pack in layers within your bag - frequently used items on top
Use compression sacks for sleeping bag and clothes
Waterproof everything - use dry bags or plastic bags
Weigh your pack - your daypack should be 5-8 kg maximum
Your porter carries the heavy stuff - main bag can be 12-15 kg
Test all gear before leaving home - especially boots and electronics
Bring spare batteries - cold weather drains them quickly
Pack medicines in hand luggage for the Lukla flight
Gear Rental vs Buying
Items worth renting in Kathmandu (if you don't own them):
Sleeping bag ($1-2 per day)
Down jacket ($1-2 per day)
Trekking poles ($1 per day)
Duffel bag ($5-10 one-time)
Items you should buy:
Where to rent/buy:
Thamel area in Kathmandu has dozens of trekking shops
Check gear carefully before renting
Get receipt and note any damage
Good brands available: North Face, Marmot, Sherpa Adventure Gear
Importance of Acclimatization on Your Journey from Lukla to EBC
Acclimatization is the single most important factor determining whether you successfully reach Everest Base Camp and return safely. Understanding and respecting the acclimatization process can make the difference between a successful trek and a medical emergency.
What is Acclimatization?
Acclimatization is your body's process of adjusting to lower oxygen levels at high altitude. At 5,500 meters (the altitude of Kala Patthar), the air contains only about 50% of the oxygen available at sea level. Your body needs time to adapt to functioning with less oxygen.
When you ascend to high altitude, your body responds by:
Breathing faster and deeper to take in more oxygen
Producing more red blood cells to carry oxygen more efficiently
Increasing blood flow to vital organs
Making cellular changes to use oxygen more effectively
These adaptations take time - typically several days at each altitude range. If you ascend too quickly, your body cannot adapt fast enough, leading to altitude sickness.
Why Acclimatization is Critical on the EBC Trek
The altitude profile is challenging: You'll go from 2,860 meters (Lukla) to 5,545 meters (Kala Patthar) in just 8-9 days. That's nearly 3,000 meters of elevation gain, crossing from moderate altitude into the high-altitude zone where oxygen levels are significantly reduced.
Statistics show the risk: Studies indicate that approximately 75% of trekkers experience some symptoms of altitude sickness during the EBC trek, usually mild symptoms like headaches and fatigue. About 5-10% develop moderate symptoms requiring rest or descent. Around 1-2% develop severe altitude sickness (HAPE or HACE) requiring immediate evacuation.
Proper acclimatization is preventable: Most cases of serious altitude sickness occur because trekkers ascend too quickly, ignore symptoms, or skip acclimatization days. Following proper acclimatization practices dramatically reduces your risk.
Acclimatization Schedule on the Standard Itinerary
The standard 12-day itinerary includes built-in acclimatization:
Day 1-2: Gradual introduction (Lukla to Namche)
You start at 2,860m and reach 3,440m
The first night actually descends to 2,610m, giving your body an easy start
Day 3: First acclimatization day in Namche (3,440m)
Hike to 3,962m (Everest View Hotel) but sleep at 3,440m
"Climb high, sleep low" principle in action
Day 4-5: Continued gradual ascent
Namche (3,440m) to Tengboche (3,867m) - gain 427m
Tengboche to Dingboche (4,410m) - gain 543m
These are reasonable daily gains
Day 6: Second acclimatization day in Dingboche (4,410m)
Hike to 5,083m (Nagartsang Peak) but sleep at 4,410m
Crucial preparation for going higher
Day 7-8: Final push to high altitude
Day 9: Descend immediately after reaching Kala Patthar
Key Acclimatization Principles
- "Climb High, Sleep Low" This is the golden rule. On rest days, you hike to higher altitude during the day but return to lower altitude to sleep. This exposes your body to low oxygen while allowing recovery at better oxygen levels during sleep.
- Ascend Slowly Above 3,000 Meters Once above 3,000 meters, you should not increase sleeping altitude by more than 300-500 meters per day. The standard itinerary follows this guideline carefully.
- Build Rest Days into Your Schedule Rest days are not optional luxuries - they're essential safety measures. The two acclimatization days at Namche and Dingboche allow your body to catch up with the altitude gain.
- Stay Hydrated Dehydration worsens altitude sickness. At high altitude, you lose water faster through breathing (the air is very dry) and increased urination (your body's response to altitude). Drink 3-4 liters of water daily, even if you don't feel thirsty.
- Walk Slowly Walking too fast at altitude puts unnecessary stress on your body. The Nepali phrase "bistari bistari" (slowly, slowly) or the Swahili "pole pole" should be your mantra. It's not a race.
- Listen to Your Body Pay attention to symptoms. A mild headache might be normal, but worsening symptoms mean you need to stop ascending or descend. Never ignore symptoms or hide them from your guide.
Recognizing Altitude Sickness
Mild Acute Mountain Sickness (AMS):
Headache (most common symptom)
Nausea or loss of appetite
Dizziness or lightheadedness
Fatigue more than expected
Difficulty sleeping
Shortness of breath during exercise
Treatment for mild AMS:
Stop ascending until symptoms improve
Rest for a day at current altitude
Hydrate well
Take pain relievers for headache
Consider Diamox if not already taking it
Moderate AMS:
Severe headache not relieved by medication
Vomiting
Increasing weakness
Shortness of breath at rest
Decreased coordination (ataxia test: walk heel-to-toe in straight line)
Confusion or altered consciousness
Treatment for moderate AMS:
Severe Altitude Sickness (HAPE and HACE):
HAPE (High Altitude Pulmonary Edema) - fluid in lungs:
Severe difficulty breathing, even at rest
Chest tightness or congestion
Coughing up pink, frothy fluid
Rapid heart rate
Blue lips or fingernails
Extreme fatigue
HACE (High Altitude Cerebral Edema) - fluid in brain:
Severe, incapacitating headache
Vomiting
Cannot walk straight (severe ataxia)
Confusion, irrational behavior
Drowsiness, unconsciousness
Seizures
Treatment for HAPE/HACE:
Immediate descent is the only effective treatment
Descend as far and fast as safely possible (500-1000m minimum)
Helicopter evacuation if possible
Supplemental oxygen if available
Dexamethasone (for HACE) or Nifedipine (for HAPE) if available
These are life-threatening emergencies
Factors That Affect Acclimatization
Individual Variation:
Some people acclimatize naturally faster than others
Physical fitness does NOT predict acclimatization ability
Previous altitude experience helps somewhat
Genetic factors play a role
Rate of Ascent:
The single biggest controllable factor
Ascending too fast is the main cause of altitude sickness
Following the proper itinerary with rest days is crucial
Hydration Status:
Dehydration significantly worsens altitude effects
Dark urine indicates dehydration
Drink consistently throughout the day
Alcohol and Sleeping Pills:
Alcohol worsens altitude sickness and dehydration
Sleeping pills can suppress breathing - dangerous at altitude
Avoid both, especially above 4,000 meters
Pre-existing Illness:
Colds, respiratory infections make altitude harder
Heart or lung conditions increase risk
Consult your doctor before trekking
Using Diamox (Acetazolamide)
Diamox is a medication that helps acclimatization by making your blood more acidic, which stimulates breathing.
How it helps:
Reduces altitude sickness symptoms
Helps you acclimatize faster
Makes breathing easier, especially during sleep
Reduces periodic breathing (Cheyne-Stokes respiration)
Typical dosage:
125-250mg twice daily
Start 1-2 days before reaching altitude
Continue until descending below 3,000m
Some people only take it starting from Namche
Side effects:
Tingling in fingers, toes, lips (common and harmless)
Increased urination
Altered taste (carbonated drinks taste flat)
Rarely: nausea, drowsiness
Important notes:
Consult your doctor before taking Diamox
Try it at home first to check for side effects
It's contraindicated if you're allergic to sulfa drugs
It's a supplement to proper acclimatization, not a replacement
You still must follow all acclimatization practices
Practical Acclimatization Tips
Before the Trek:
Arrive in Kathmandu 2-3 days early to adjust to 1,400m
Get good sleep before starting the trek
Start the trek well-hydrated and healthy
During the Trek:
Walk slowly - never rush
Carry water and sip constantly
Eat regular meals even without appetite
Carbohydrates are easier to digest at altitude
Don't skip rest days
Hike on rest days rather than just staying in bed
Monitor your symptoms daily
Be honest with your guide about how you feel
Don't compare yourself to other trekkers
Take regular breaks during walking
Sleep Tips at Altitude:
Sleep with head slightly elevated
Use extra blankets/clothing - stay warm
Don't use sleeping pills
Periodic breathing (pausing between breaths) is normal
Don't worry if you wake frequently
When to Descend:
If symptoms worsen despite rest
If you can't eat or drink
If you can't walk straight
If you're confused or acting strangely
If you have severe headache unrelieved by medication
If you develop HAPE or HACE symptoms
When in doubt, descend
The Psychology of Acclimatization
Managing Expectations:
It's normal to feel tired and have mild symptoms
Most people feel "not quite right" above 4,000m
This doesn't mean you won't reach your goal
The discomfort is temporary
Dealing with Frustration:
You might feel frustrated when you need extra rest days
Other trekkers might seem fine while you struggle
Remember: altitude affects everyone differently
Health and safety come before summit goals
Recognizing Pressure:
Don't feel pressured by your group to continue if unwell
Guides are trained to make conservative decisions
There's no shame in descending if needed
You can always try again another time
Supporting Others:
Watch your trekking partners for symptoms
Altitude can affect judgment - speak up if someone seems unwell
Create a supportive environment where people can admit difficulties
Why Some Trekkers Fail to Acclimatize
Common mistakes that lead to altitude problems:
Ascending too quickly - skipping rest days or rushing between stops
Ignoring early symptoms - pushing through mild symptoms that worsen
Dehydration - not drinking enough water
Starting sick - beginning the trek with a cold or illness
Poor sleep - not getting enough rest
Overexertion - walking too fast or too far
Alcohol consumption - drinking alcohol at altitude
Hiding symptoms - not telling guides about problems
Success Through Proper Acclimatization
Following proper acclimatization practices means:
Over 90% success rate reaching Everest Base Camp
Minimal risk of serious altitude sickness
More energy to enjoy the experience
Better photographs (you feel well enough to care)
Positive memories rather than suffering
Safe return home
Remember: The mountains will always be here. Your health is more important than reaching any summit. Proper acclimatization is not just about reaching your goal - it's about doing so safely and enjoyably.
How Difficult is the Lukla to Everest Base Camp Trek?
The Everest Base Camp trek is considered moderate to challenging. Understanding what makes it difficult helps you prepare properly and set realistic expectations.
Overall Difficulty Rating
Difficulty Level: Moderate to Challenging (rated 7-8 out of 10 for trekking difficulty)
This rating comes from several factors working together:
Significant altitude gain
Long daily walking hours
Challenging terrain in sections
Basic accommodation
Variable weather conditions
Physical and mental endurance required
However, the trek requires no technical climbing skills, no specialized mountaineering equipment, and can be completed by anyone in good health with proper preparation.
Physical Demands
Daily Walking:
Average 5-7 hours per day
Some days up to 8-9 hours (Days 8 and 9)
Total distance: approximately 130 kilometers round trip
Total elevation gain: approximately 2,685 meters ascending
Terrain Challenges:
Stone steps (thousands of them - hard on knees)
Steep uphill sections (especially Namche Hill on Day 2)
Rocky, uneven trails at high altitude
Glacier moraine walking (loose rocks, tricky footing)
Suspension bridges (can be intimidating for some)
Exposed sections along cliffs
Stream crossings on stepping stones
Physical Fitness Requirements: You should be able to:
Walk 6-8 hours per day for consecutive days
Handle steep uphill climbs with a daypack
Manage steep descents (hard on knees and ankles)
Carry 5-8 kg daypack comfortably
Maintain balance on uneven terrain
Function with reduced oxygen at altitude
The Altitude Challenge
Altitude is the biggest difficulty factor on this trek. Even very fit athletes can struggle with altitude sickness because fitness doesn't predict altitude performance.
Altitude Effects You'll Experience:
Shortness of breath during normal activities
Need to walk much slower than usual
Headaches (especially days 2-3)
Reduced appetite
Difficulty sleeping
General fatigue
Mental fog or slower thinking
Critical Altitude Sections:
Namche Bazaar (3,440m) - first major test
Dingboche (4,410m) - entering high-altitude zone
Lobuche and Gorak Shep (above 4,900m) - very challenging
Kala Patthar (5,545m) - hardest due to altitude and steepness
About 75% of trekkers experience some mild altitude symptoms. Proper acclimatization and slow ascent reduce serious risks, but altitude remains the factor you can't fully control through fitness alone.
Challenging Sections on EBC Trek
Day 2: Phakding to Namche (Hardest Day for Many):
Steep 600m climb over 2-3 hours
Your first real test of fitness and altitude
Many people struggle here
Difficulty: 8/10
Day 7: Dughla Climb:
Steep uphill on loose rocks
At 4,600m+ altitude makes it exhausting
Only takes 45 minutes but feels much longer
Difficulty: 8/10
Day 8: Lobuche to EBC:
Long day (7-9 hours total)
Walking on glacier moraine (tricky footing)
Very high altitude throughout
Mentally and physically exhausting
Difficulty: 9/10
Day 9: Kala Patthar Climb:
Very steep ascent
Starting at 4 AM in freezing cold and darkness
At 5,545m - the highest point and lowest oxygen
Fatigue from previous day
Many consider this the hardest single section
Difficulty: 9/10
Descents:
Steep stone steps are hard on knees
Trekking poles help significantly
The descent from Kala Patthar to Pheriche is long
Difficulty: 6-7/10
Mental and Emotional Challenges
Psychological Demands:
Long days of repetitive walking
Discomfort from altitude effects
Basic living conditions
Cold nights
Missing home comforts
Dealing with fatigue and possibly mild illness
Making the decision to turn back if needed
Mental Toughness Required:
The trek tests mental endurance as much as physical fitness. You'll have moments of:
Questioning why you're doing this
Wanting to give up (especially on Namche Hill or Kala Patthar)
Feeling uncomfortable and wanting modern comforts
Dealing with cold, fatigue, and altitude symptoms simultaneously
Having a strong "why" - your personal reason for doing the trek - helps you push through difficult moments.
Environmental and Comfort Challenges
Weather Conditions:
Extreme cold at high altitude (below -20°C at night)
Wind chill makes it feel even colder
Sudden weather changes
Possible snow or rain
Intense sun causing sunburn
Basic Living Conditions:
Hygiene Limitations:
Difficulty Compared to Other Activities
Easier than:
Technical mountaineering or rock climbing
Ultra-marathons or Ironman competitions
High-altitude peaks requiring technical skills
Multi-week wilderness expeditions
Similar to:
Climbing Mount Kilimanjaro (but EBC is longer)
Peru's Inca Trail (but higher altitude)
Long-distance backpacking trips with elevation
Harder than:
Regular hiking or trekking at low altitude
Day hikes in local mountains
Multi-day treks without altitude factor
Age and Demographics
The trek is completed successfully by people from diverse backgrounds:
Age Range:
Youngest successful trekkers: 8-10 years old
Oldest successful trekkers: 80+ years old
Most common age: 25-45 years old
Large number of trekkers in their 50s-70s
Gender:
Roughly 40-45% female trekkers
Gender makes no difference in success rates
Women often pace themselves better
Experience Level:
About 30% are first-time trekkers
40% have some trekking experience
30% are experienced trekkers
Previous experience helps but isn't required
Factors That Make It Easier
What Helps:
Hiring a porter (reduces weight you carry)
Good physical conditioning
Previous altitude experience
Starting with proper fitness level
Good quality gear
Positive mental attitude
Trekking in best season (October or April)
Slower pace
Extra acclimatization days
Good guide support
Factors That Make It Harder
What Makes It More Challenging:
Starting with poor fitness
No altitude experience
Ascending too quickly
Trekking in winter or monsoon
Carrying too much weight
Pre-existing health issues
Arriving sick (cold, respiratory infection)
Dehydration
Poor sleep
Negative mindset
Training Recommendations
To make the trek easier, train for at least 2-3 months before:
Cardiovascular Training:
Running, cycling, or swimming: 4-5 times per week
Build up to 60+ minutes of continuous cardio
Include interval training
Stair climbing is excellent preparation
Strength Training:
Focus on legs: squats, lunges, step-ups
Core strength: planks, crunches
2-3 times per week
Hiking Practice:
Long hikes with elevation gain
Wear your trekking boots to break them in
Carry a weighted backpack (gradually increase weight)
Practice consecutive days of hiking if possible
Mental Preparation:
Research the trek thoroughly
Understand what to expect
Visualize success
Prepare for discomfort
Accept that you'll have hard moments
Can Anyone Do This Trek?
Good Candidates:
In good general health
No serious heart or lung conditions
Able to train for 2-3 months beforehand
Comfortable with basic living conditions
Mentally prepared for challenge
Realistic about difficulty
Willing to listen to guides and descend if needed
Should Reconsider or Get Medical Clearance:
Heart disease or high blood pressure
Lung conditions (asthma, COPD)
Recent surgery
Pregnancy
Severe anemia
History of blood clots
Severe knee or joint problems
Anyone over 65 (medical clearance recommended)
Reality Check: Success Rates
Overall success rates:
About 85-90% of trekkers reach Everest Base Camp
About 80-85% reach Kala Patthar
10-15% turn back due to altitude sickness, injury, or illness
1-2% require helicopter evacuation
Reasons people don't complete the trek:
Acute altitude sickness (most common)
Injuries (ankle, knee problems)
Illness (respiratory infections, stomach issues)
Weather (flight cancellations, dangerous conditions)
Personal reasons (family emergency, work)
Simply deciding it's too hard (rare but happens)
Making It Easier on Yourself
Practical Tips:
Hire a porter - carrying only 5-8kg vs 15kg makes a huge difference
Use trekking poles - reduces knee strain by 20-25%
Choose best season - spring and autumn have best conditions
Take it slow - "bistari bistari" should be your constant mindset
Add buffer days - extra days reduce pressure
Stay positive - attitude significantly affects experience
Focus on the journey - enjoy villages, culture, scenery along the way
Break it into chunks - focus on reaching the next teahouse, not the whole trek
Celebrate small victories - reaching each village is an accomplishment
Don't compare yourself - everyone has different capabilities and struggles
The Bottom Line on Difficulty
Is the Everest Base Camp trek difficult? Yes, absolutely. It challenges you physically, mentally, and emotionally.
Is it achievable? Yes, for most healthy people who prepare properly and have realistic expectations.
Is it worth the difficulty? Thousands of trekkers each year return saying it was one of the best experiences of their lives despite (or because of) the challenges.
The trek is difficult, but that's part of what makes reaching Everest Base Camp so meaningful. The sense of accomplishment, the incredible mountain scenery, the cultural experience, and the personal growth make the difficulty worthwhile.
If you're willing to train, prepare properly, pace yourself, and respect the altitude, you can successfully complete this trek and return with memories and accomplishments that last a lifetime.
Conclusion
The Everest Base Camp trek from Lukla is more than just a walk to the base of the world's highest mountain. It's a journey through stunning Himalayan landscapes, an immersion into Sherpa culture, a test of your physical and mental strength, and an achievement you'll carry with you forever.
Key Takeaways:
Prepare properly: Physical training for 2-3 months makes a significant difference
Respect altitude: Follow acclimatization guidelines strictly - this is the most important success factor
Pack wisely: Good gear makes the trek more comfortable, but don't overpack
Choose your season: October and April offer the best conditions
Go slow: "Bistari bistari" - the slower you go, the better you'll feel
Hire support: A guide and porter enhance safety and enjoyment
Stay flexible: Weather and your body might require plan changes
Be present: Enjoy the journey, not just the destination
Listen to your body: Descend if you experience moderate or severe altitude symptoms
Embrace the challenge: The difficulty is part of what makes this accomplishment meaningful
The trail from Lukla to Everest Base Camp has been walked by hundreds of thousands of trekkers before you. The Sherpa people have lived in these mountains for generations. The mountains themselves have stood here for millions of years. You're joining a long tradition of people drawn to these incredible peaks.
Whether you're trekking for adventure, personal challenge, cultural experience, or simply to say you've stood at the base of Everest, this journey will exceed your expectations. The views, the people you'll meet, the lessons you'll learn about yourself, and the sense of achievement make every difficult step worthwhile.
Trek safely, trek responsibly, respect the mountains and local culture, and create memories that will inspire you for the rest of your life.
Namaste and happy trekking!